How to Program a Simple Experiment in Inquisit
This help topic introduces the Inquisit Lab Editor and shows how to create a simple categorization experiment.
The setup is explained on a PC but the steps are similar for the Mac (the interface may look slightly different).
Below we will create a simple Inquisit script that asks participants to categorize randomly selected positive and negative adjectives using the keyboard keys 'A' (for positive adjectives) and 'L'' (for negative adjectives). The script will record responses and response times.
You can find the entire code for the experiment here.
Open the Inquisit Editor:
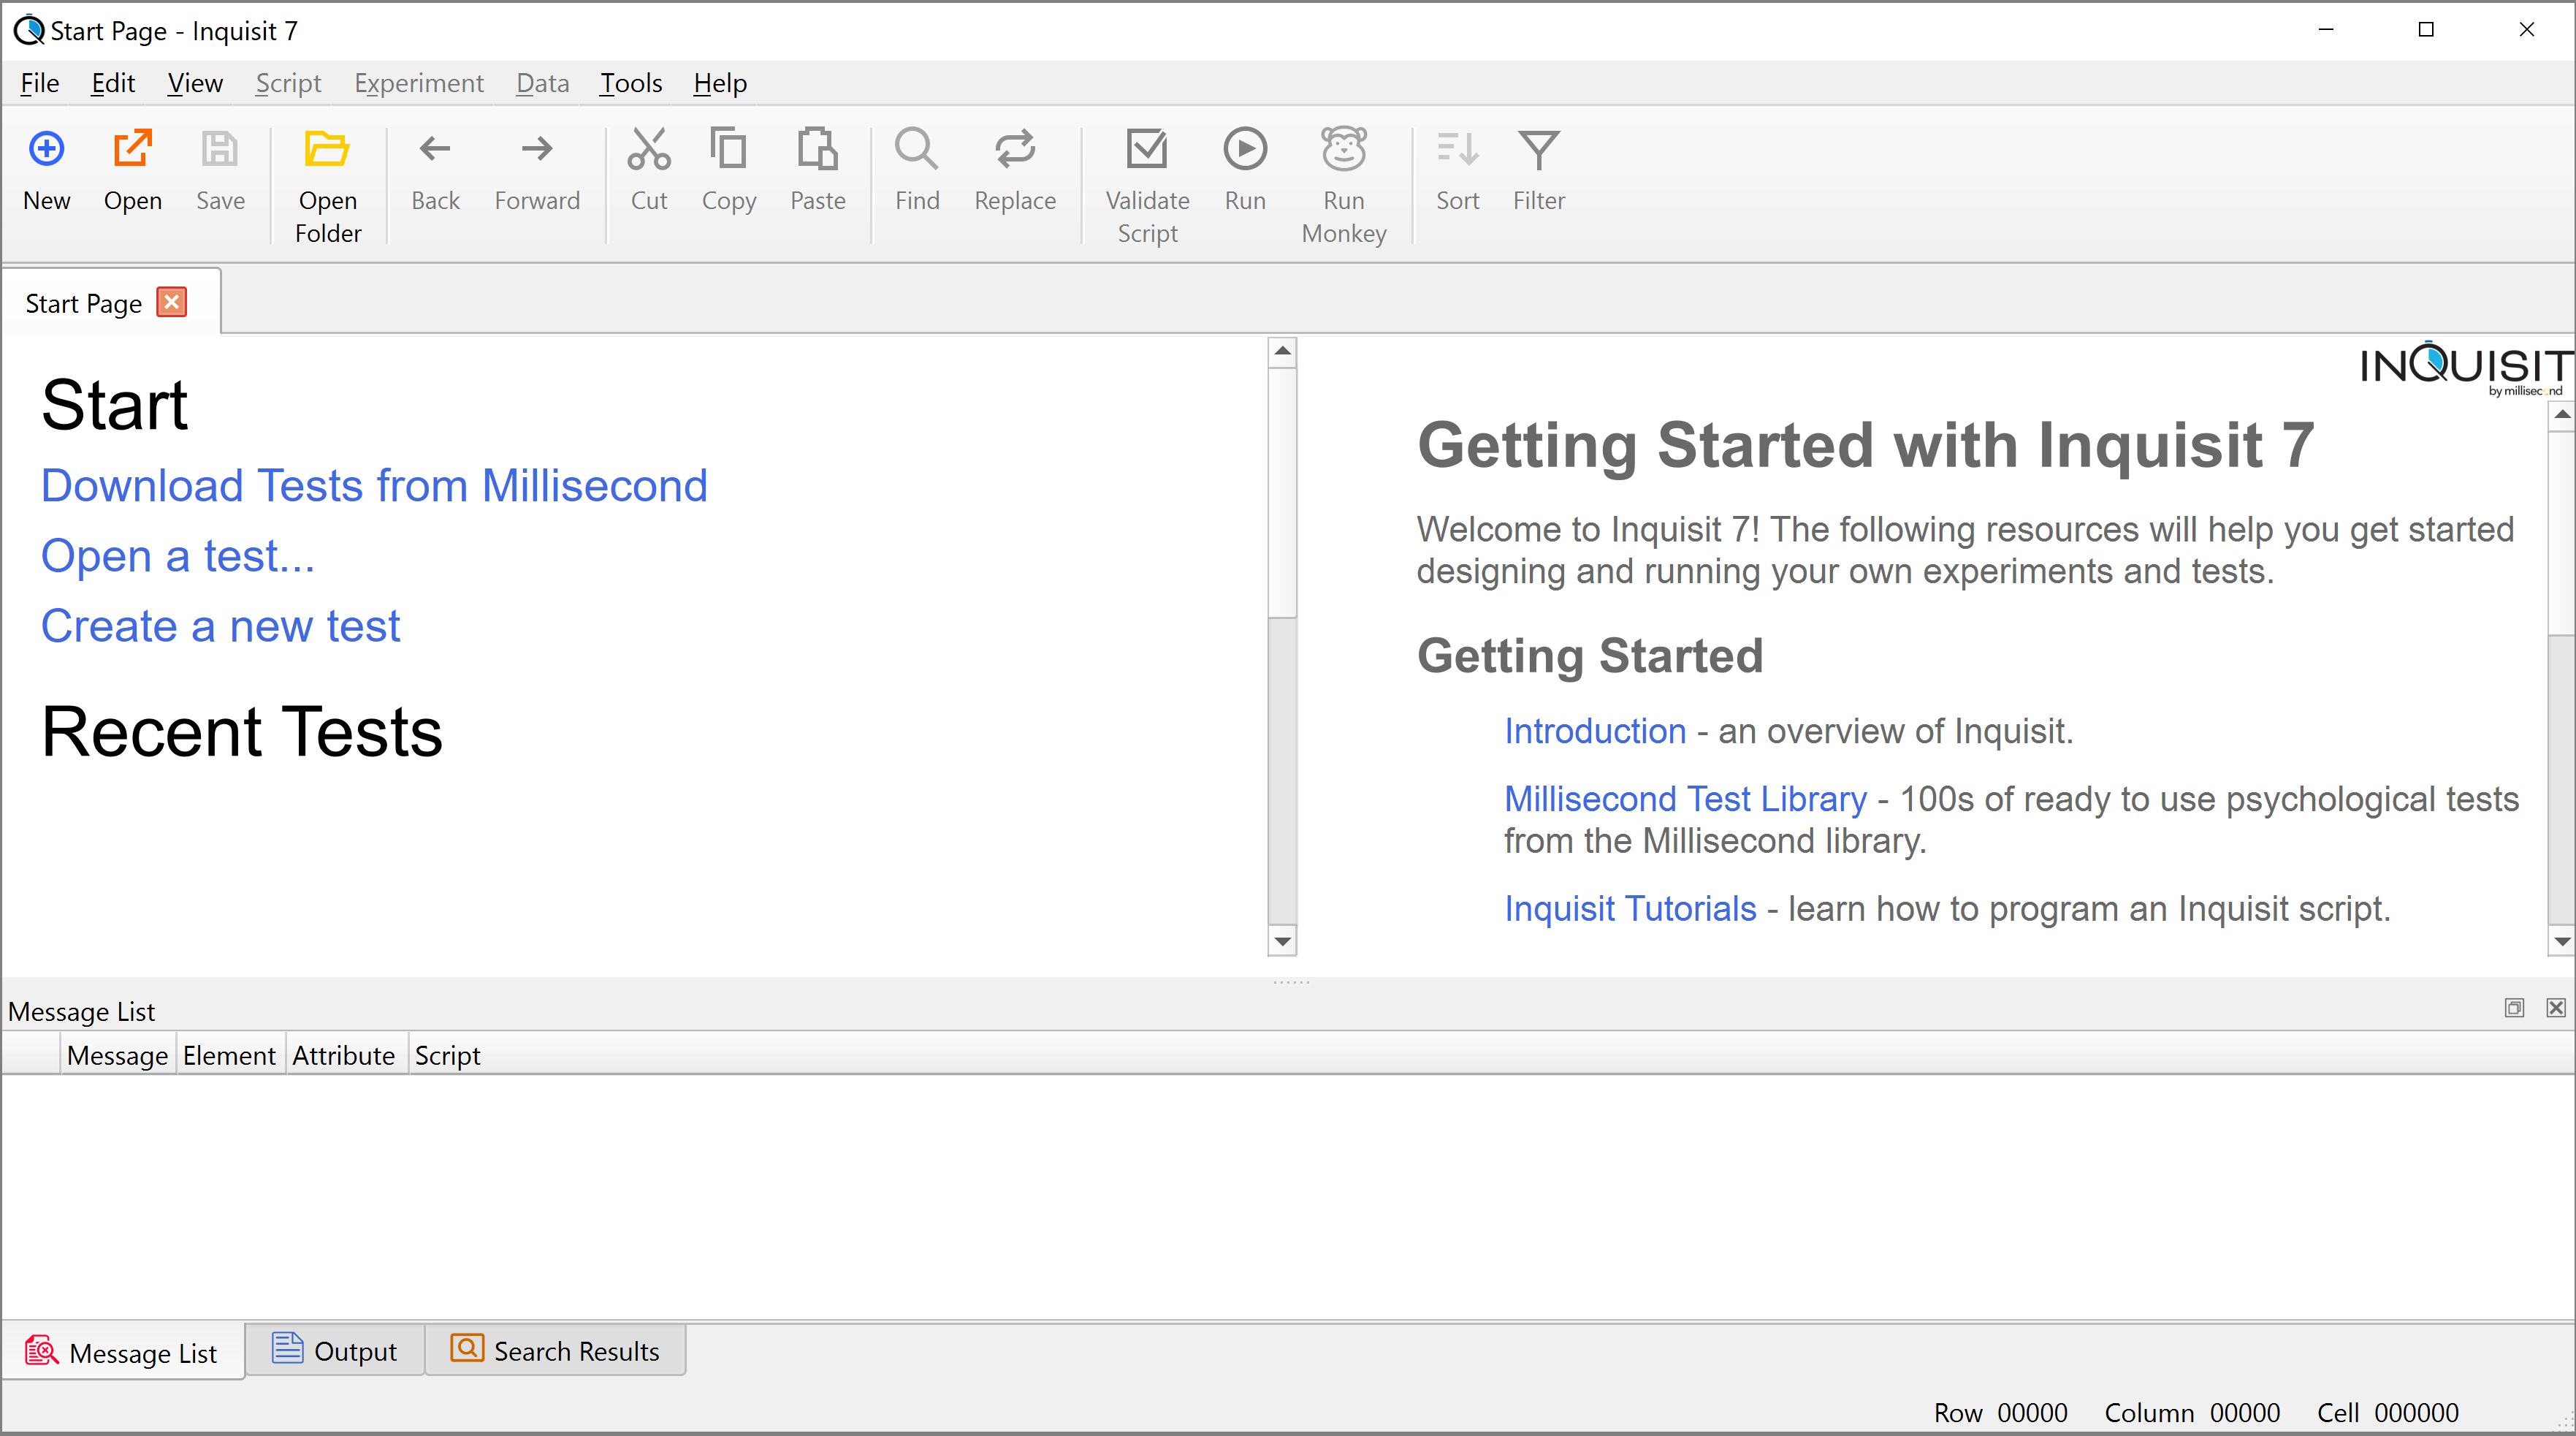
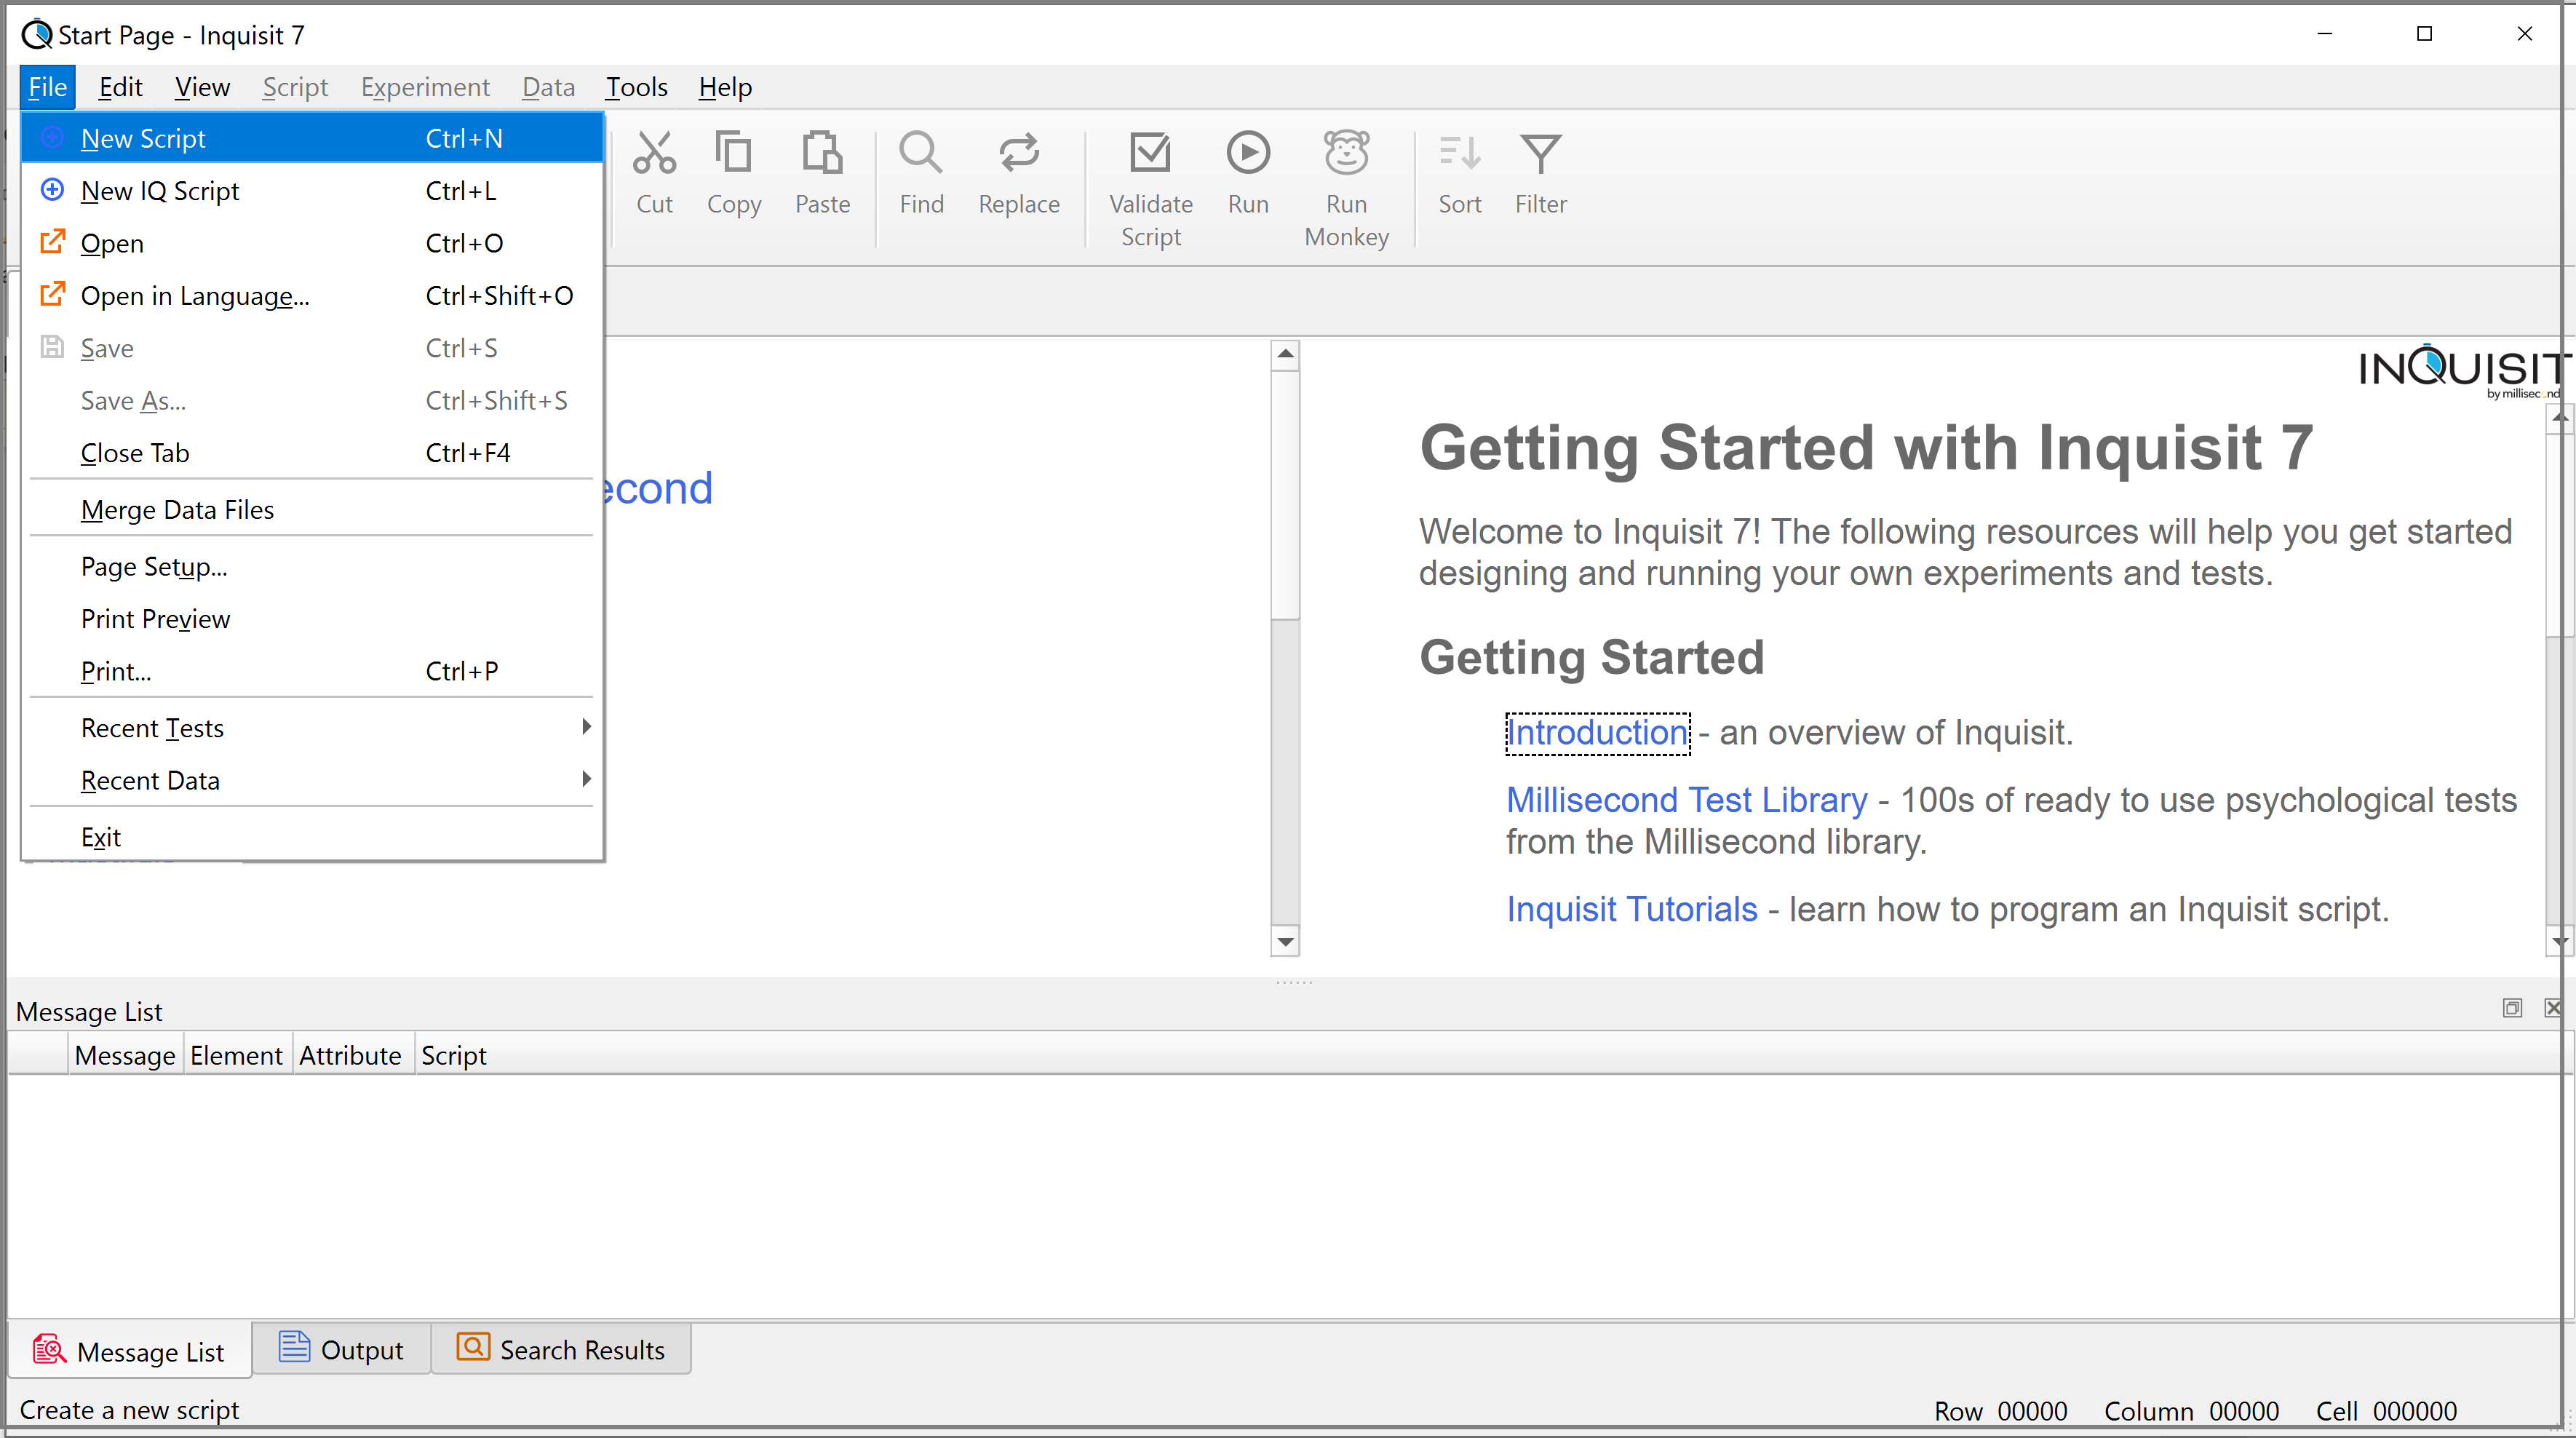
Open a New Script File:
Brief Overview of the Inquisit Lab Editor:
When you open a new *iqjs script file, you will see the following.
Note that the code window that will contain all script code, already presents the code of a very simple experimental set up by default.

Save your script
Now save your future script file under a name of your choosing. All Inquisit script files will have the extension *iqjs (here we call the file demo.iqjs):
Note that we have deleted the provided default code in the coding window.

Add Inquisit elements
The placement of the elements is not important in Inquisit scripts. You can organize your elements the way that works best for you.
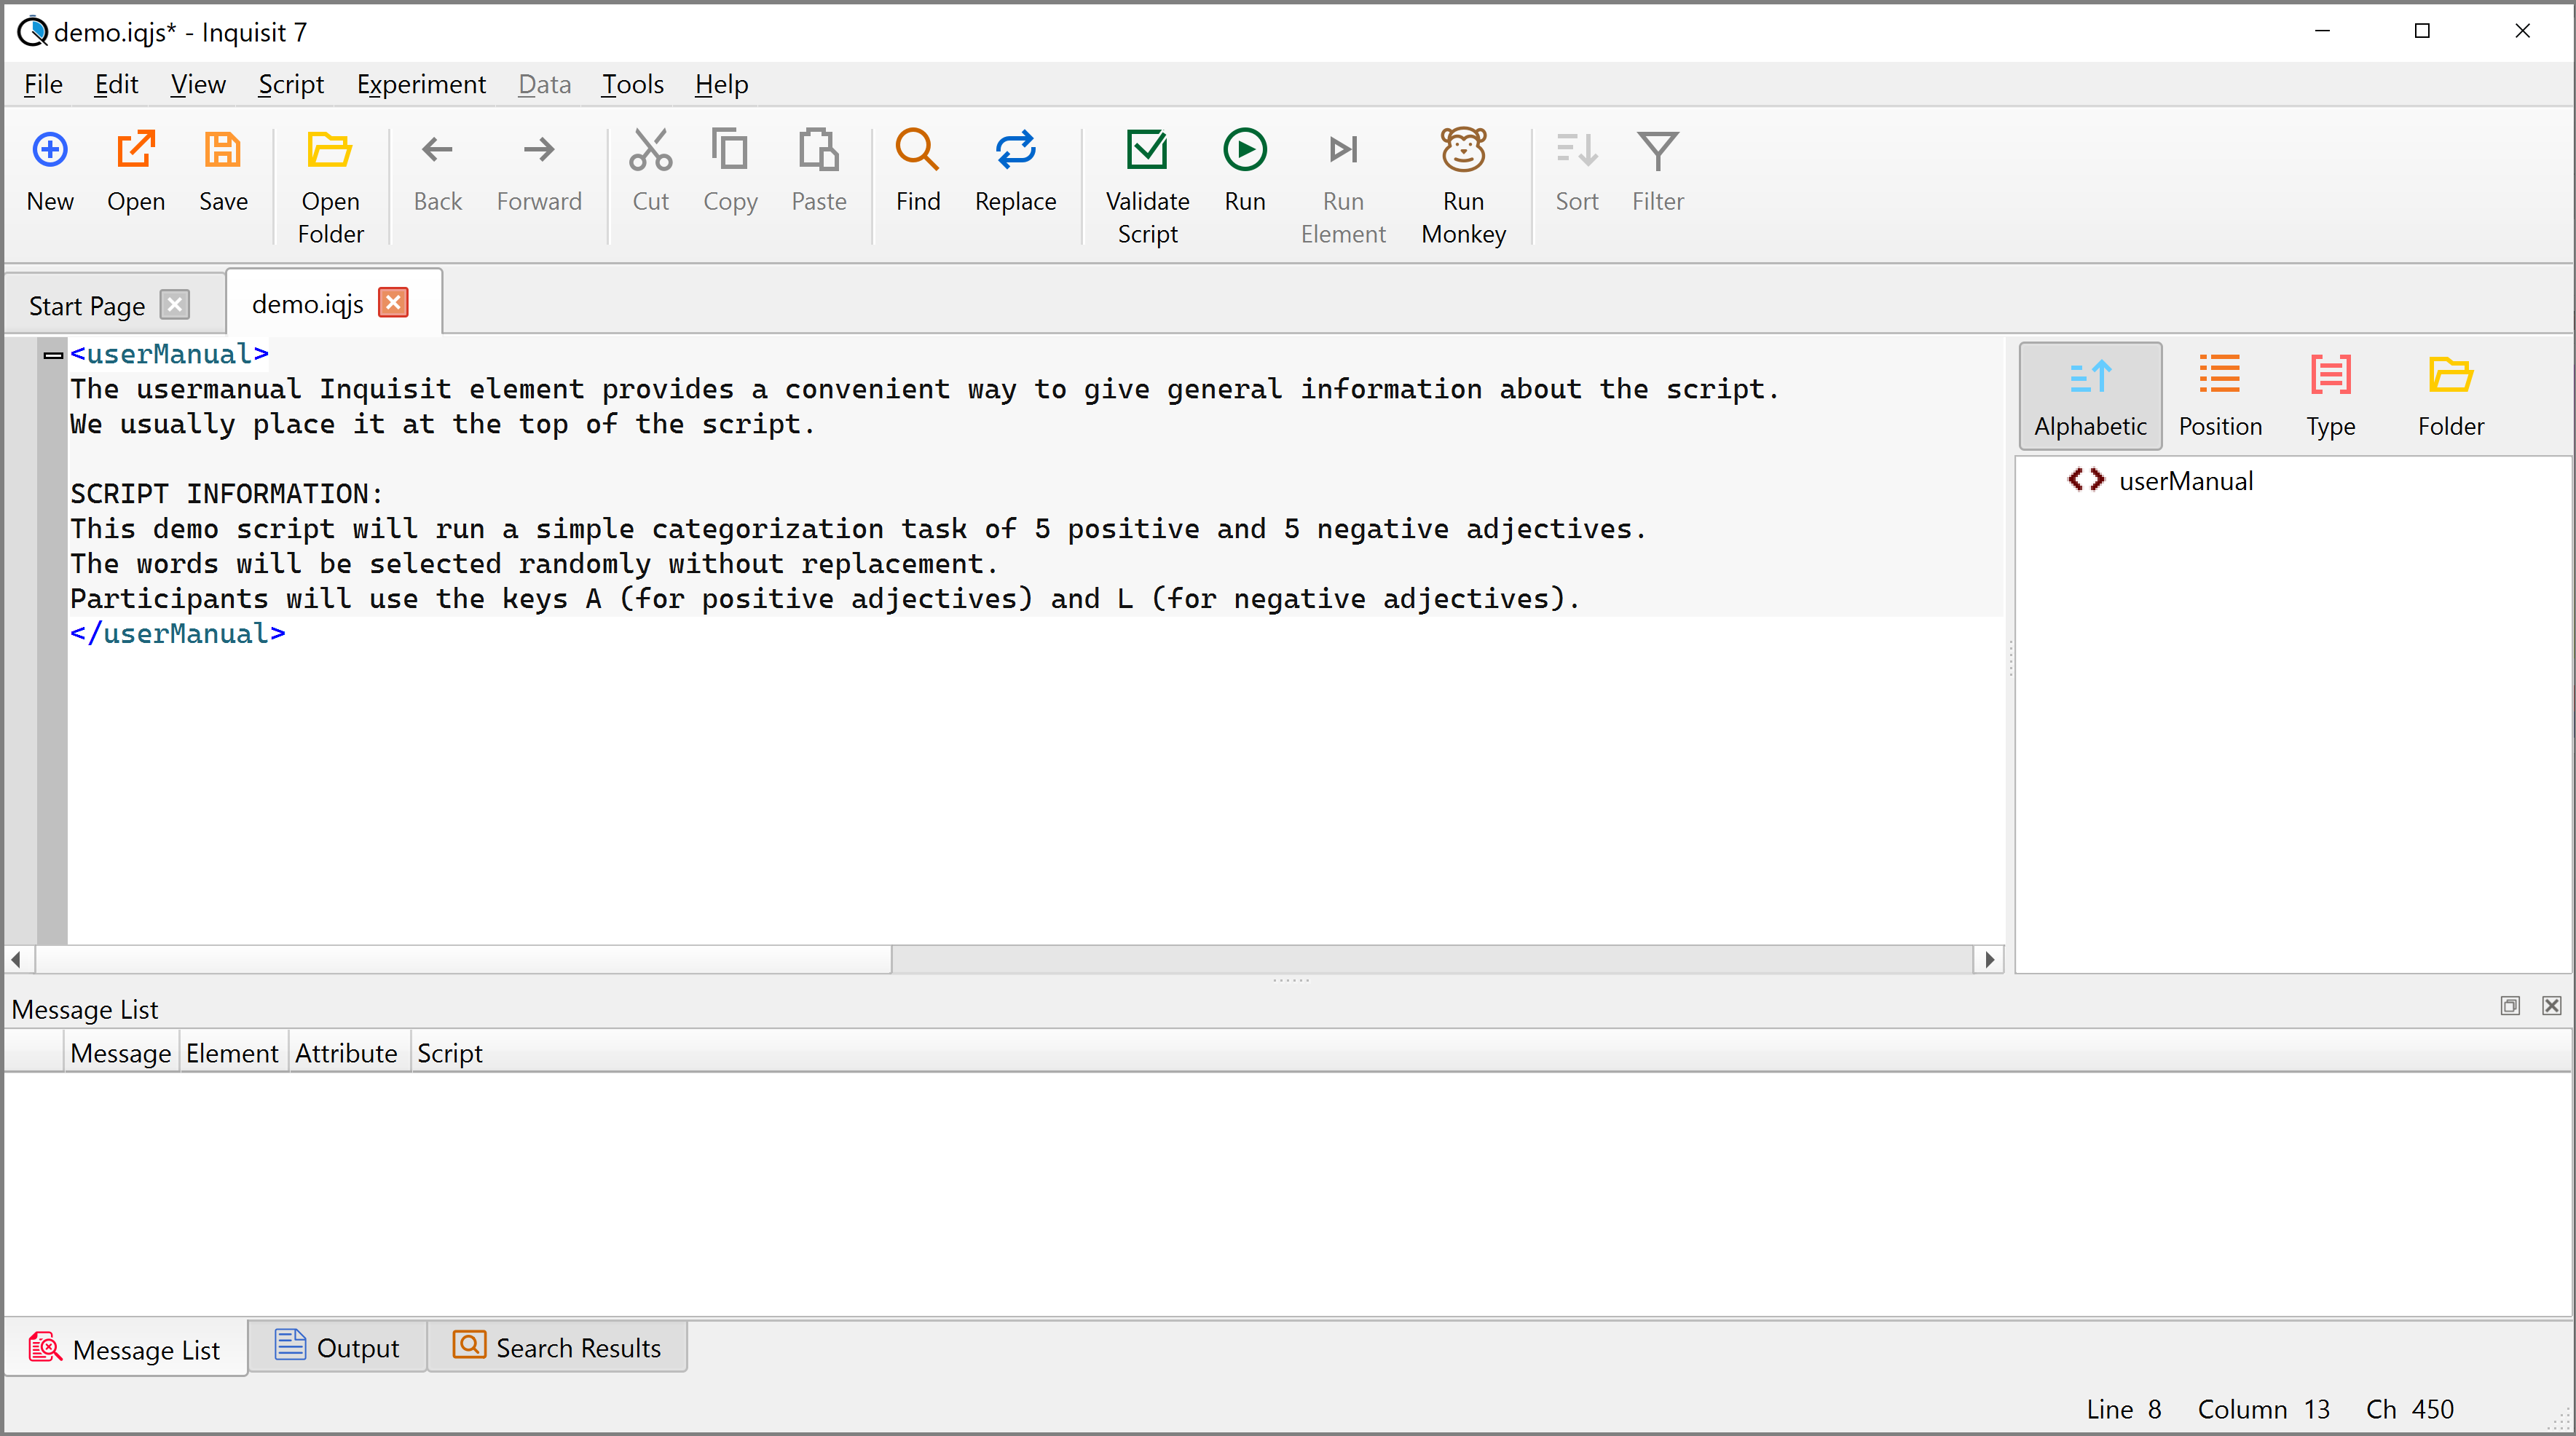
(1)<userManual>
Our first element will be the <userManual>.
The <userManual> element is not a necessary script element but it gives a convenient place to offer general information about the script. For the Millisecond library scripts, for example, the <userManual> contains general background information about the implemented procedure as well as information about the collected data files.
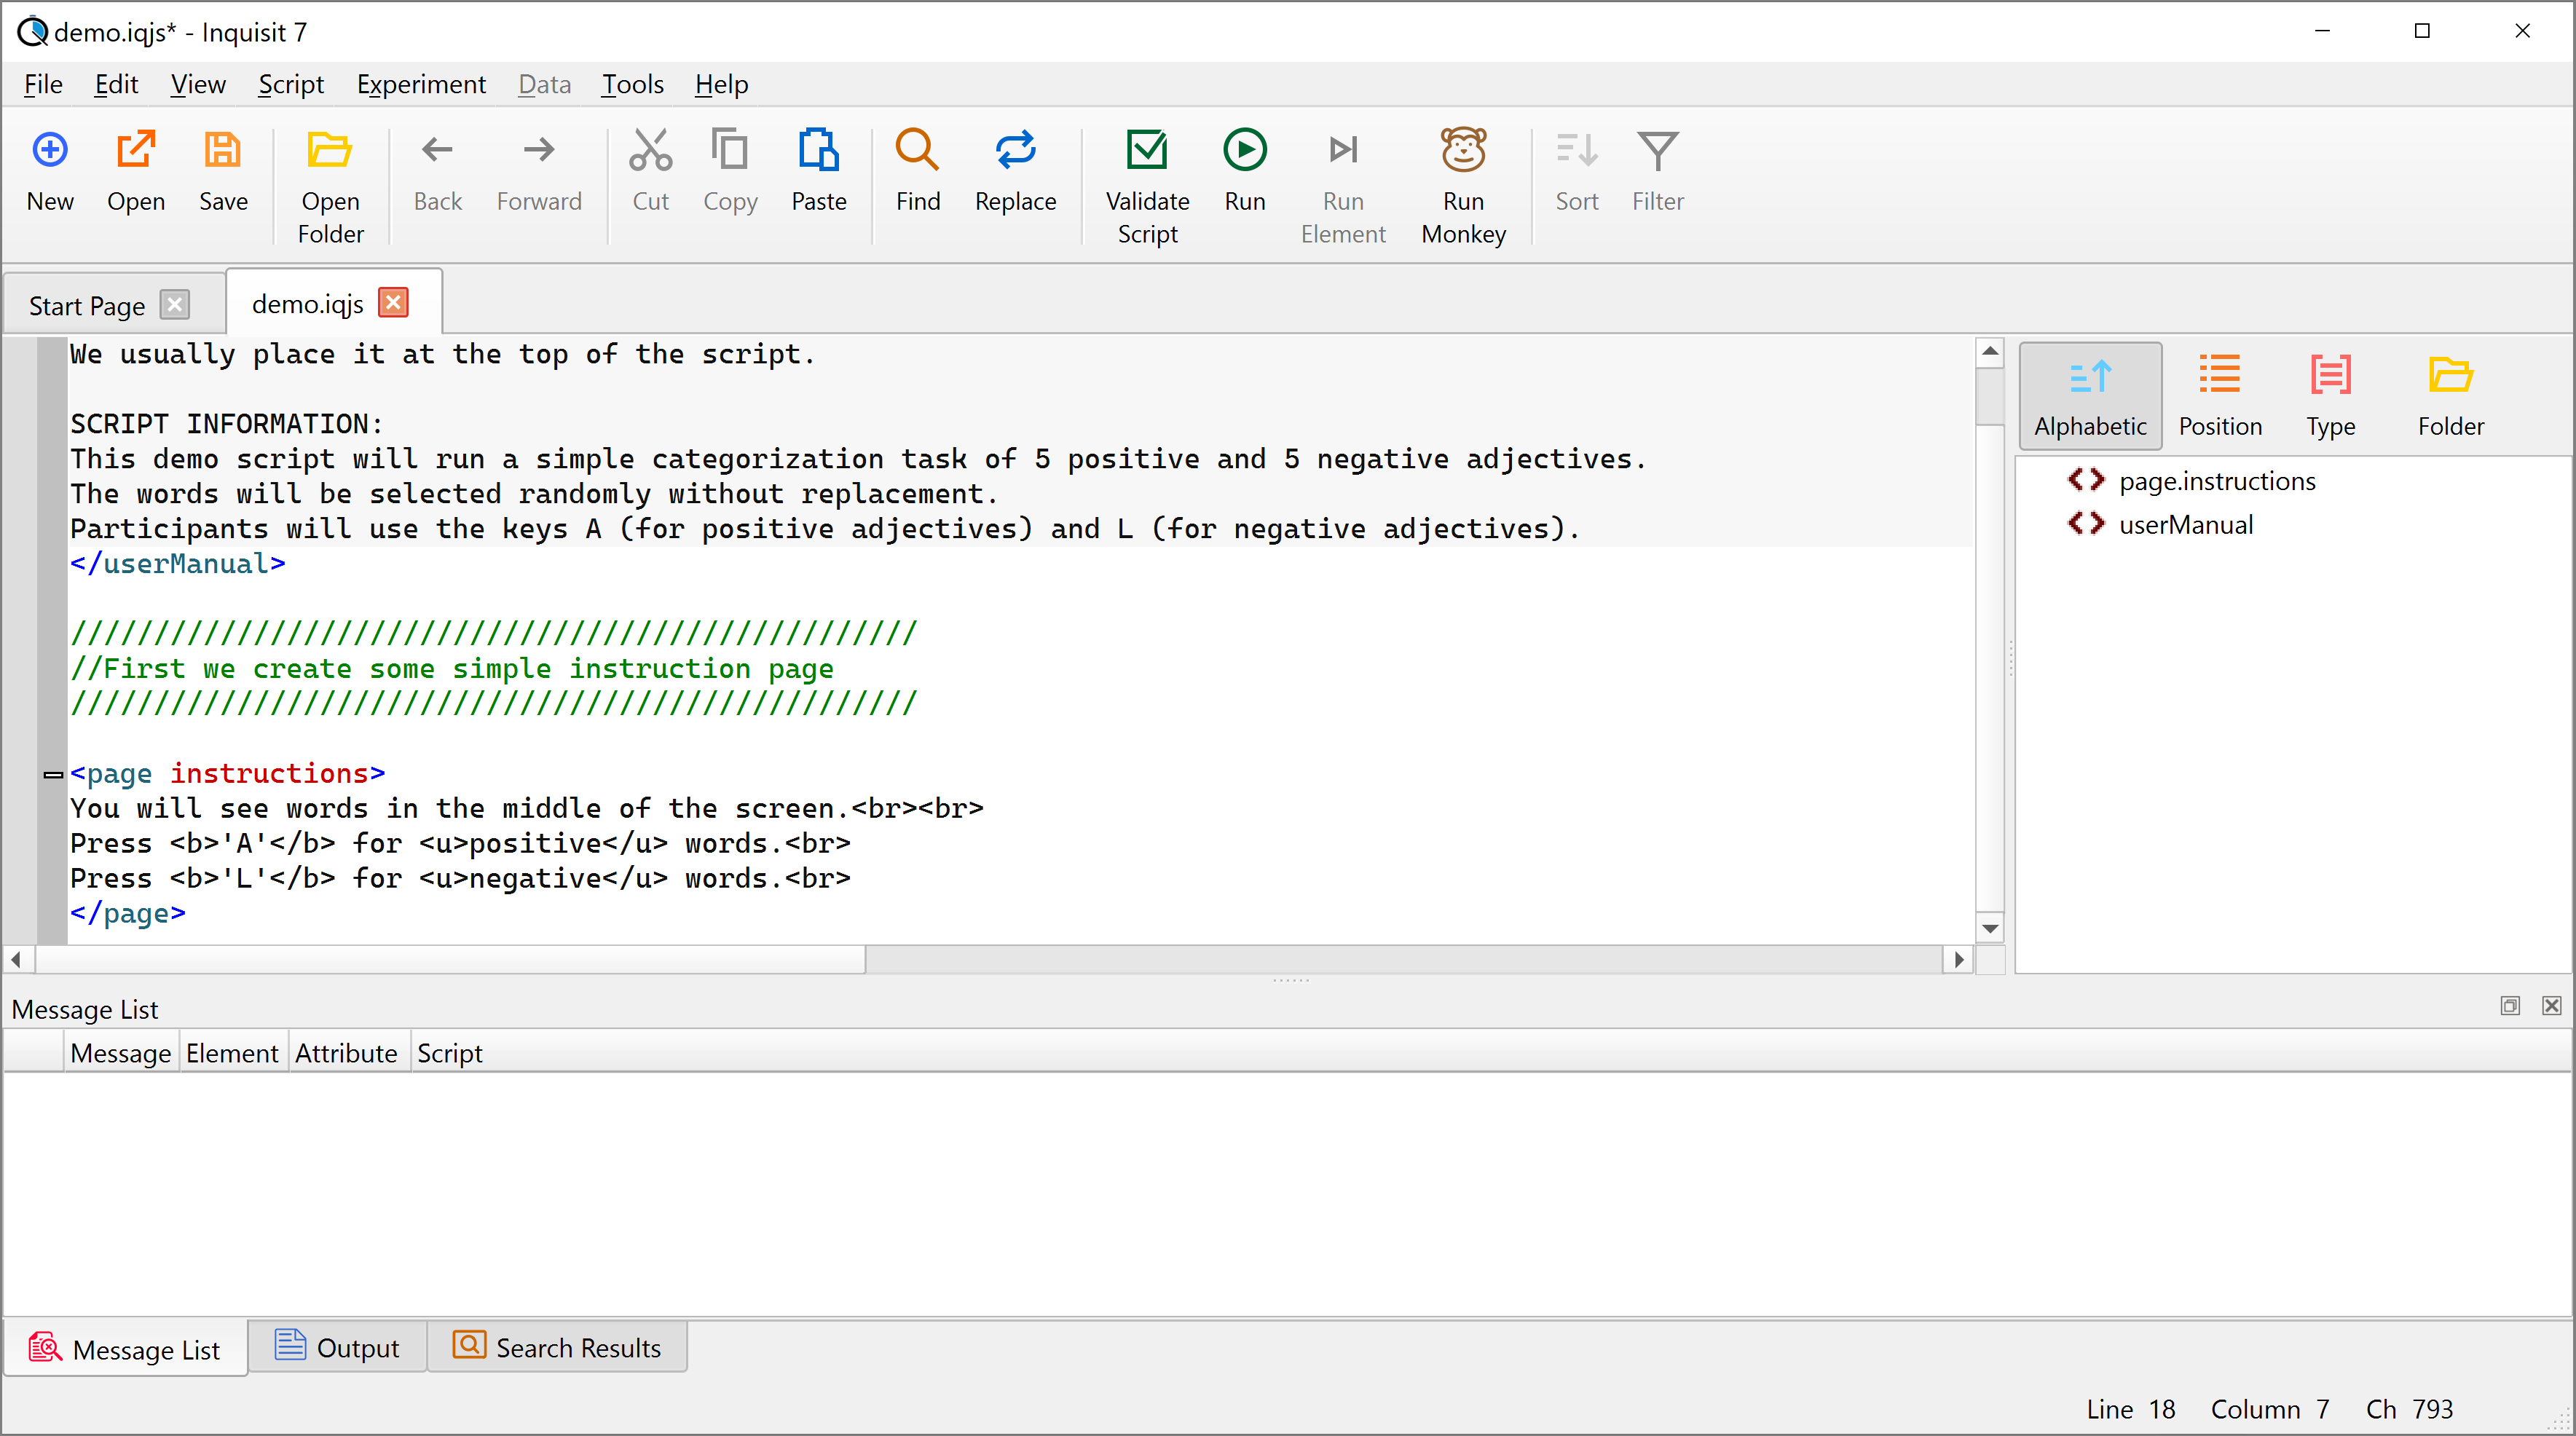
(2)<page>
Next, we will prepare some simple instructions for our participants. In this example, we will use the <page> element to present these instructions. Simply type <page> where you would like to place your <page> element.
Here we created the <page> element and added our simple instructions.
Note that we used simple hypertext markup language (html) formatting such as <br> (to include break lines) and <b></b> to bold individual words.
You can find more information about html formatting in Inquisit here.
Furthermore we added simple comments after double "//": These comments appear in green.
Preview instructions
To get a quick peek at how the instructions will present on screen, place your cursor anywhere within the <page> element and then click ‘Run Element’.
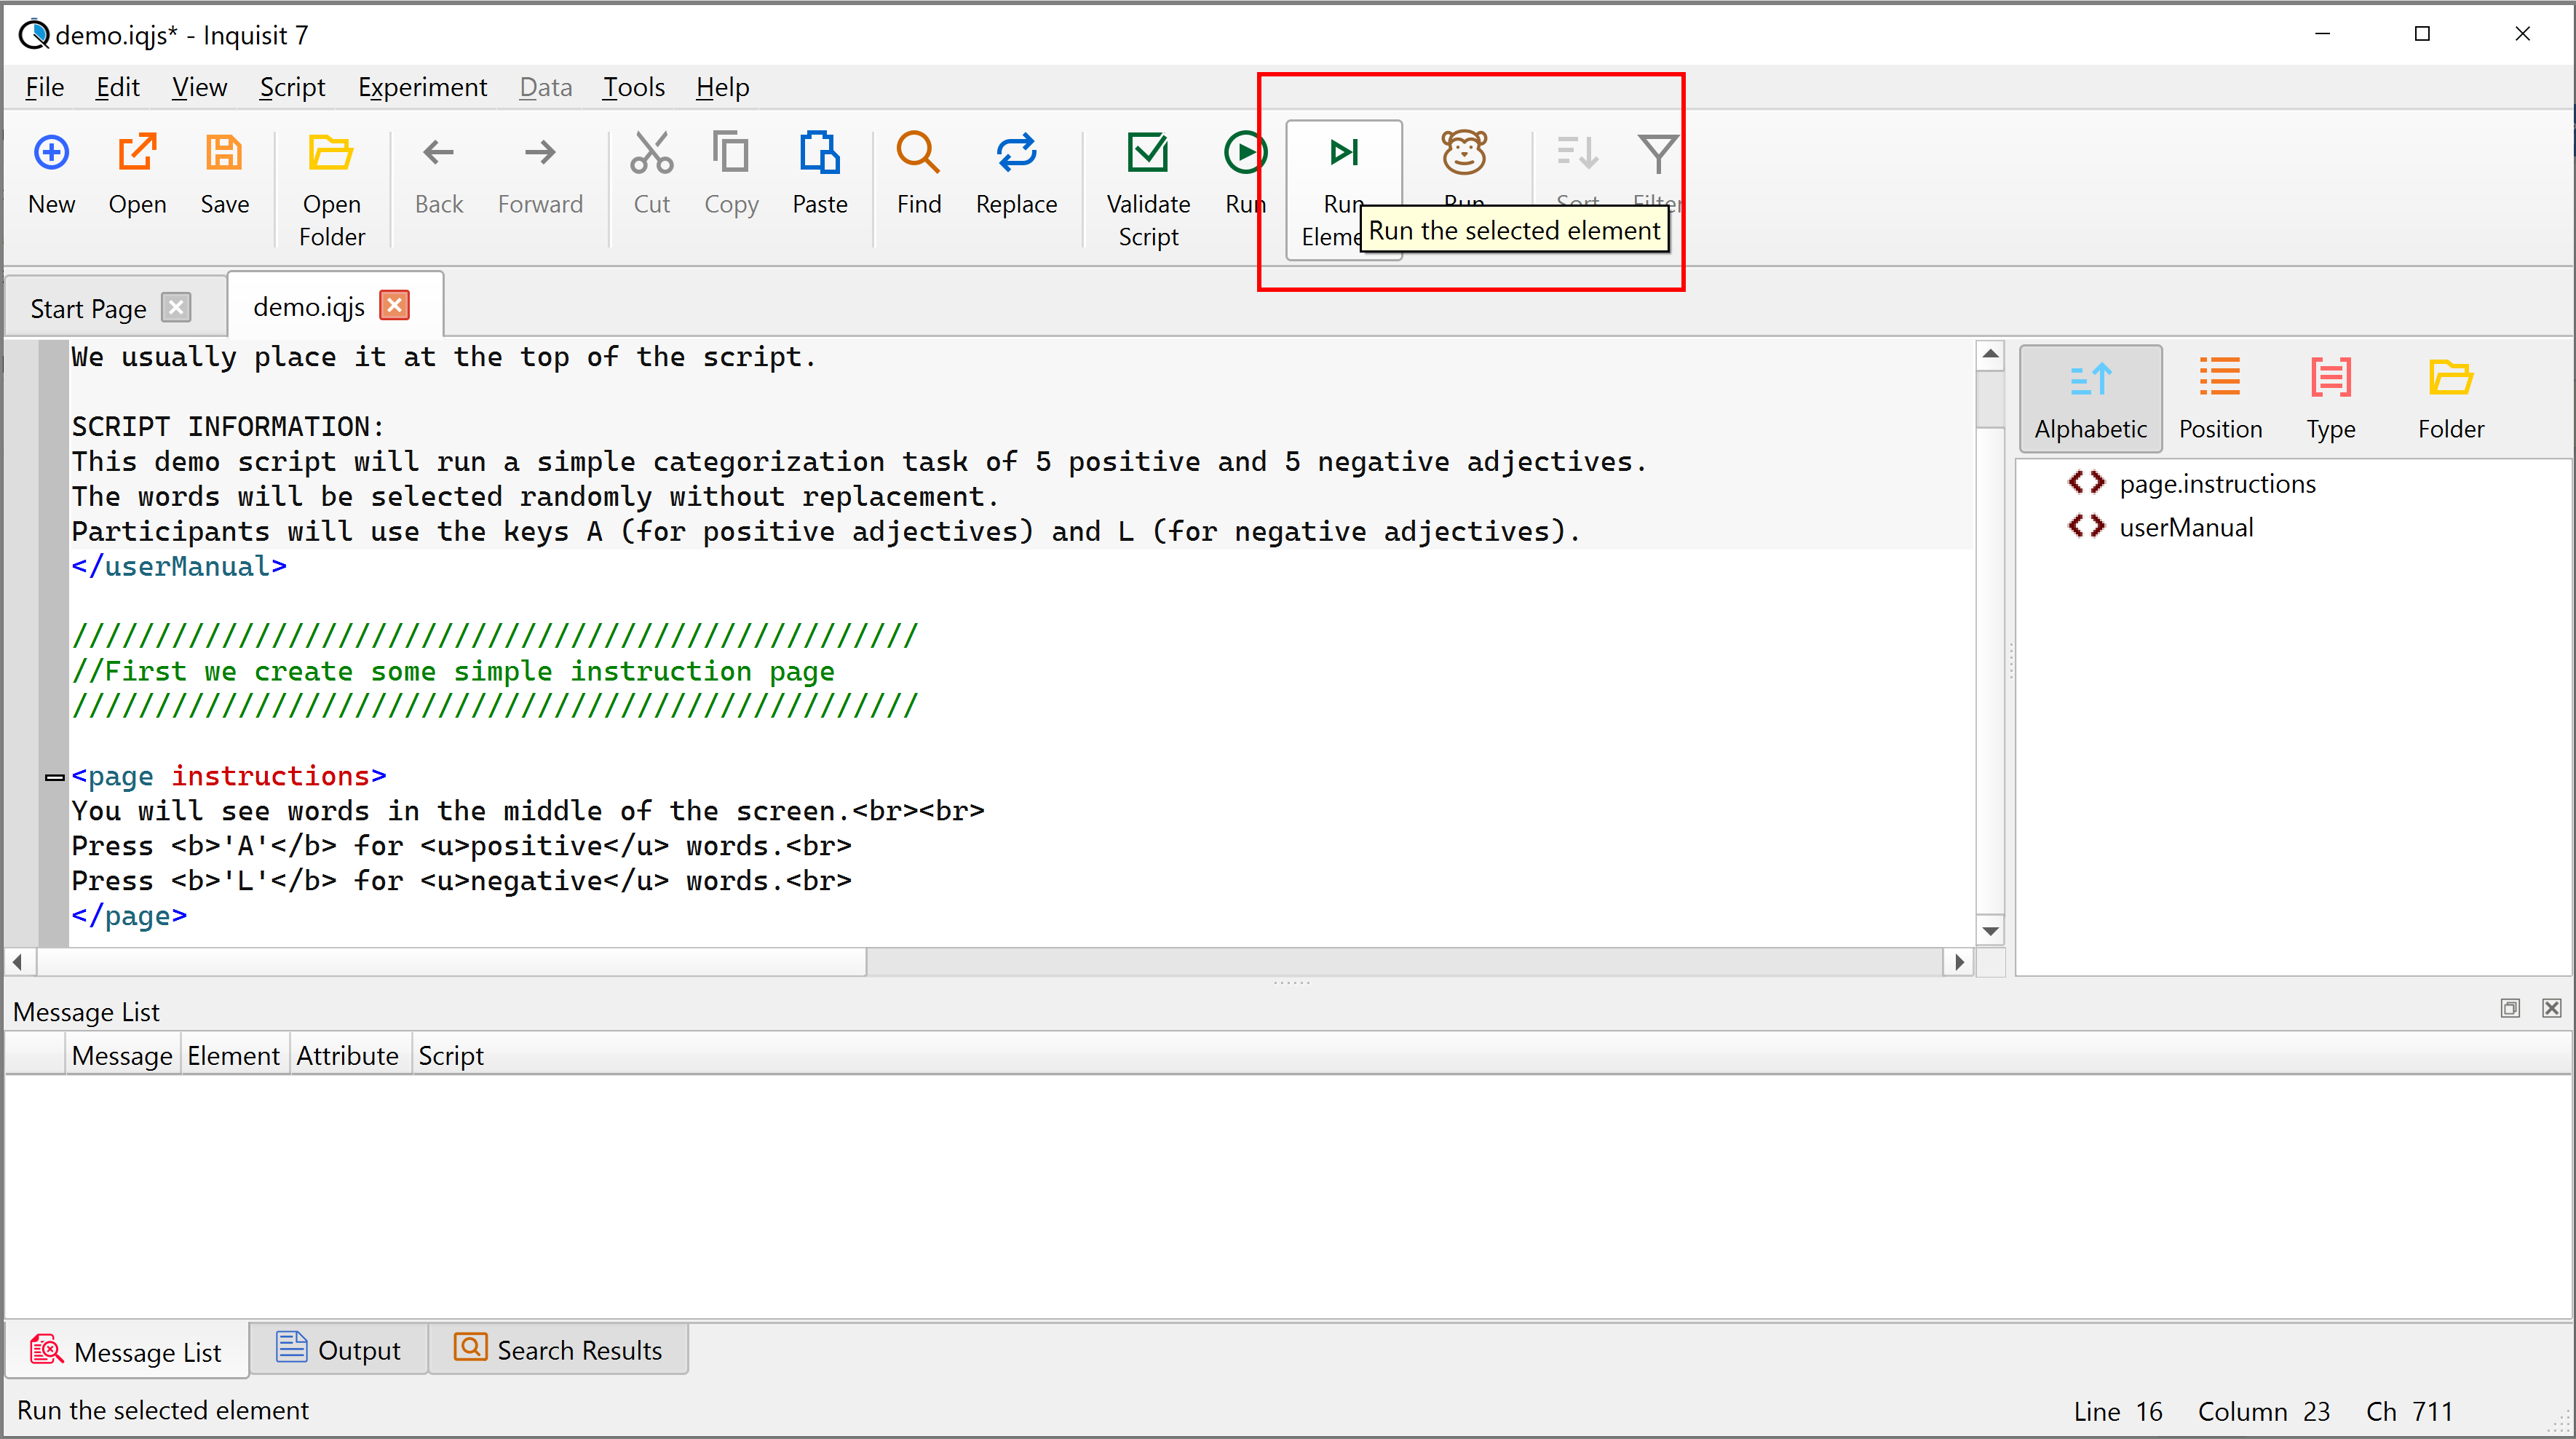
The Inquisit Run-Window will pop up.
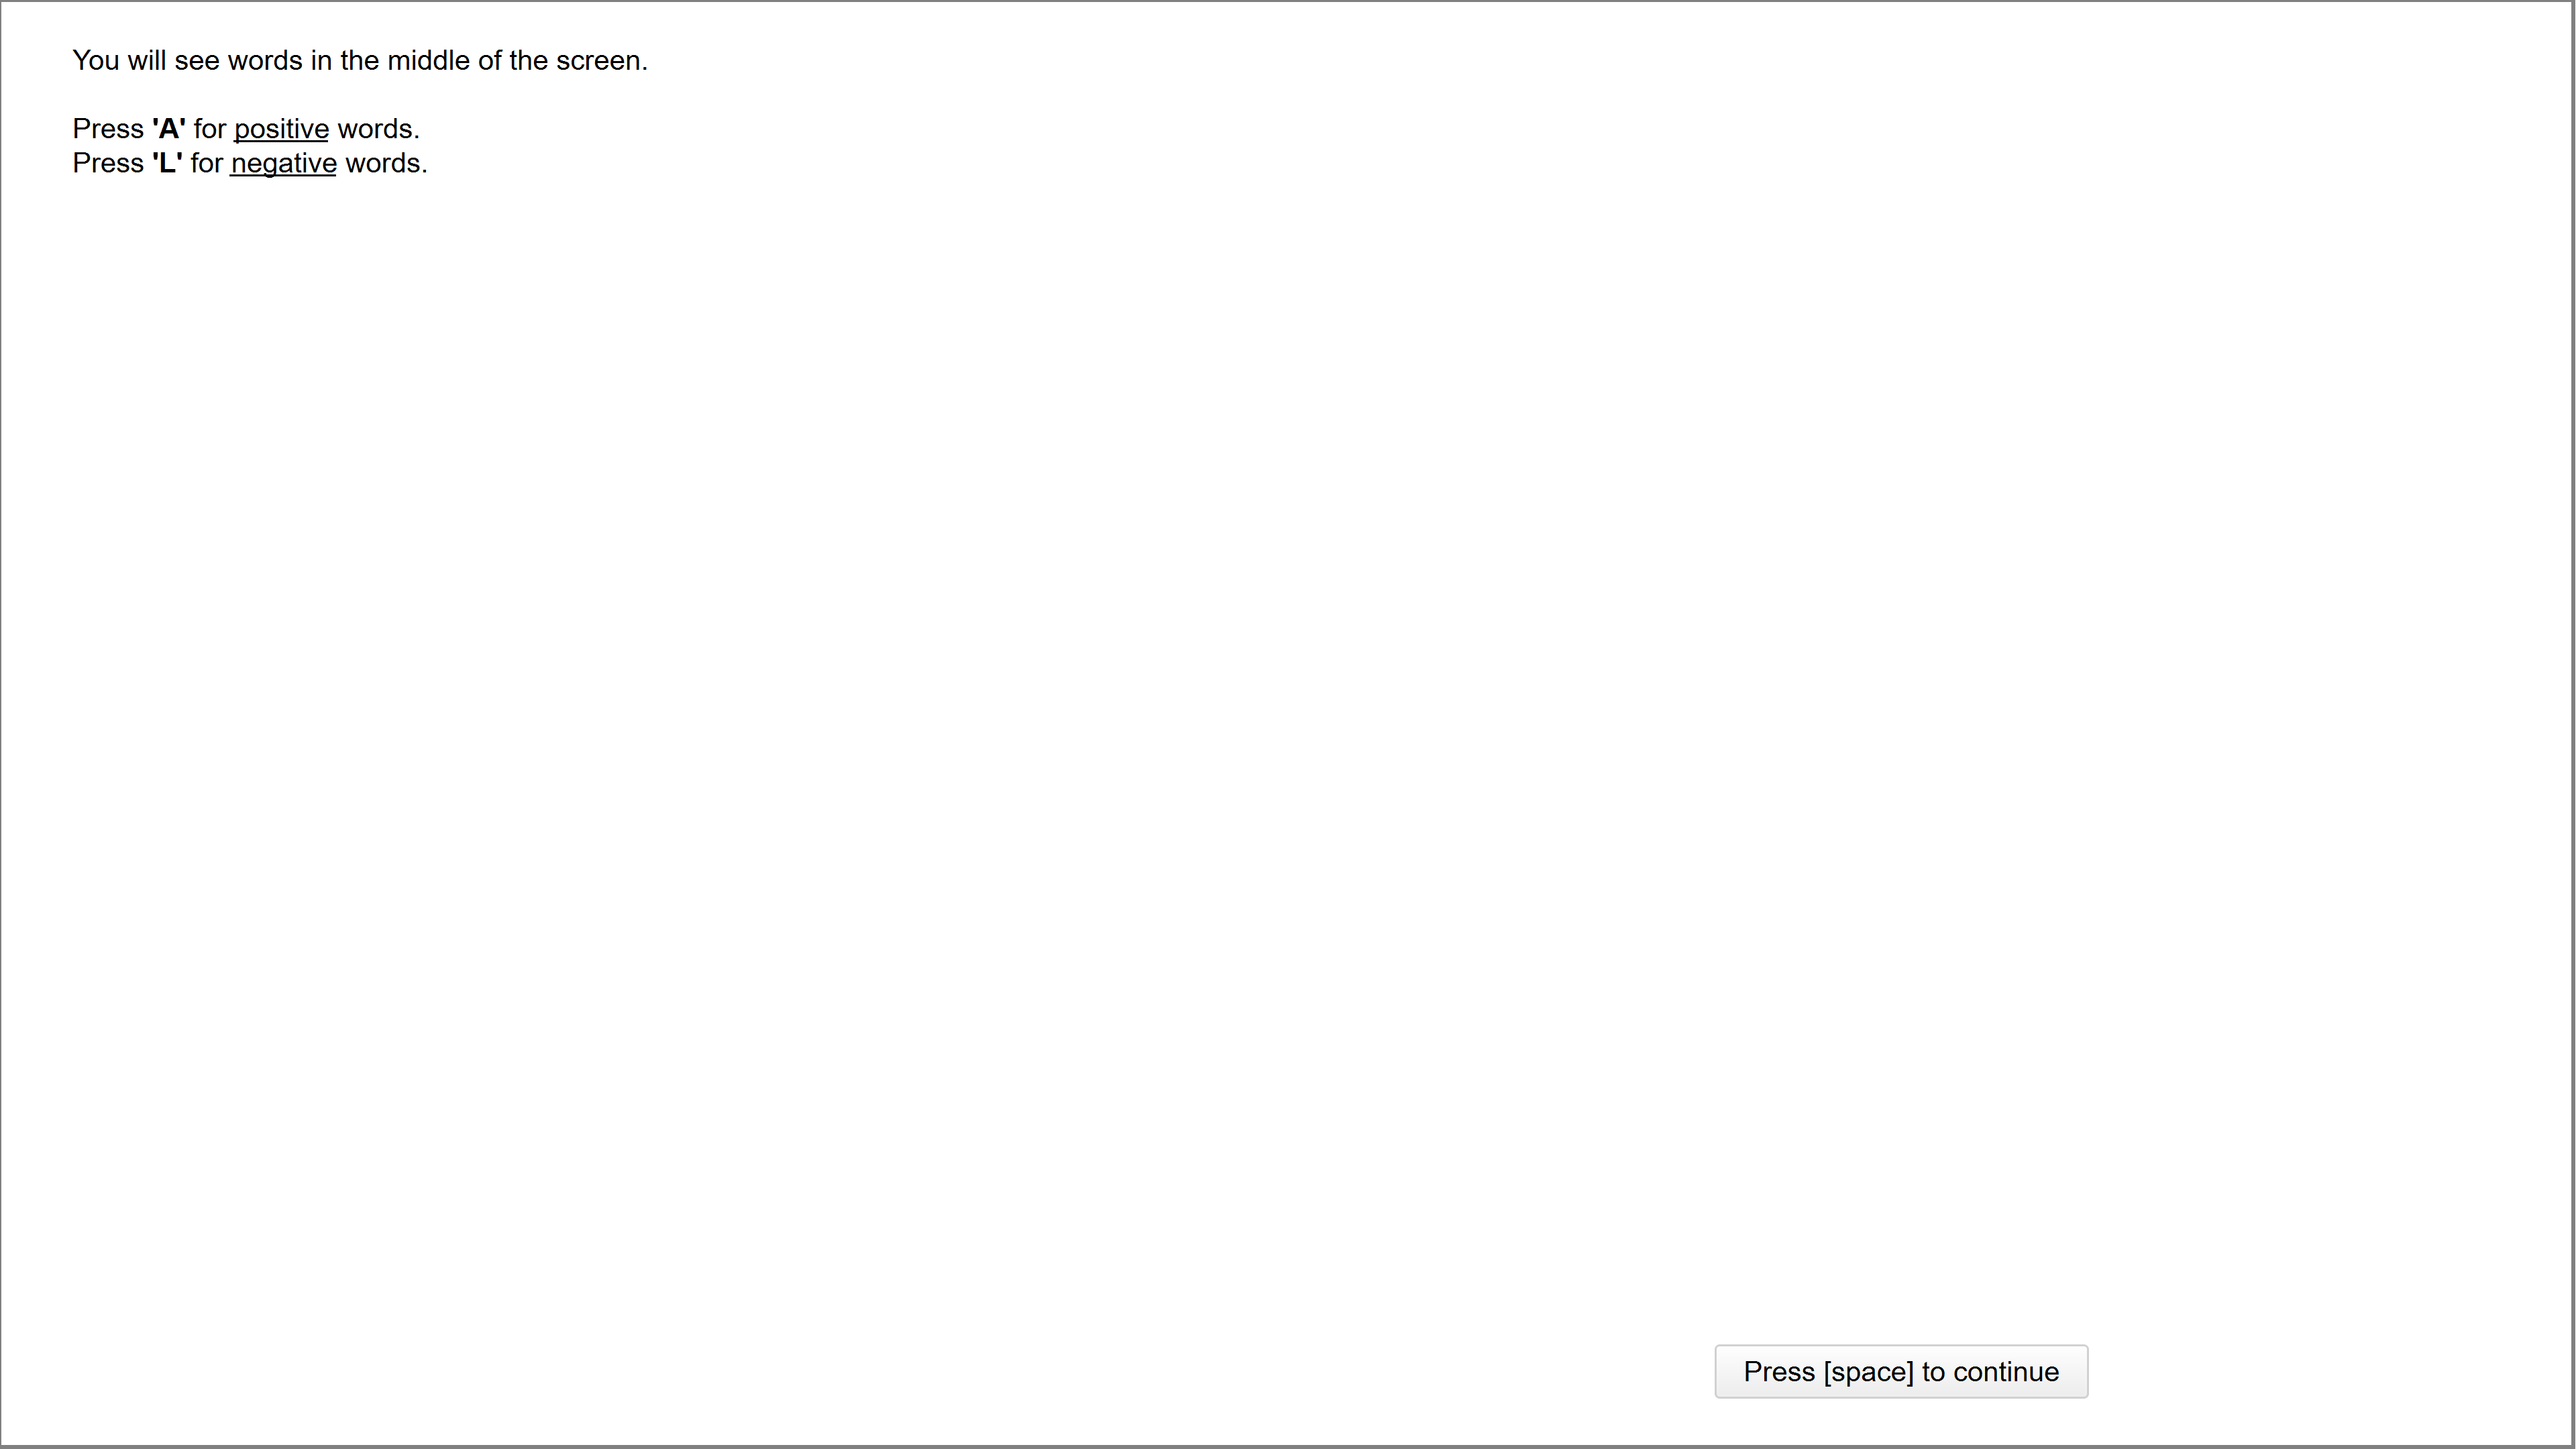
Press 'Run' to see the element.
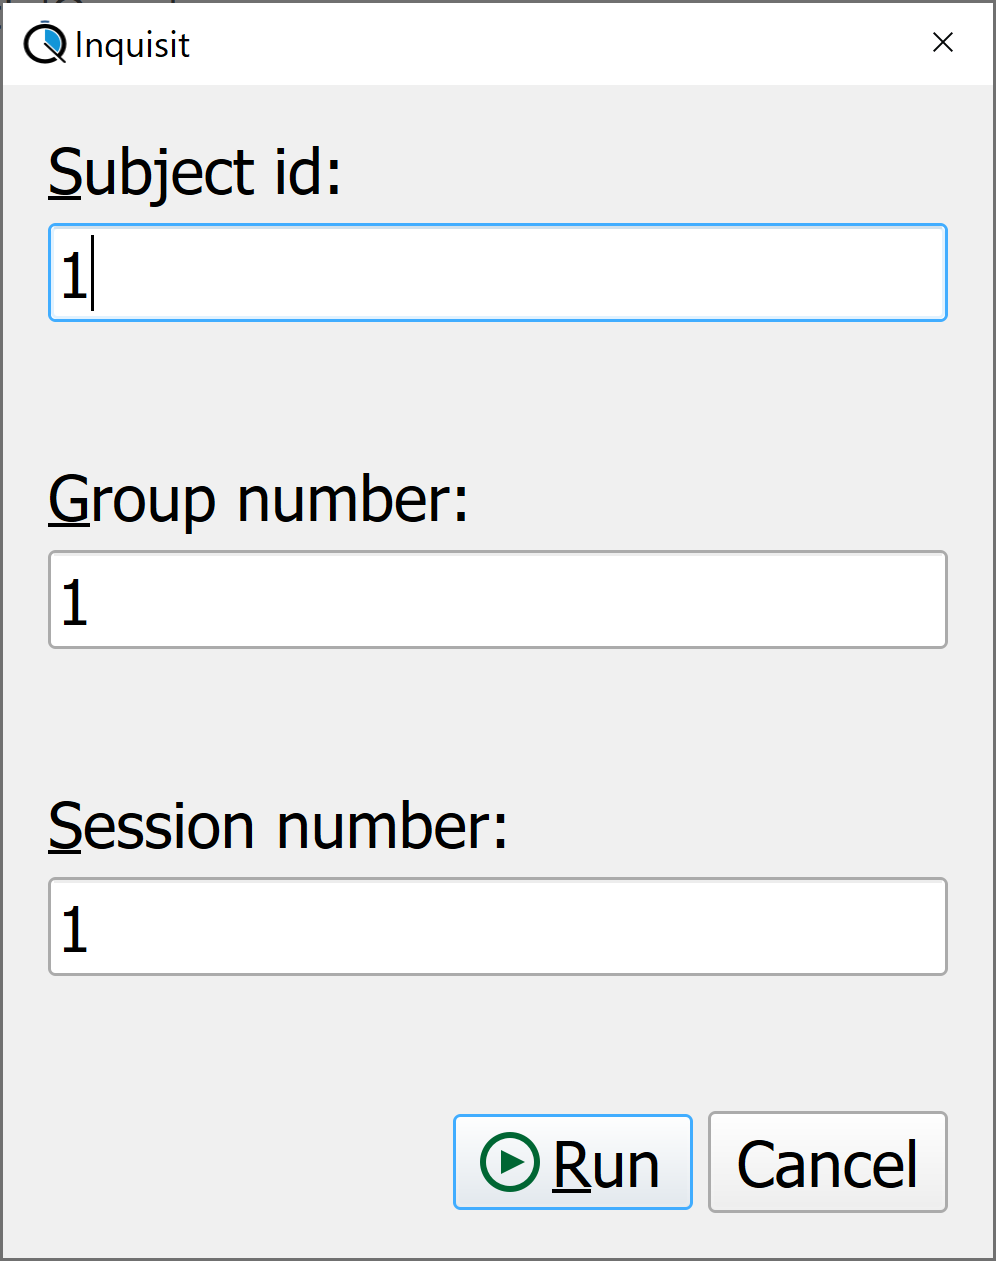
The screen:
(3)<item>
Next we will create the item lists for the positive and negative adjectives using the <item> element, which acts a simple storage container for our stimuli.
Each of our two <item> elements holds 5 word stimuli. The first item index is always 0.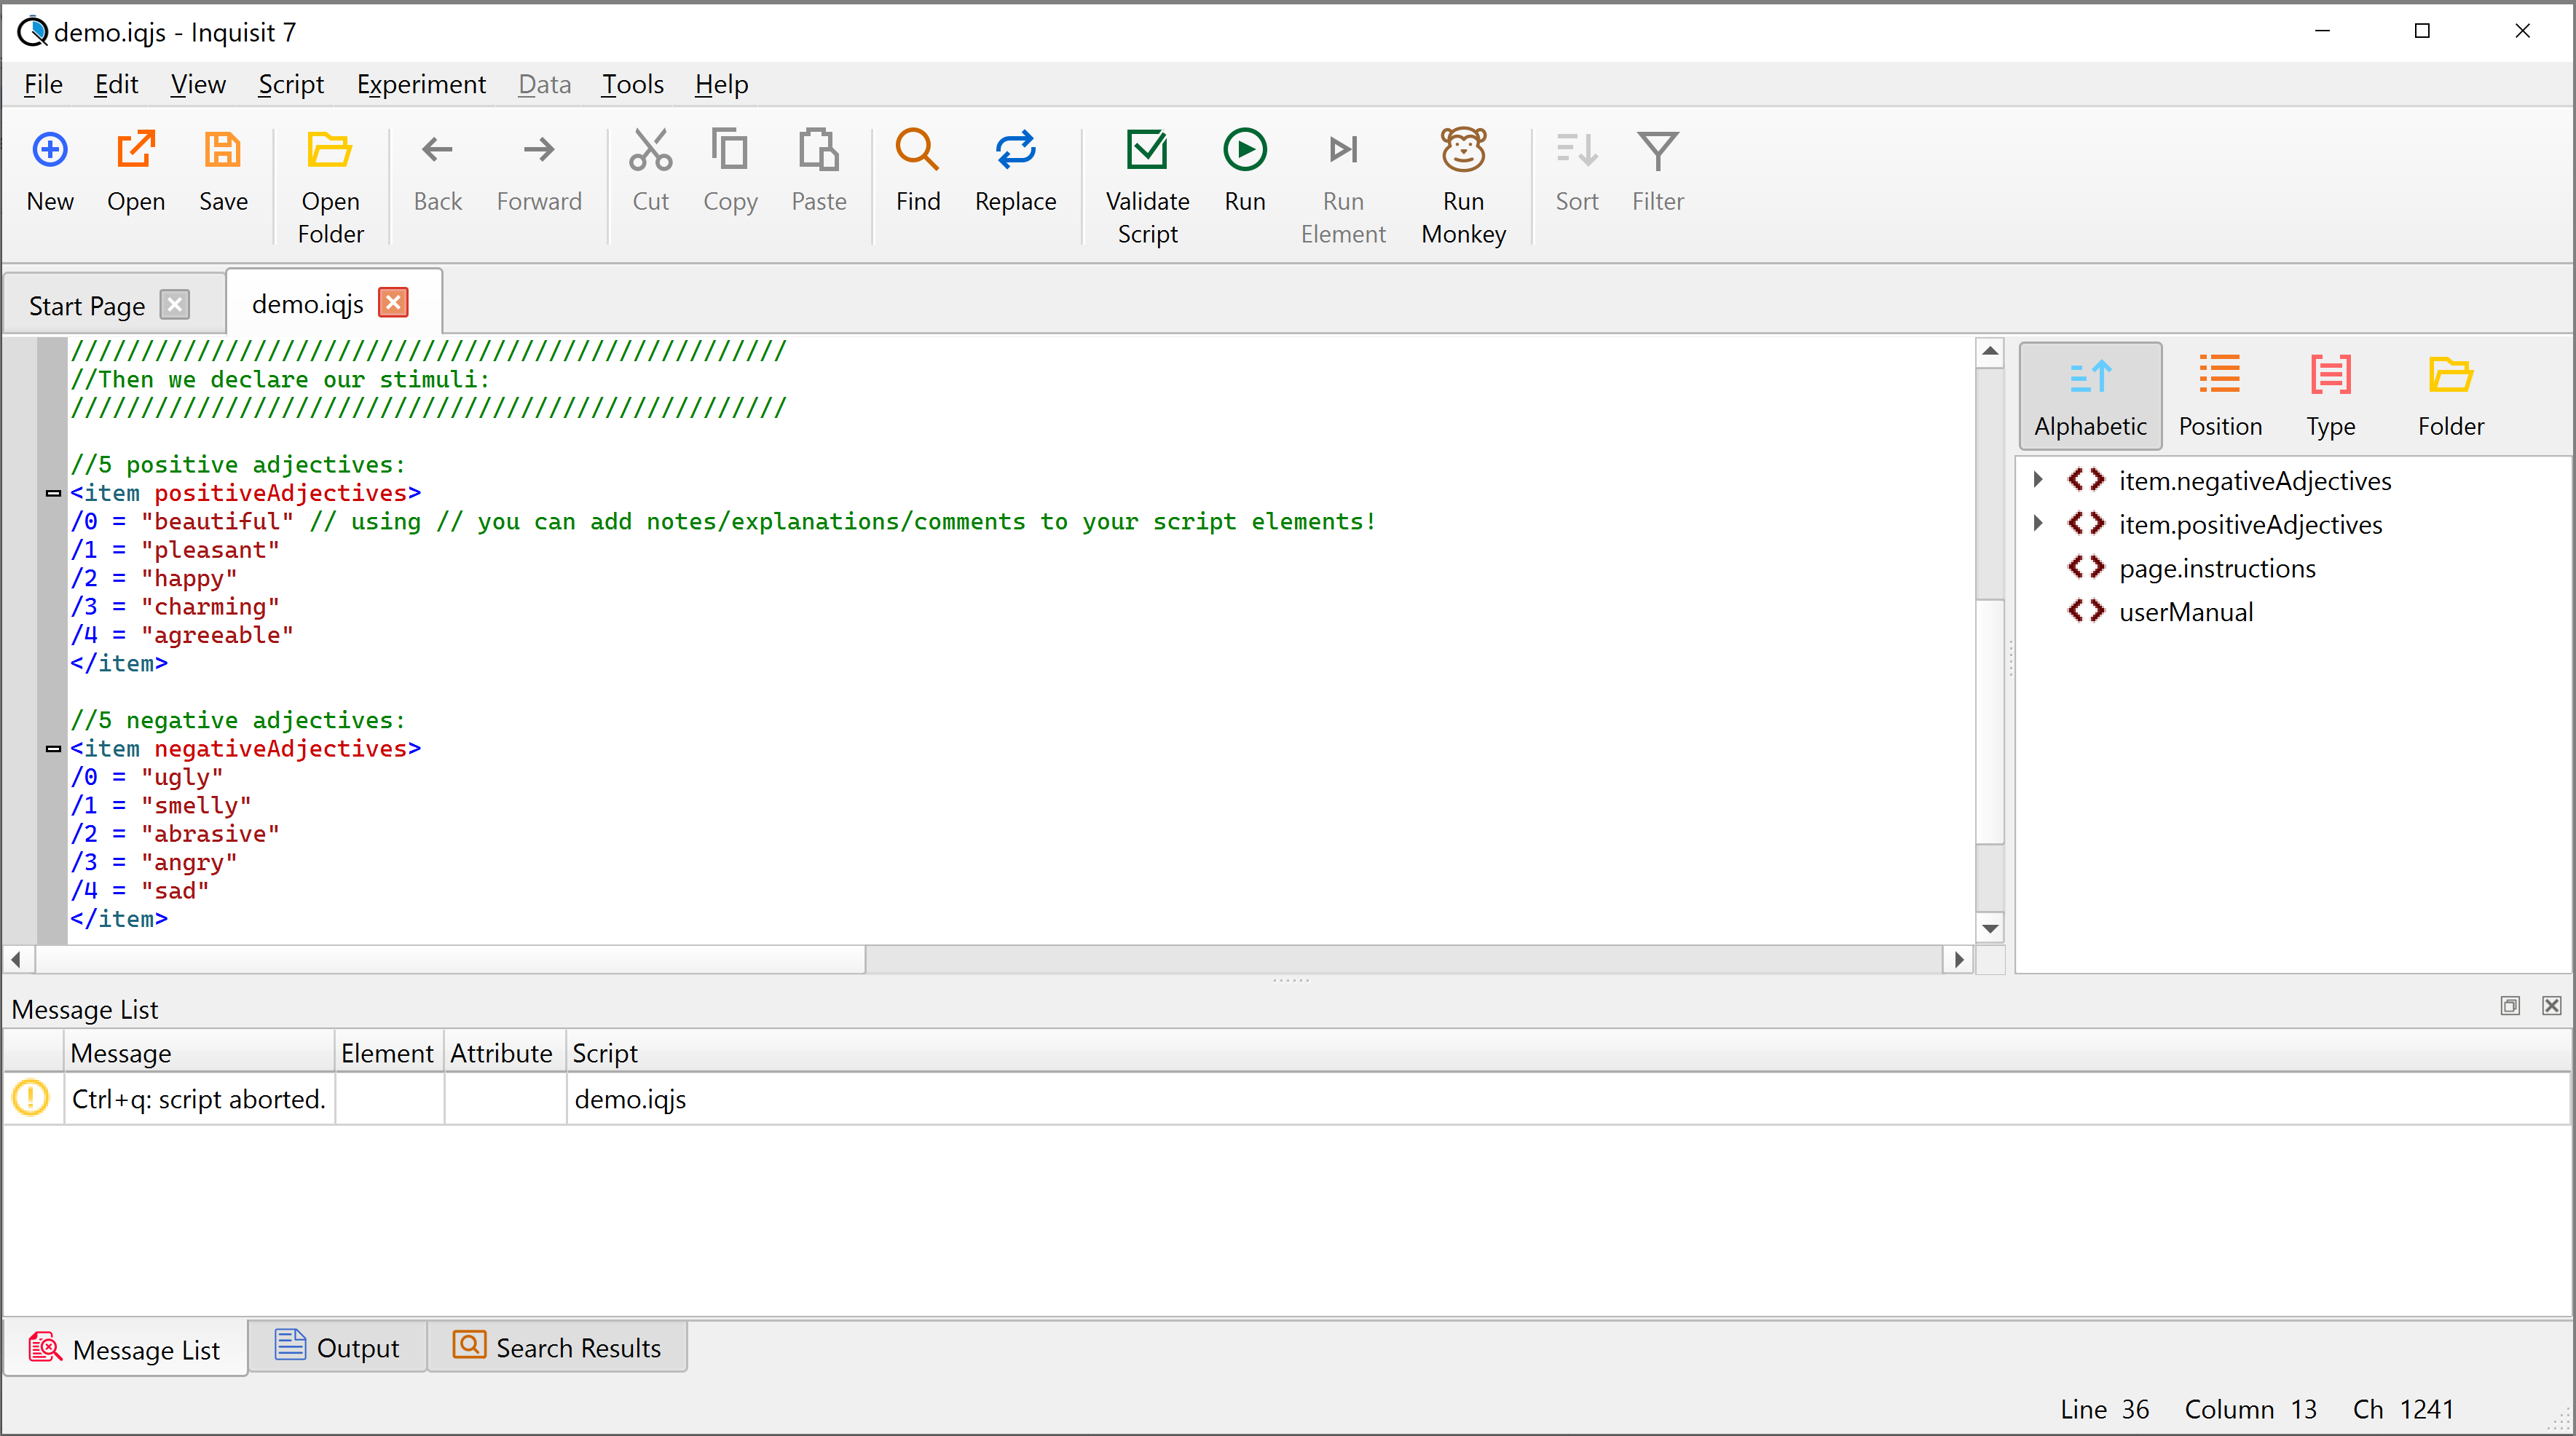
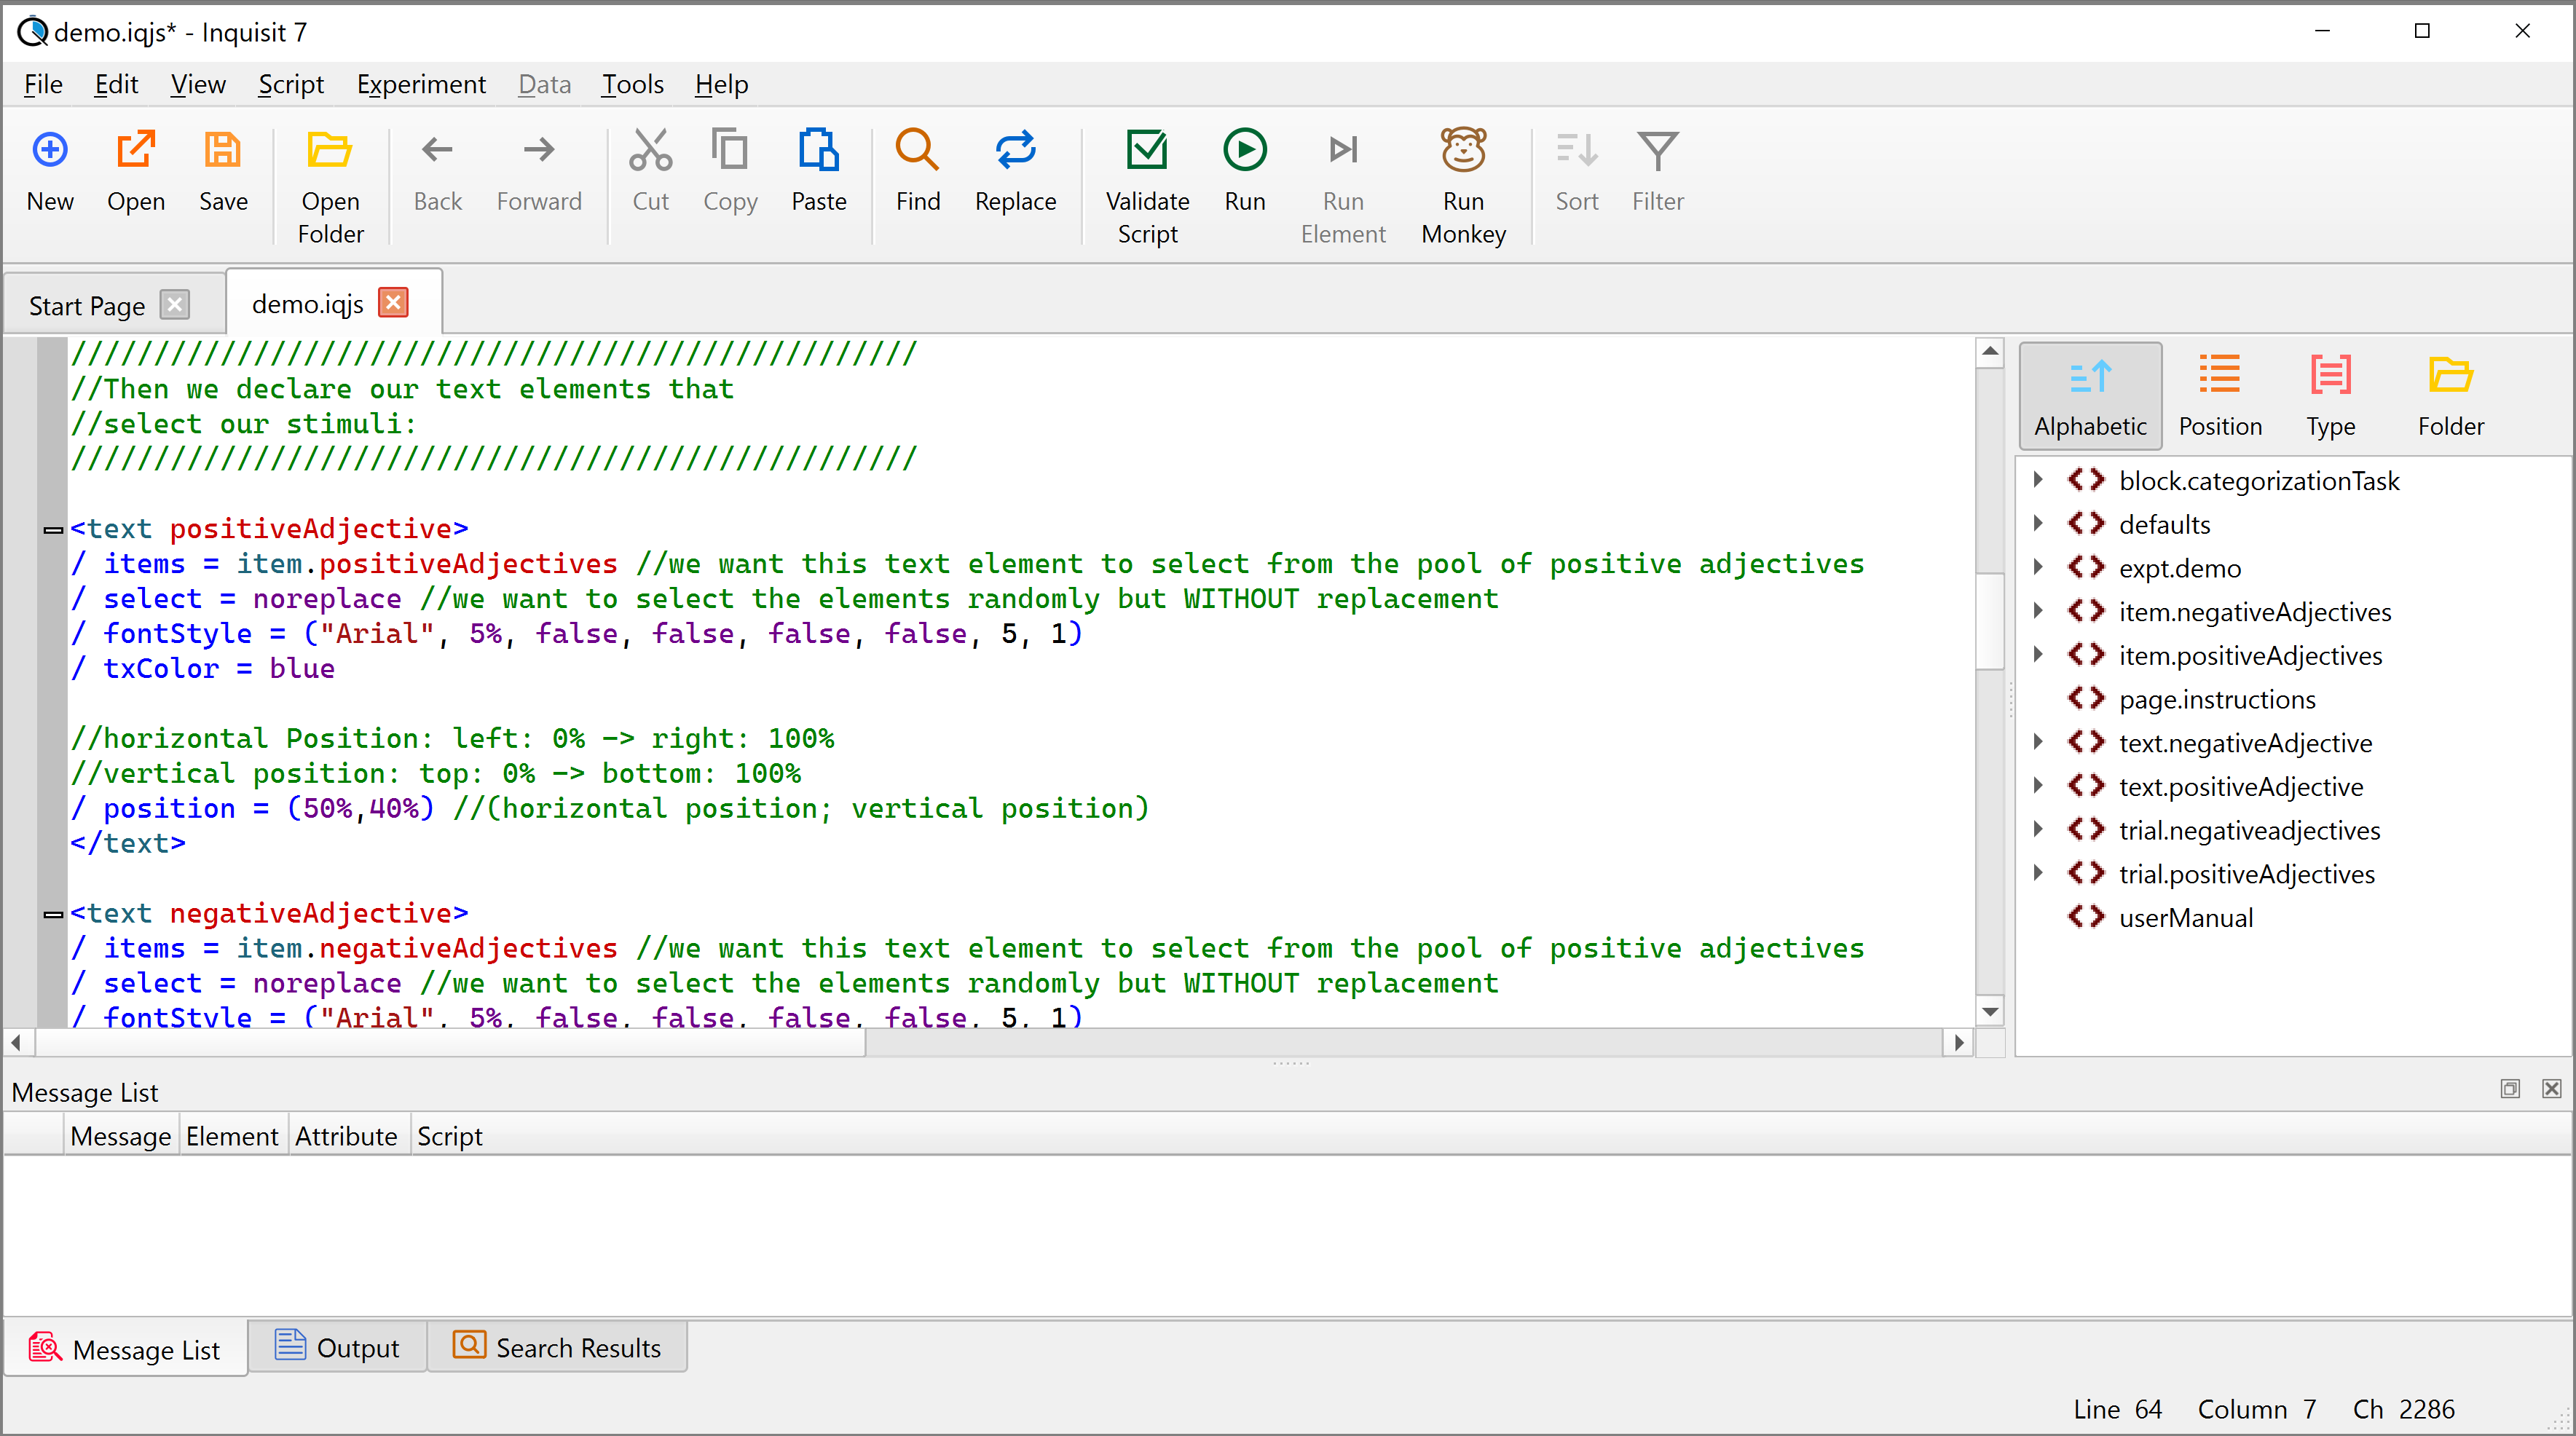
(4)<text>
To present the word stimuli on screen we also need to declare <text> elements that call the items from their respective storage container.
In our example, our two <text> elements select from item.positiveAdjectives and item.negativeAdjectives, respectively and their item selection is set to be done randomly without replacement (/select = noreplace) – thus ensuring that each of the items from their respective item pools is selected.
We also added several other attributes: we defined the fontStyle and color of the words and coded their screen position.
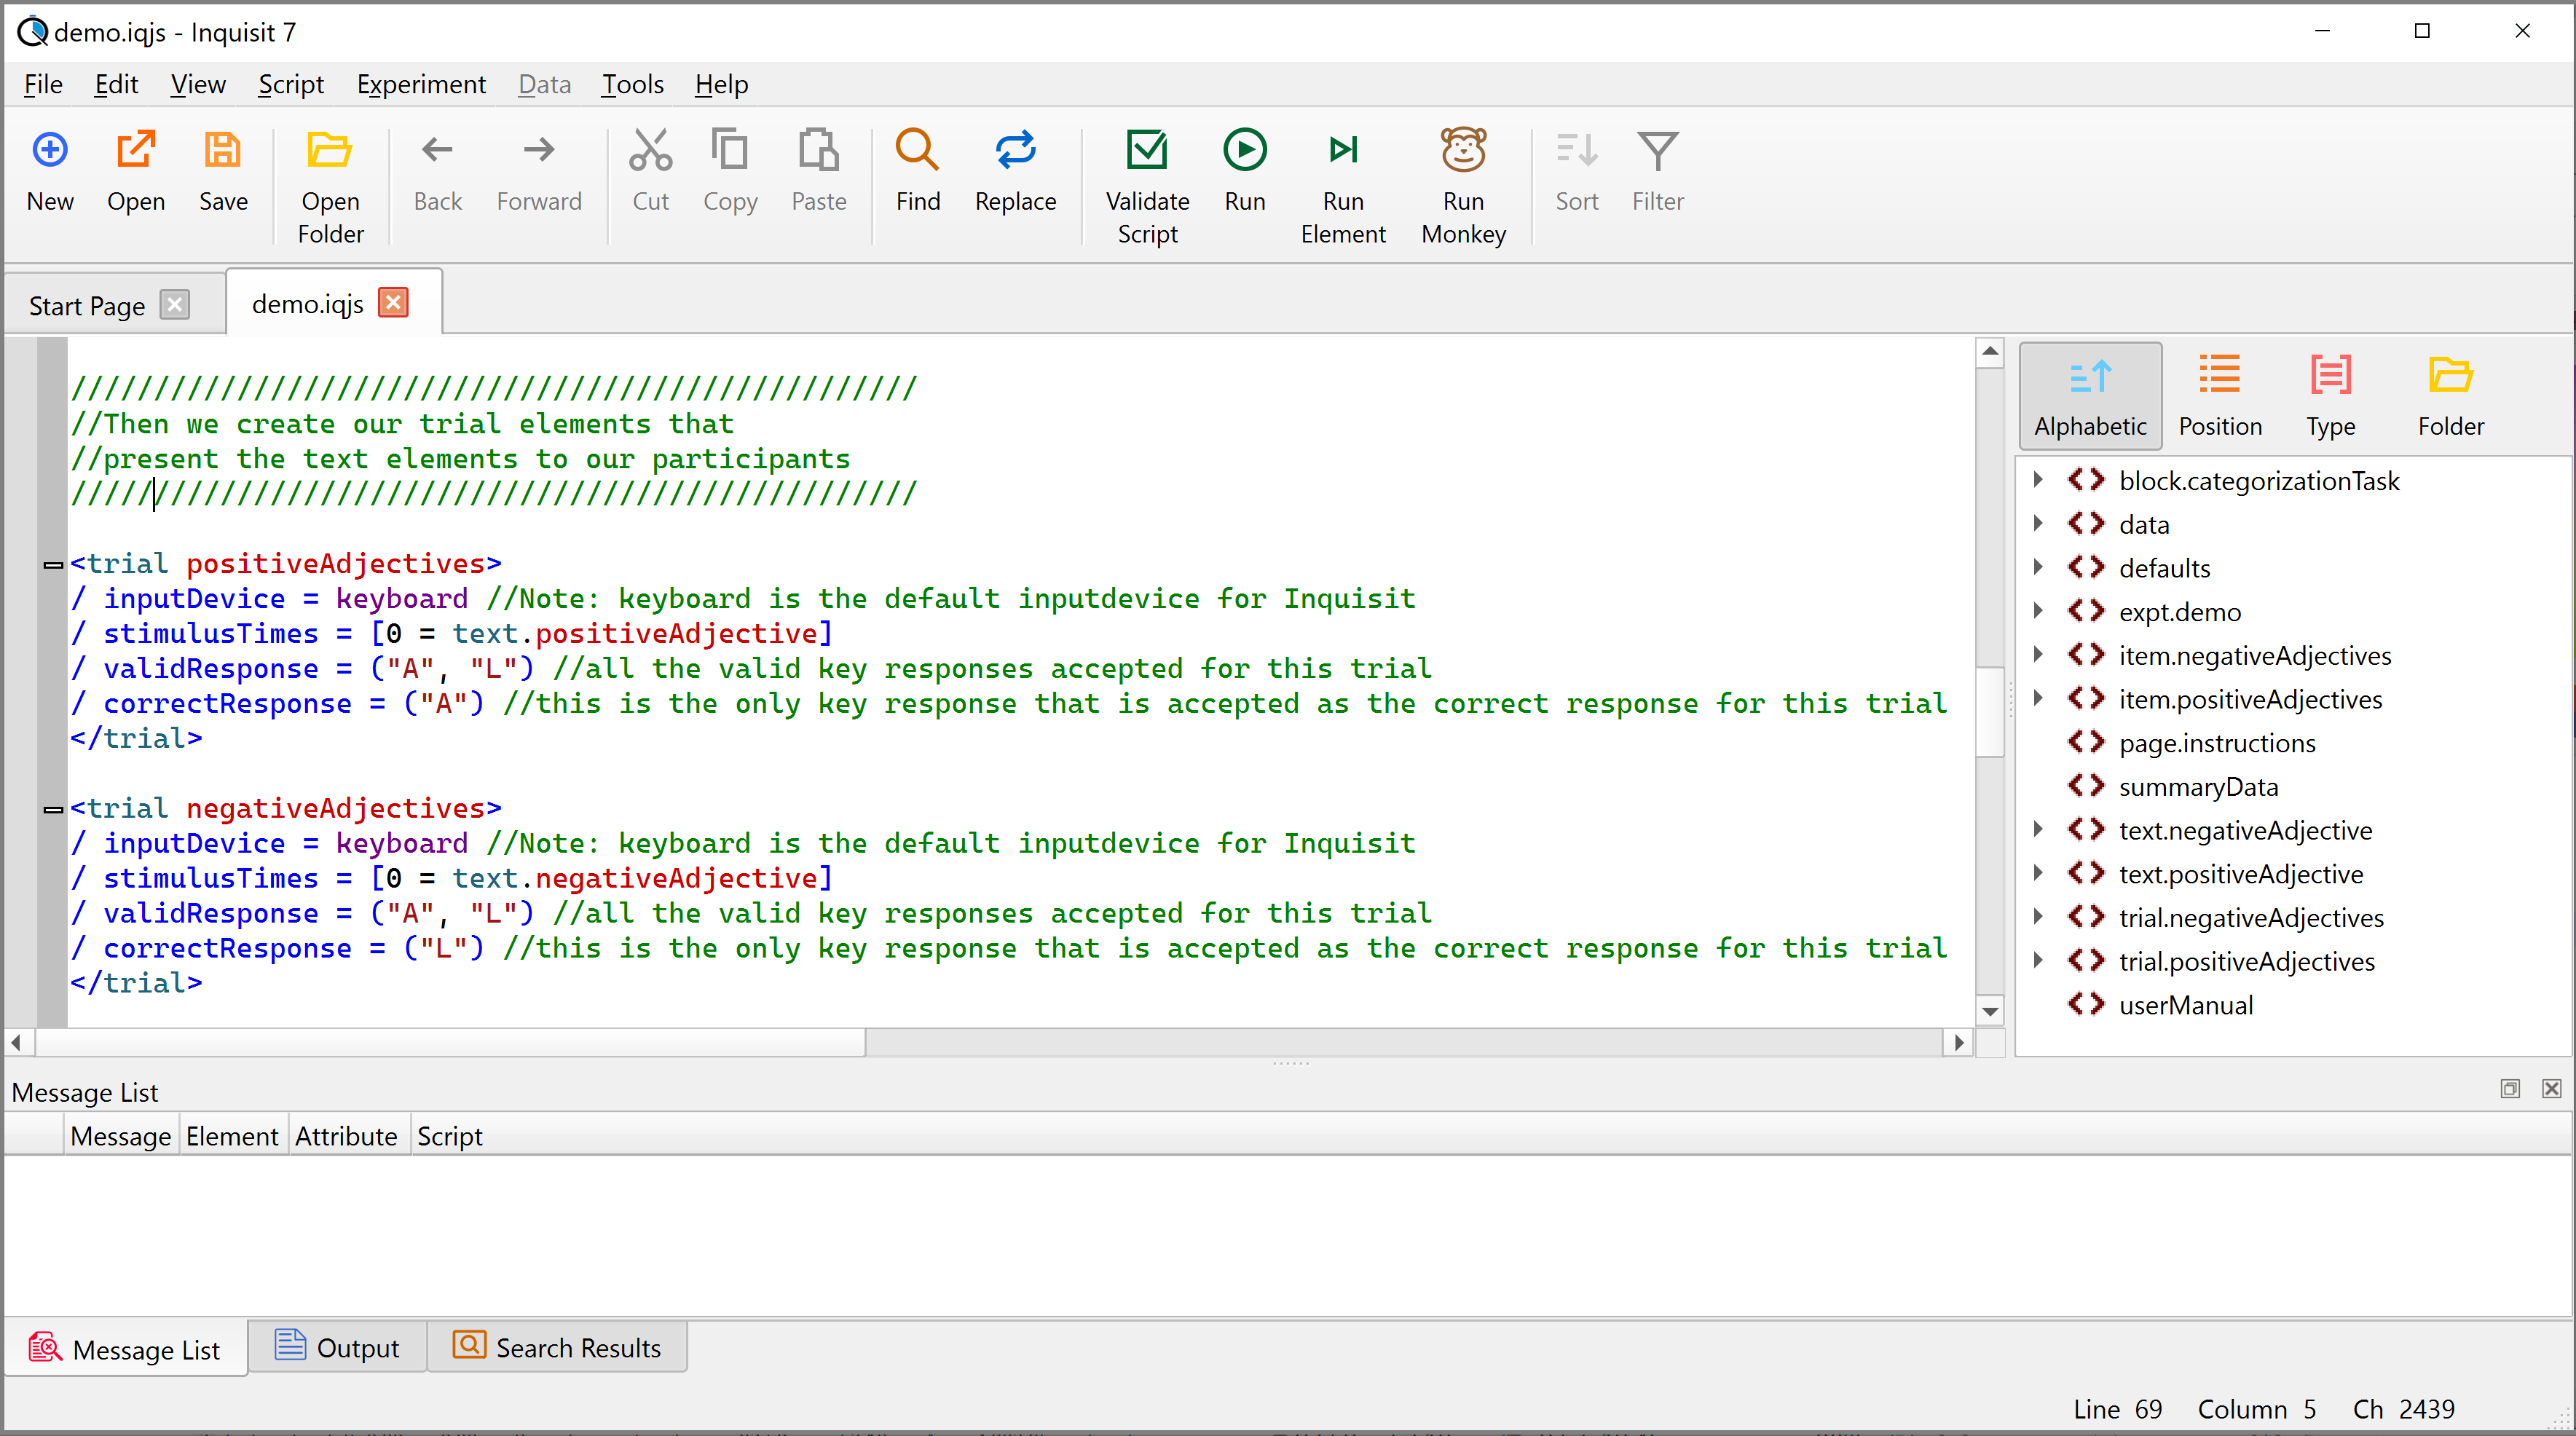
(5)<trial>
The next crucial element is the <trial> element. Trial elements present the individual text, picture, sound and video elements on screen and collect responses. Trial elements write a line of data to the raw data file (unless instructed not to). In a way trial elements are the main work horses of Inquisit experiments.
In our example, we coded two <trial> elements: one for presenting the positive and one for presenting the negative adjectives. Both trials present their respective adjectives at the start of the trial (/ stimulusTimes = [0 = …]) and both trials respond to keyboard keys “A” or “L” (the valid responses). However, trial.positiveAdjectives considers “A” to be the correct response, whereas trial.negativeAdjectives considers “L” to be the correct response.
(6)<block>
In order to present our trial elements, we further need a <block> element.
In this example the <block> element specifies that it will run 10 trials and randomly (without replacement) select from trial.positiveAdjectives and trial.negativeAdjectives.
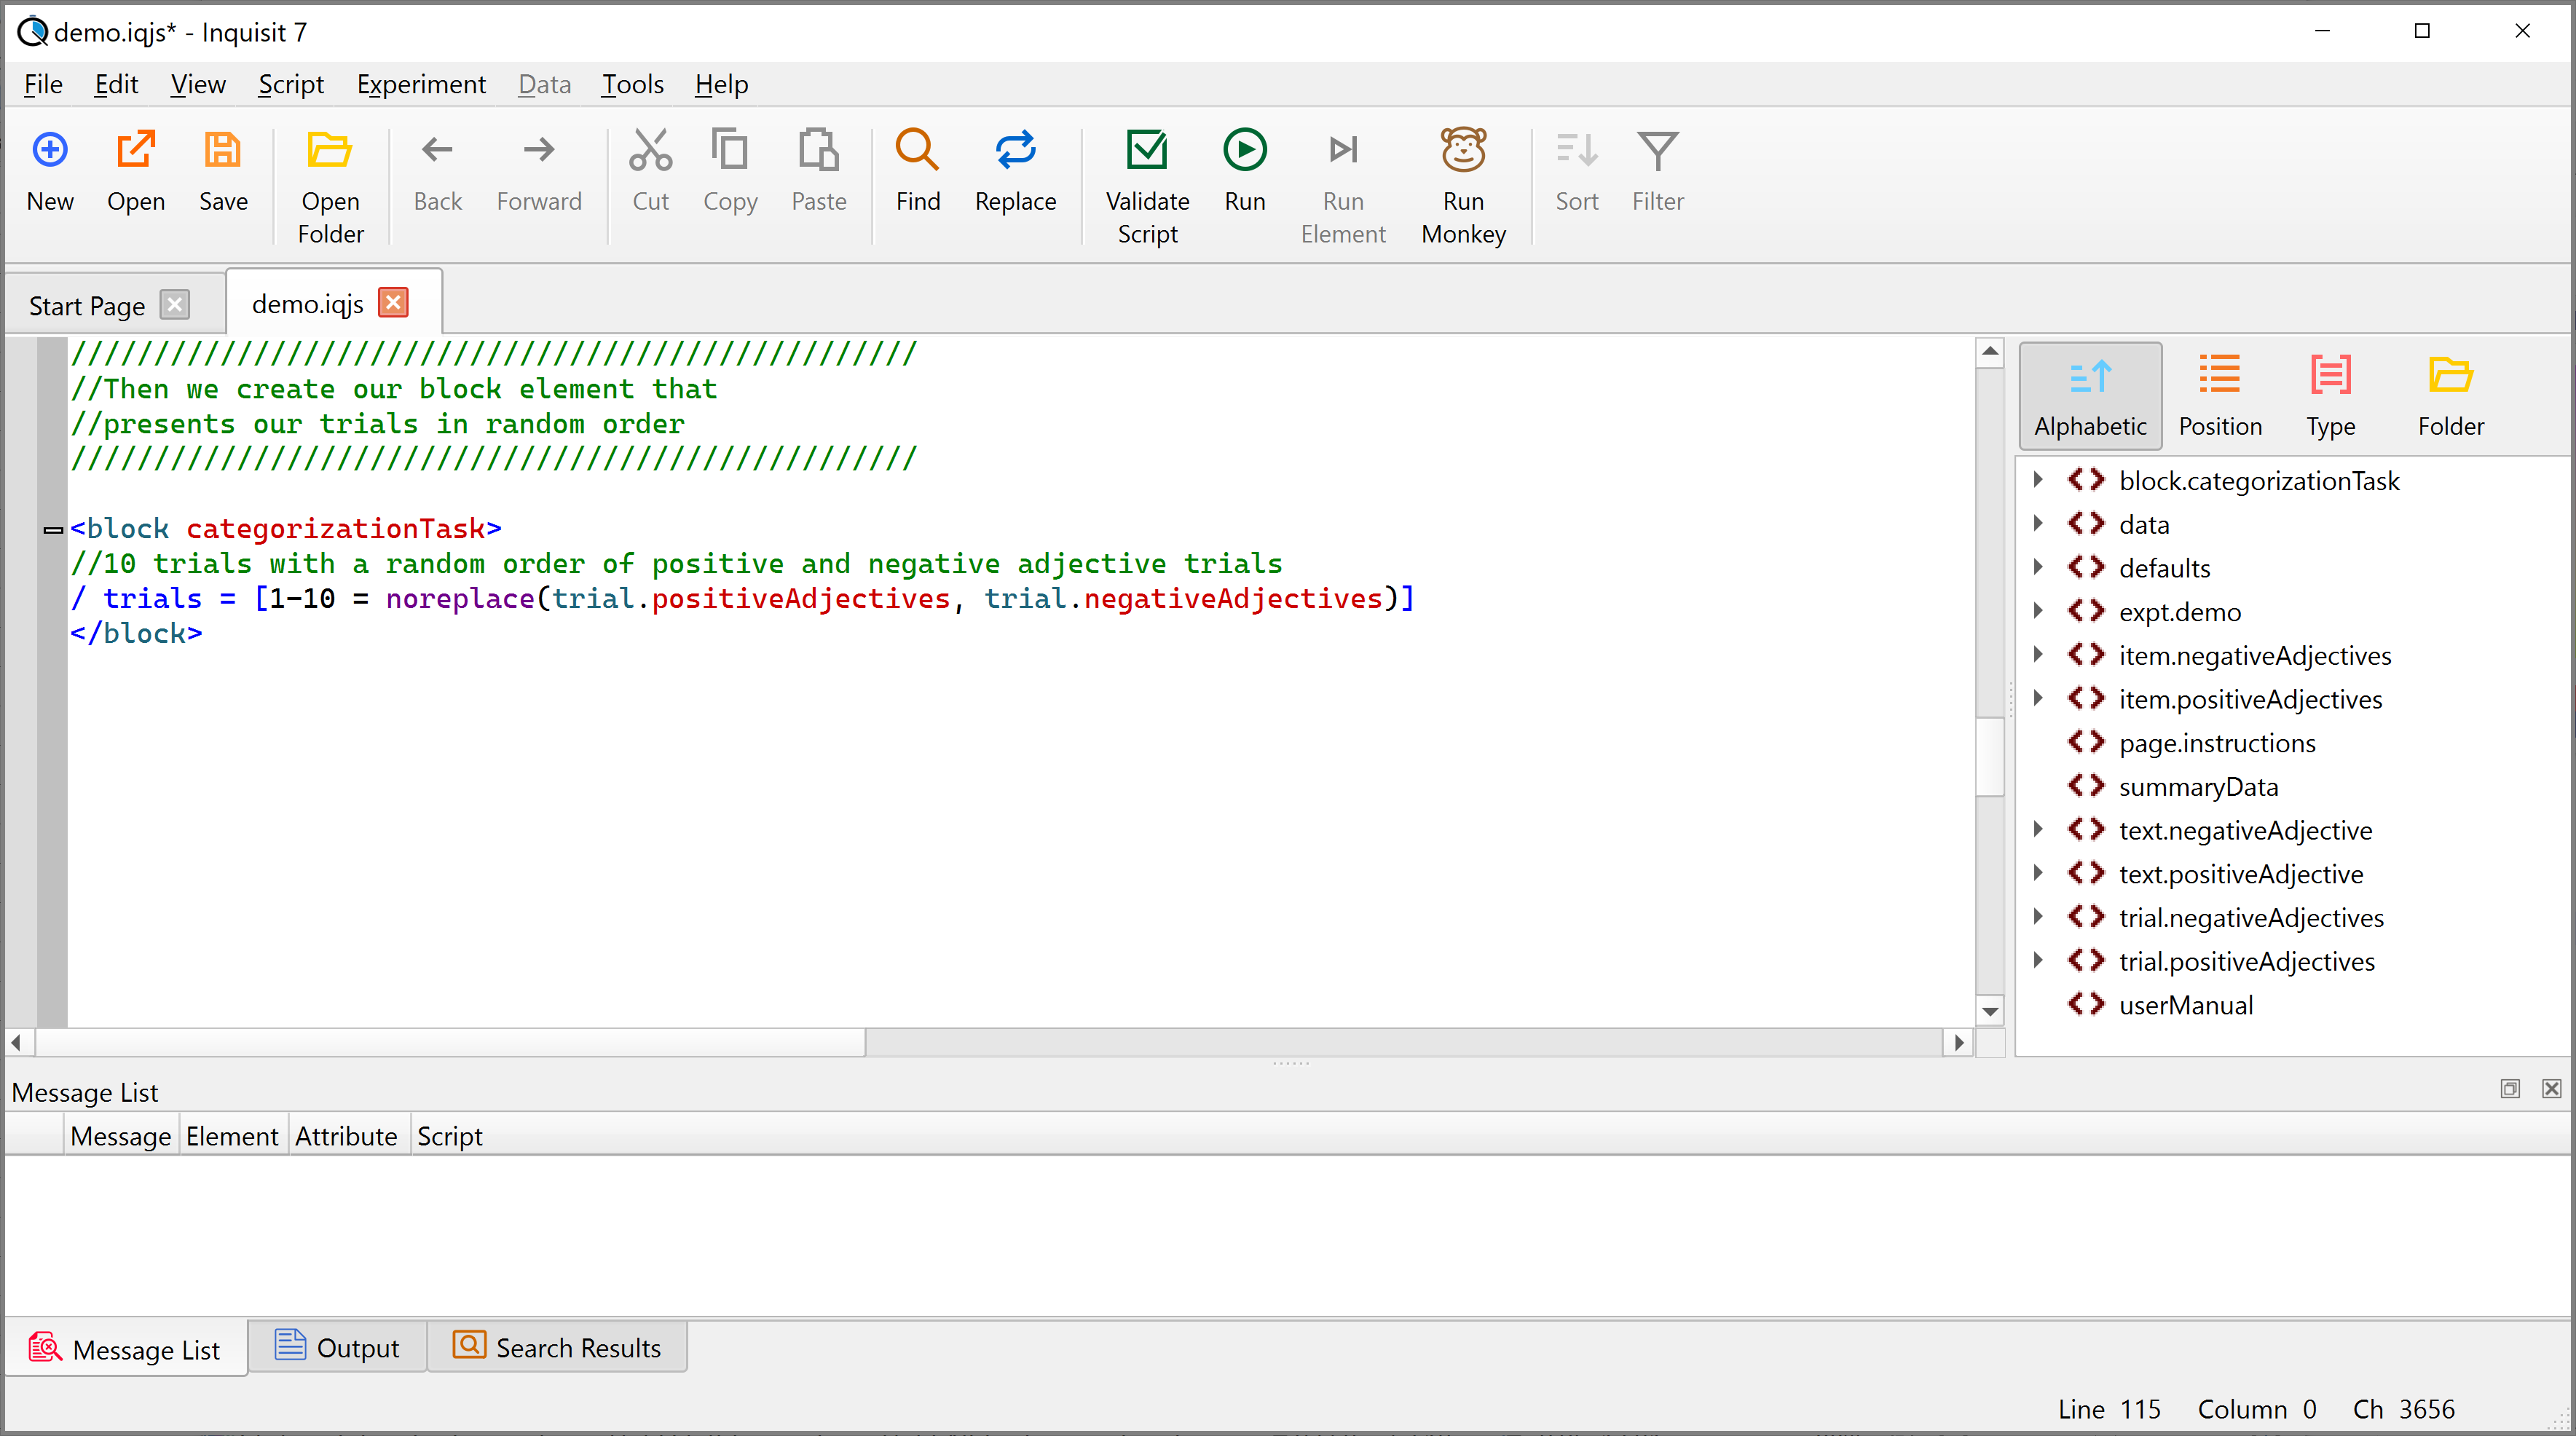
Because the ratio of positive:negative trials is 1:1, half the trials will be trial.positiveAdjectives
and half the trials will be trial.negativeAdjectives.
If we had wanted to run twice as many positive than negative adjective trials (ratio = 2:1),
we could have used the following code:
/ trials = [1-15 = noreplace(trial.positiveAdjectives, trial.positiveAdjectives, trial.negativeAdjectives)]
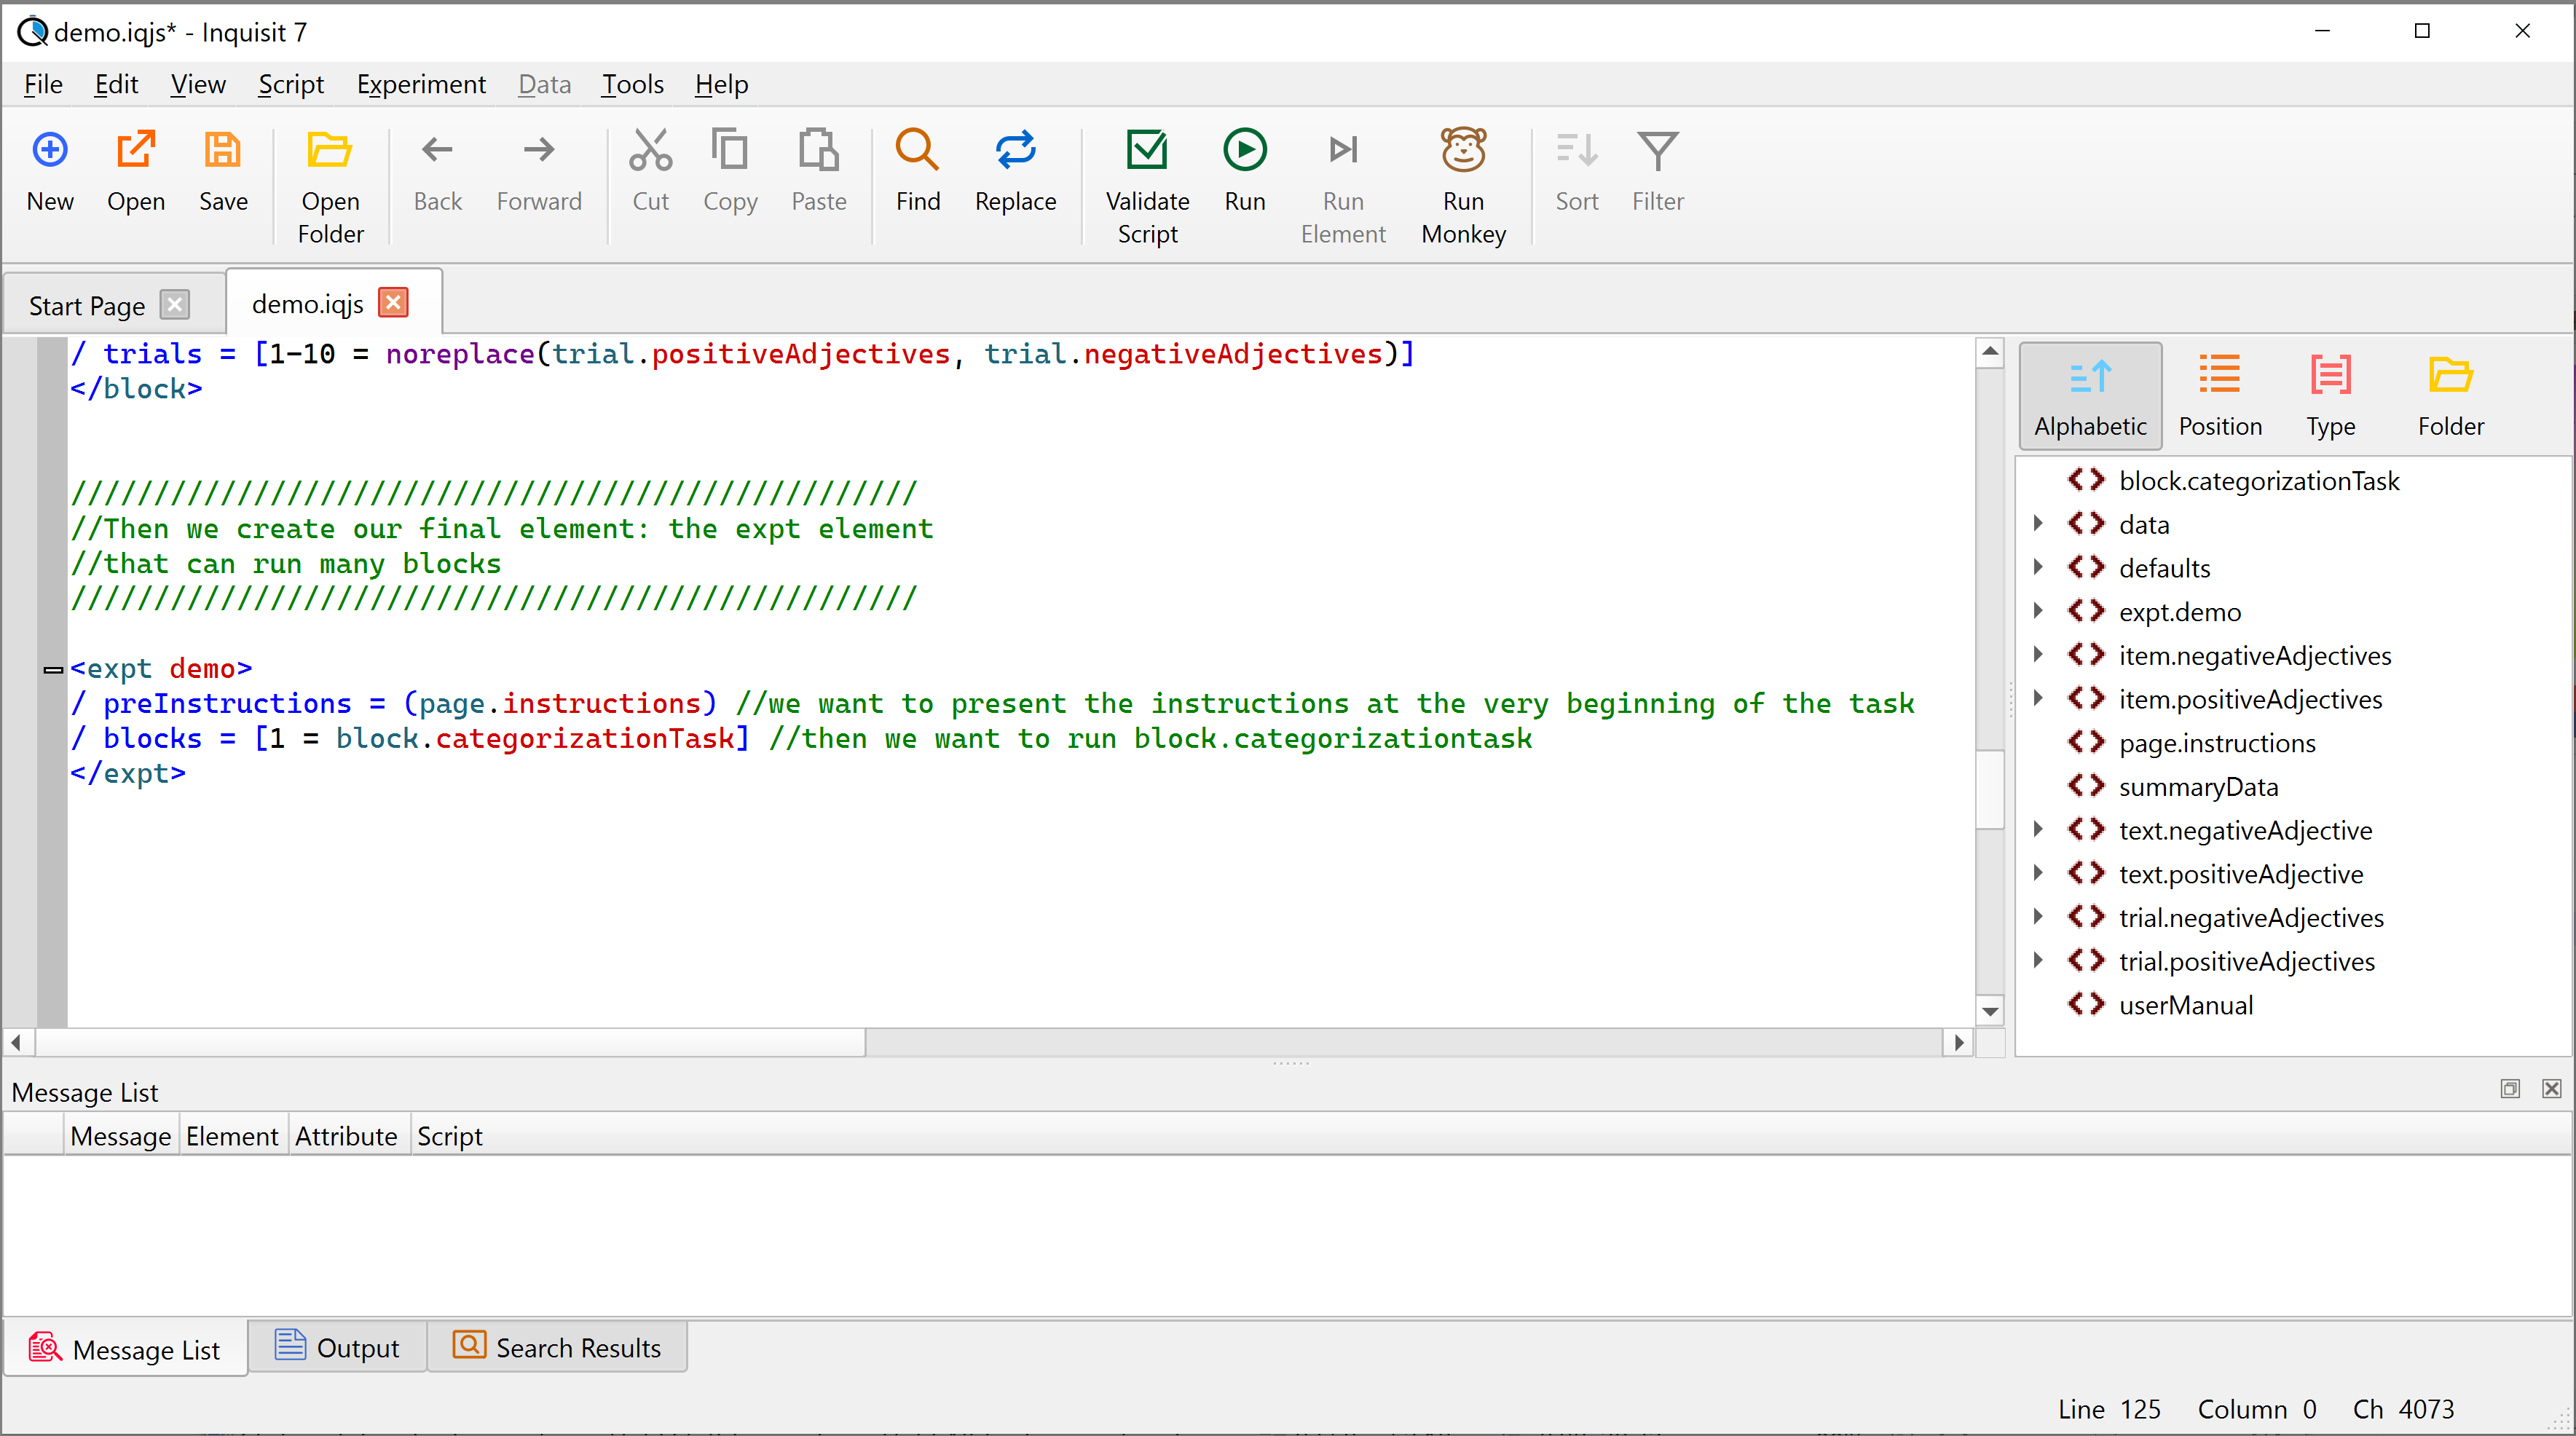
(7)…and at last, the final element: <expts>
The <expts> element defines the overall procedural flow of the experiment: It defines the order in which all the individual <block> elements should be run.
In this example, we run block.categorizationTask once. We also added the <page> under attribute ‘preInstructions’. Thus, the expt element will first run these page instructions before it calls block.categorizationtask. If we wished to, we could also add attribute ‘/ postInstructions’ to our element – though we would have to code another <page> element for this purpose. PostInstructions would be called after all blocks have run.
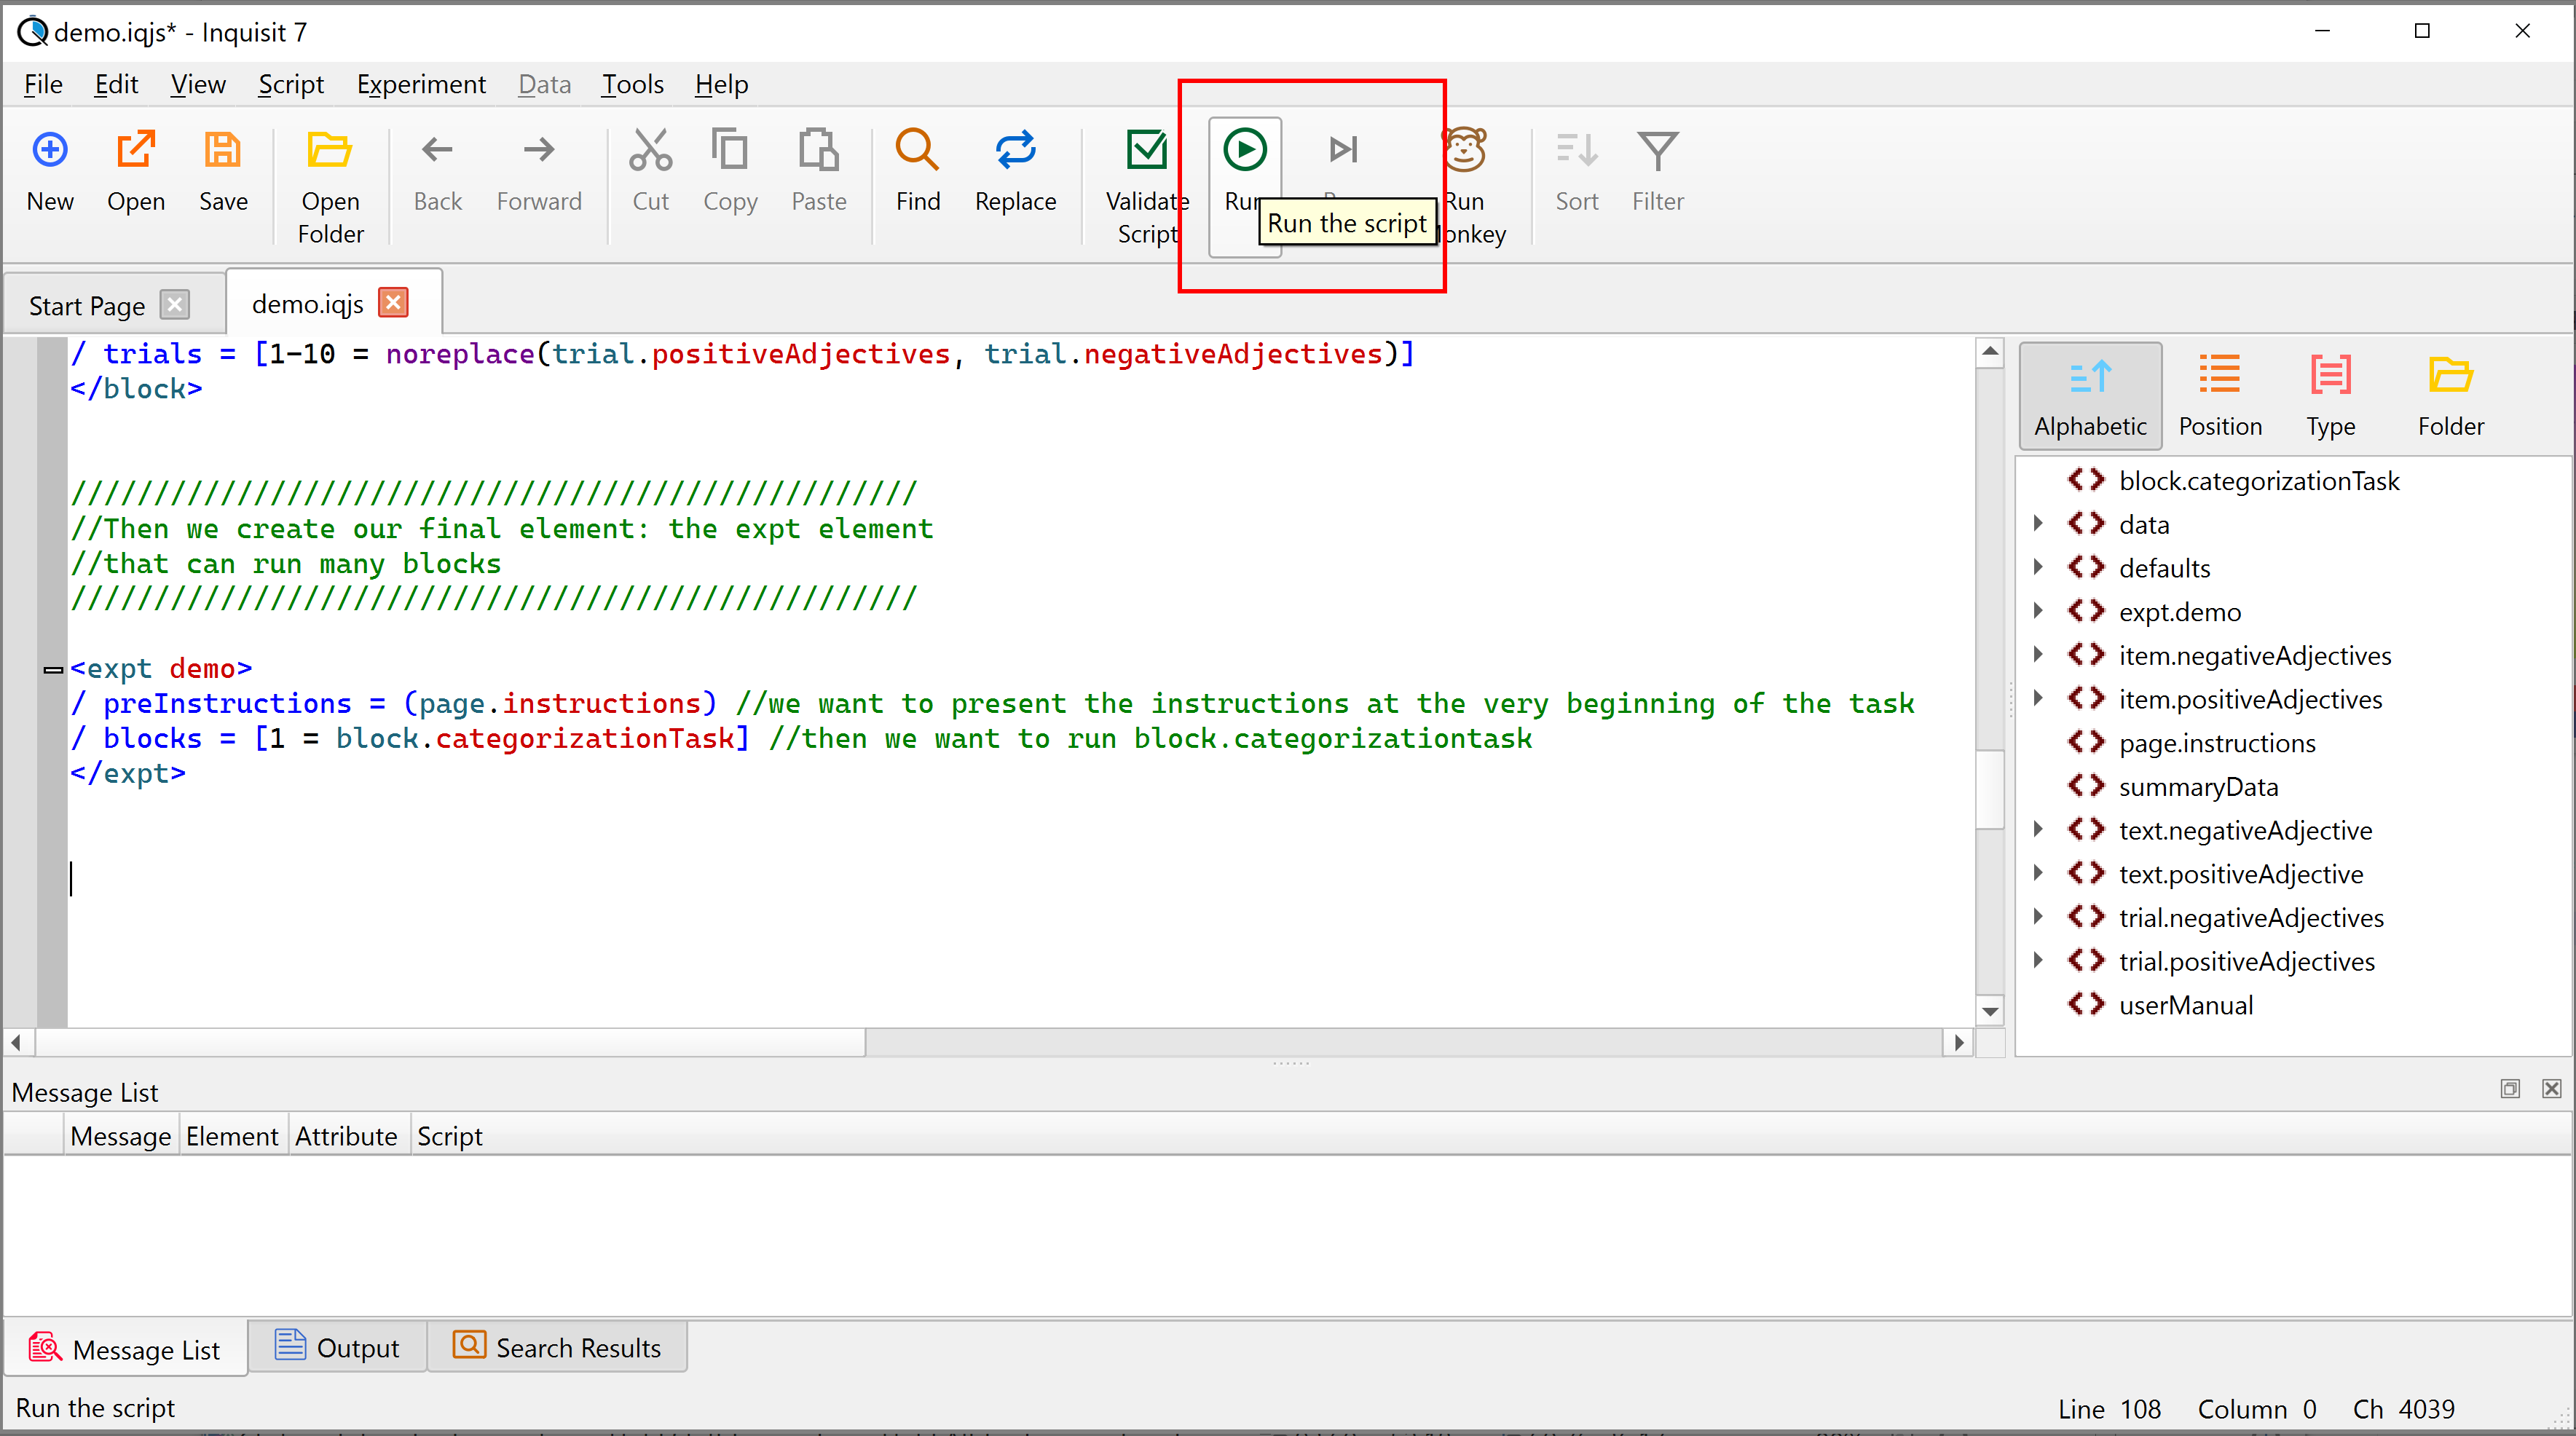
Run your experiment
All the main elements to run the simple categorization experiment are now coded. If you haven’t done so yet, go ahead and save the file.
You can start the experiment by clicking the ‘Run’ button:
CTRL-Q: In order to terminate a script, you can always press CTRL-Q. This command is meant as a coding and debugging feature and should not be shared with your participants.
CTRL-B: this command lets you skip from block to block within your script during a debugging session.
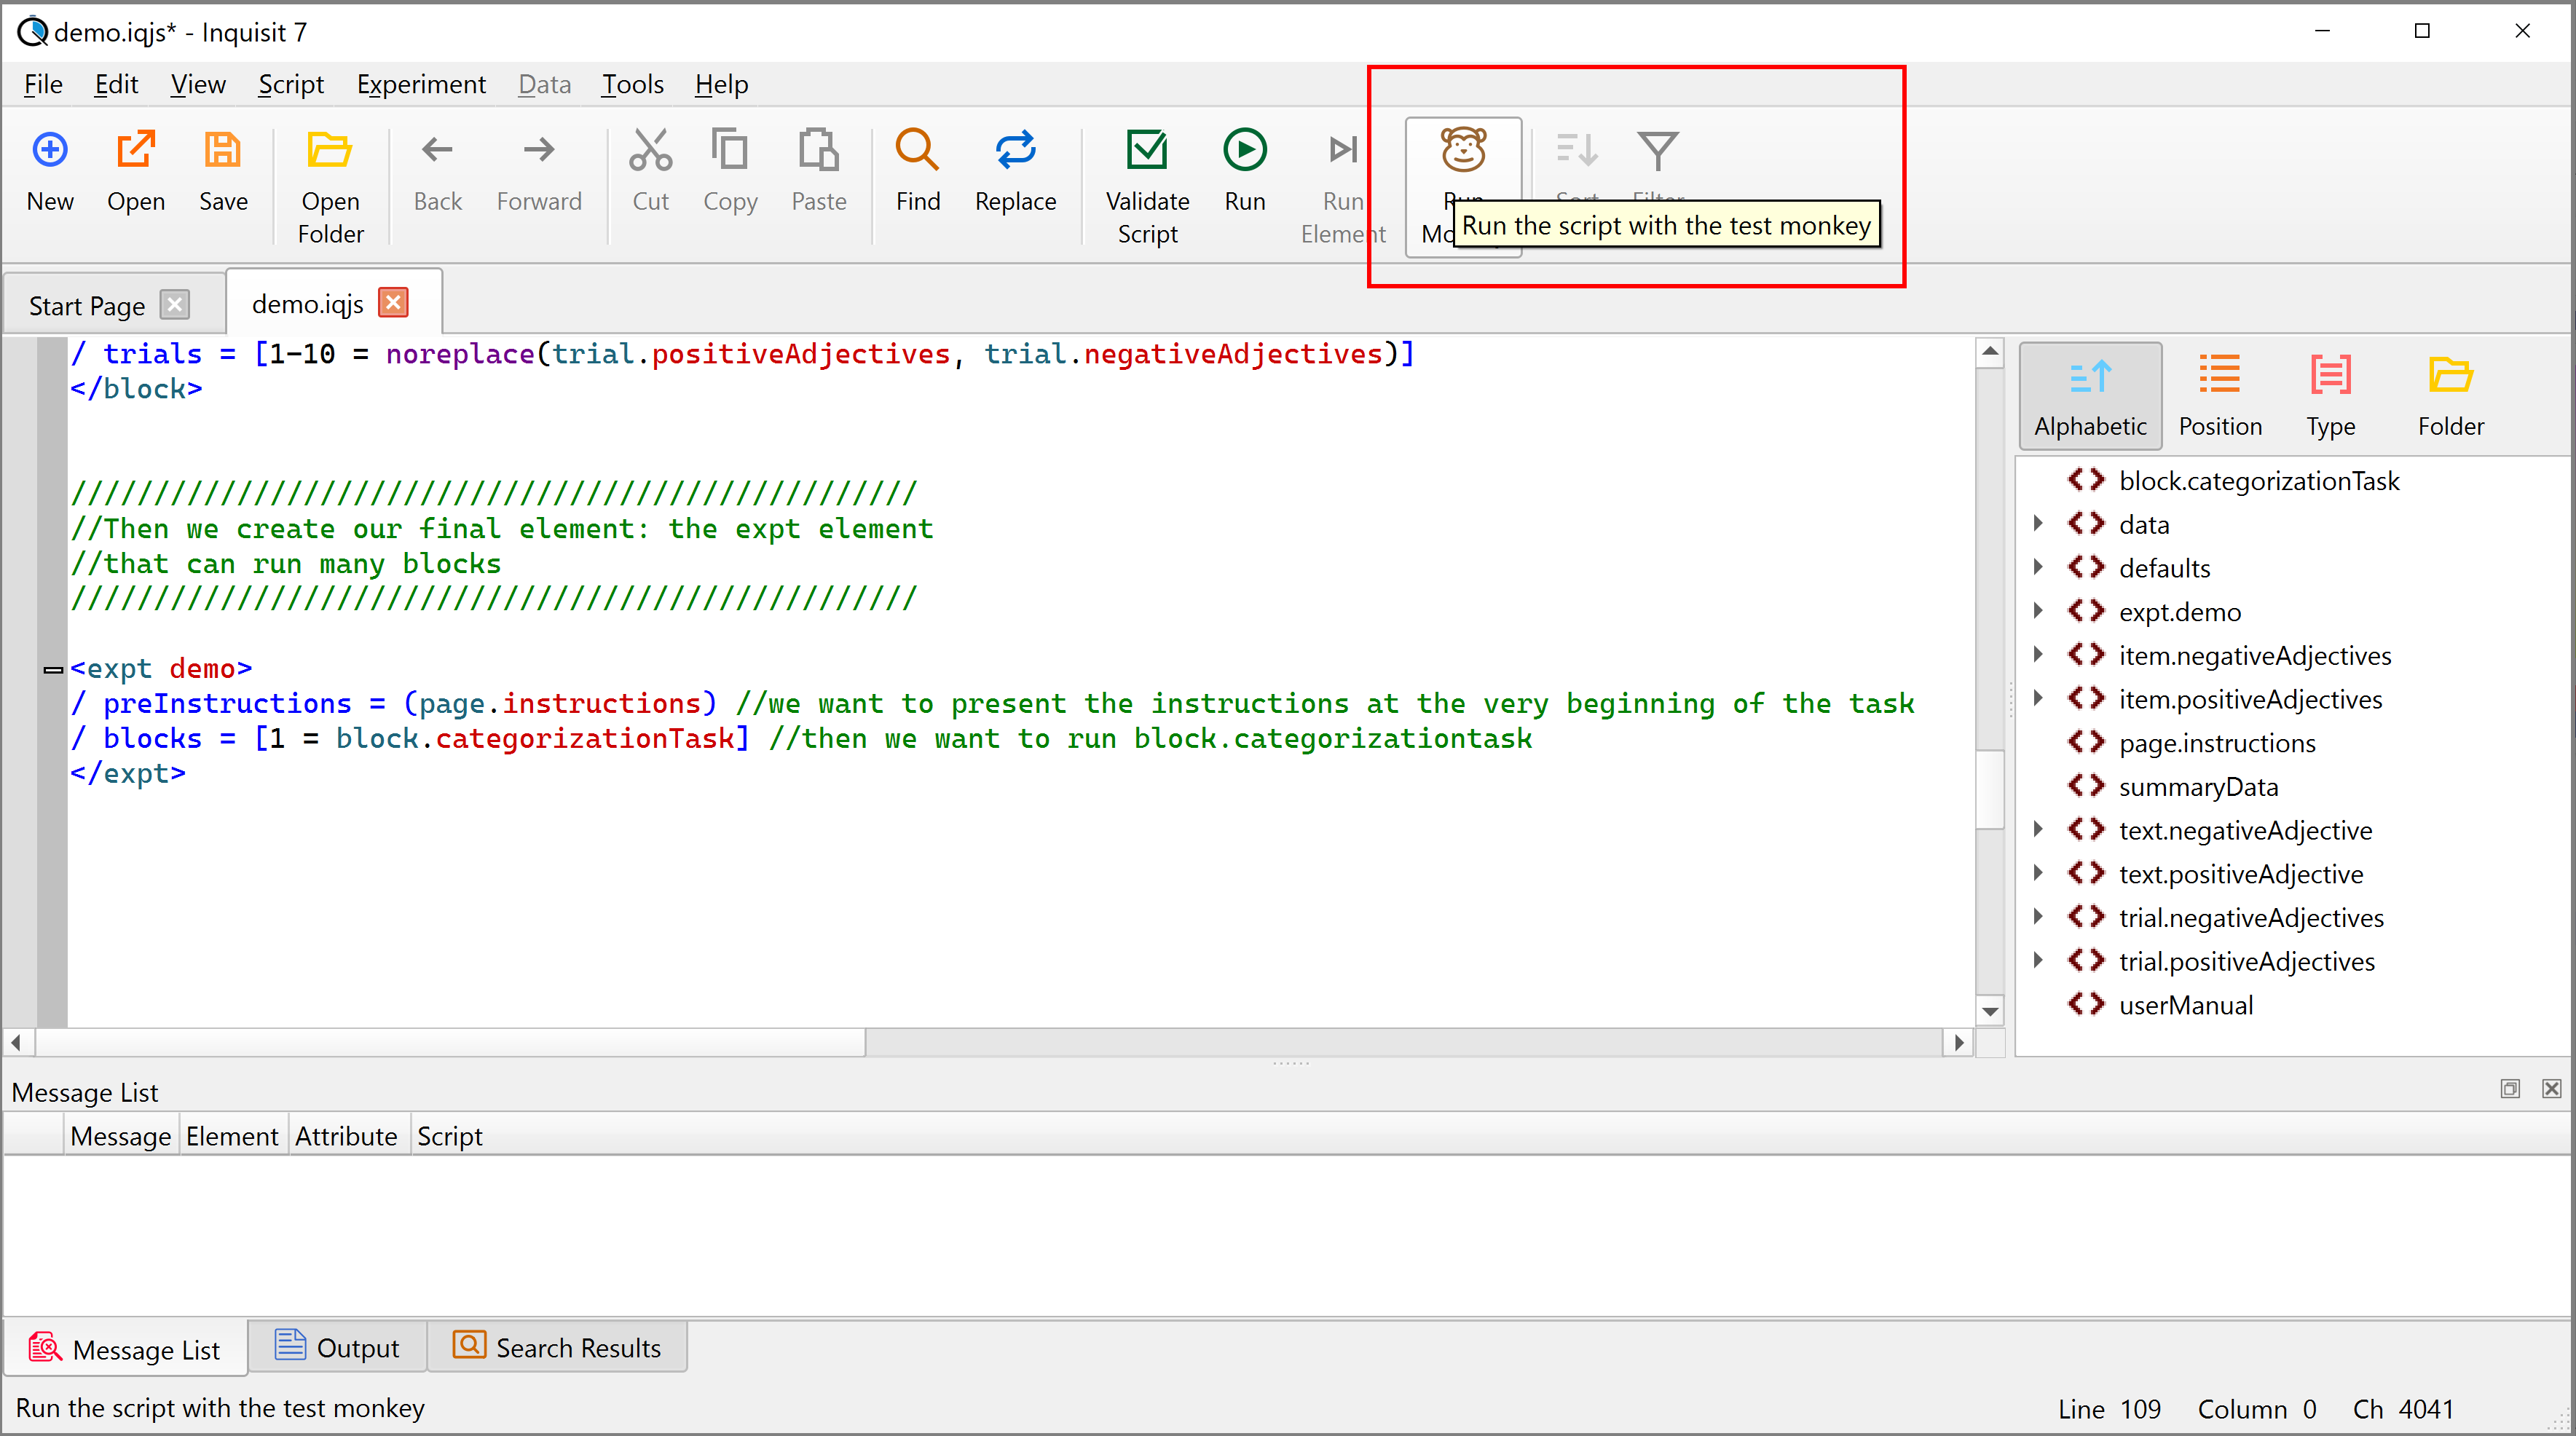
Inquisit Monkey
Any Inquisit script can be tested with the Inquisit ‘Monkey’:
The ‘Monkey’ will run through the entire experiment for you and collect bogus test data.
Inquisit Data Files
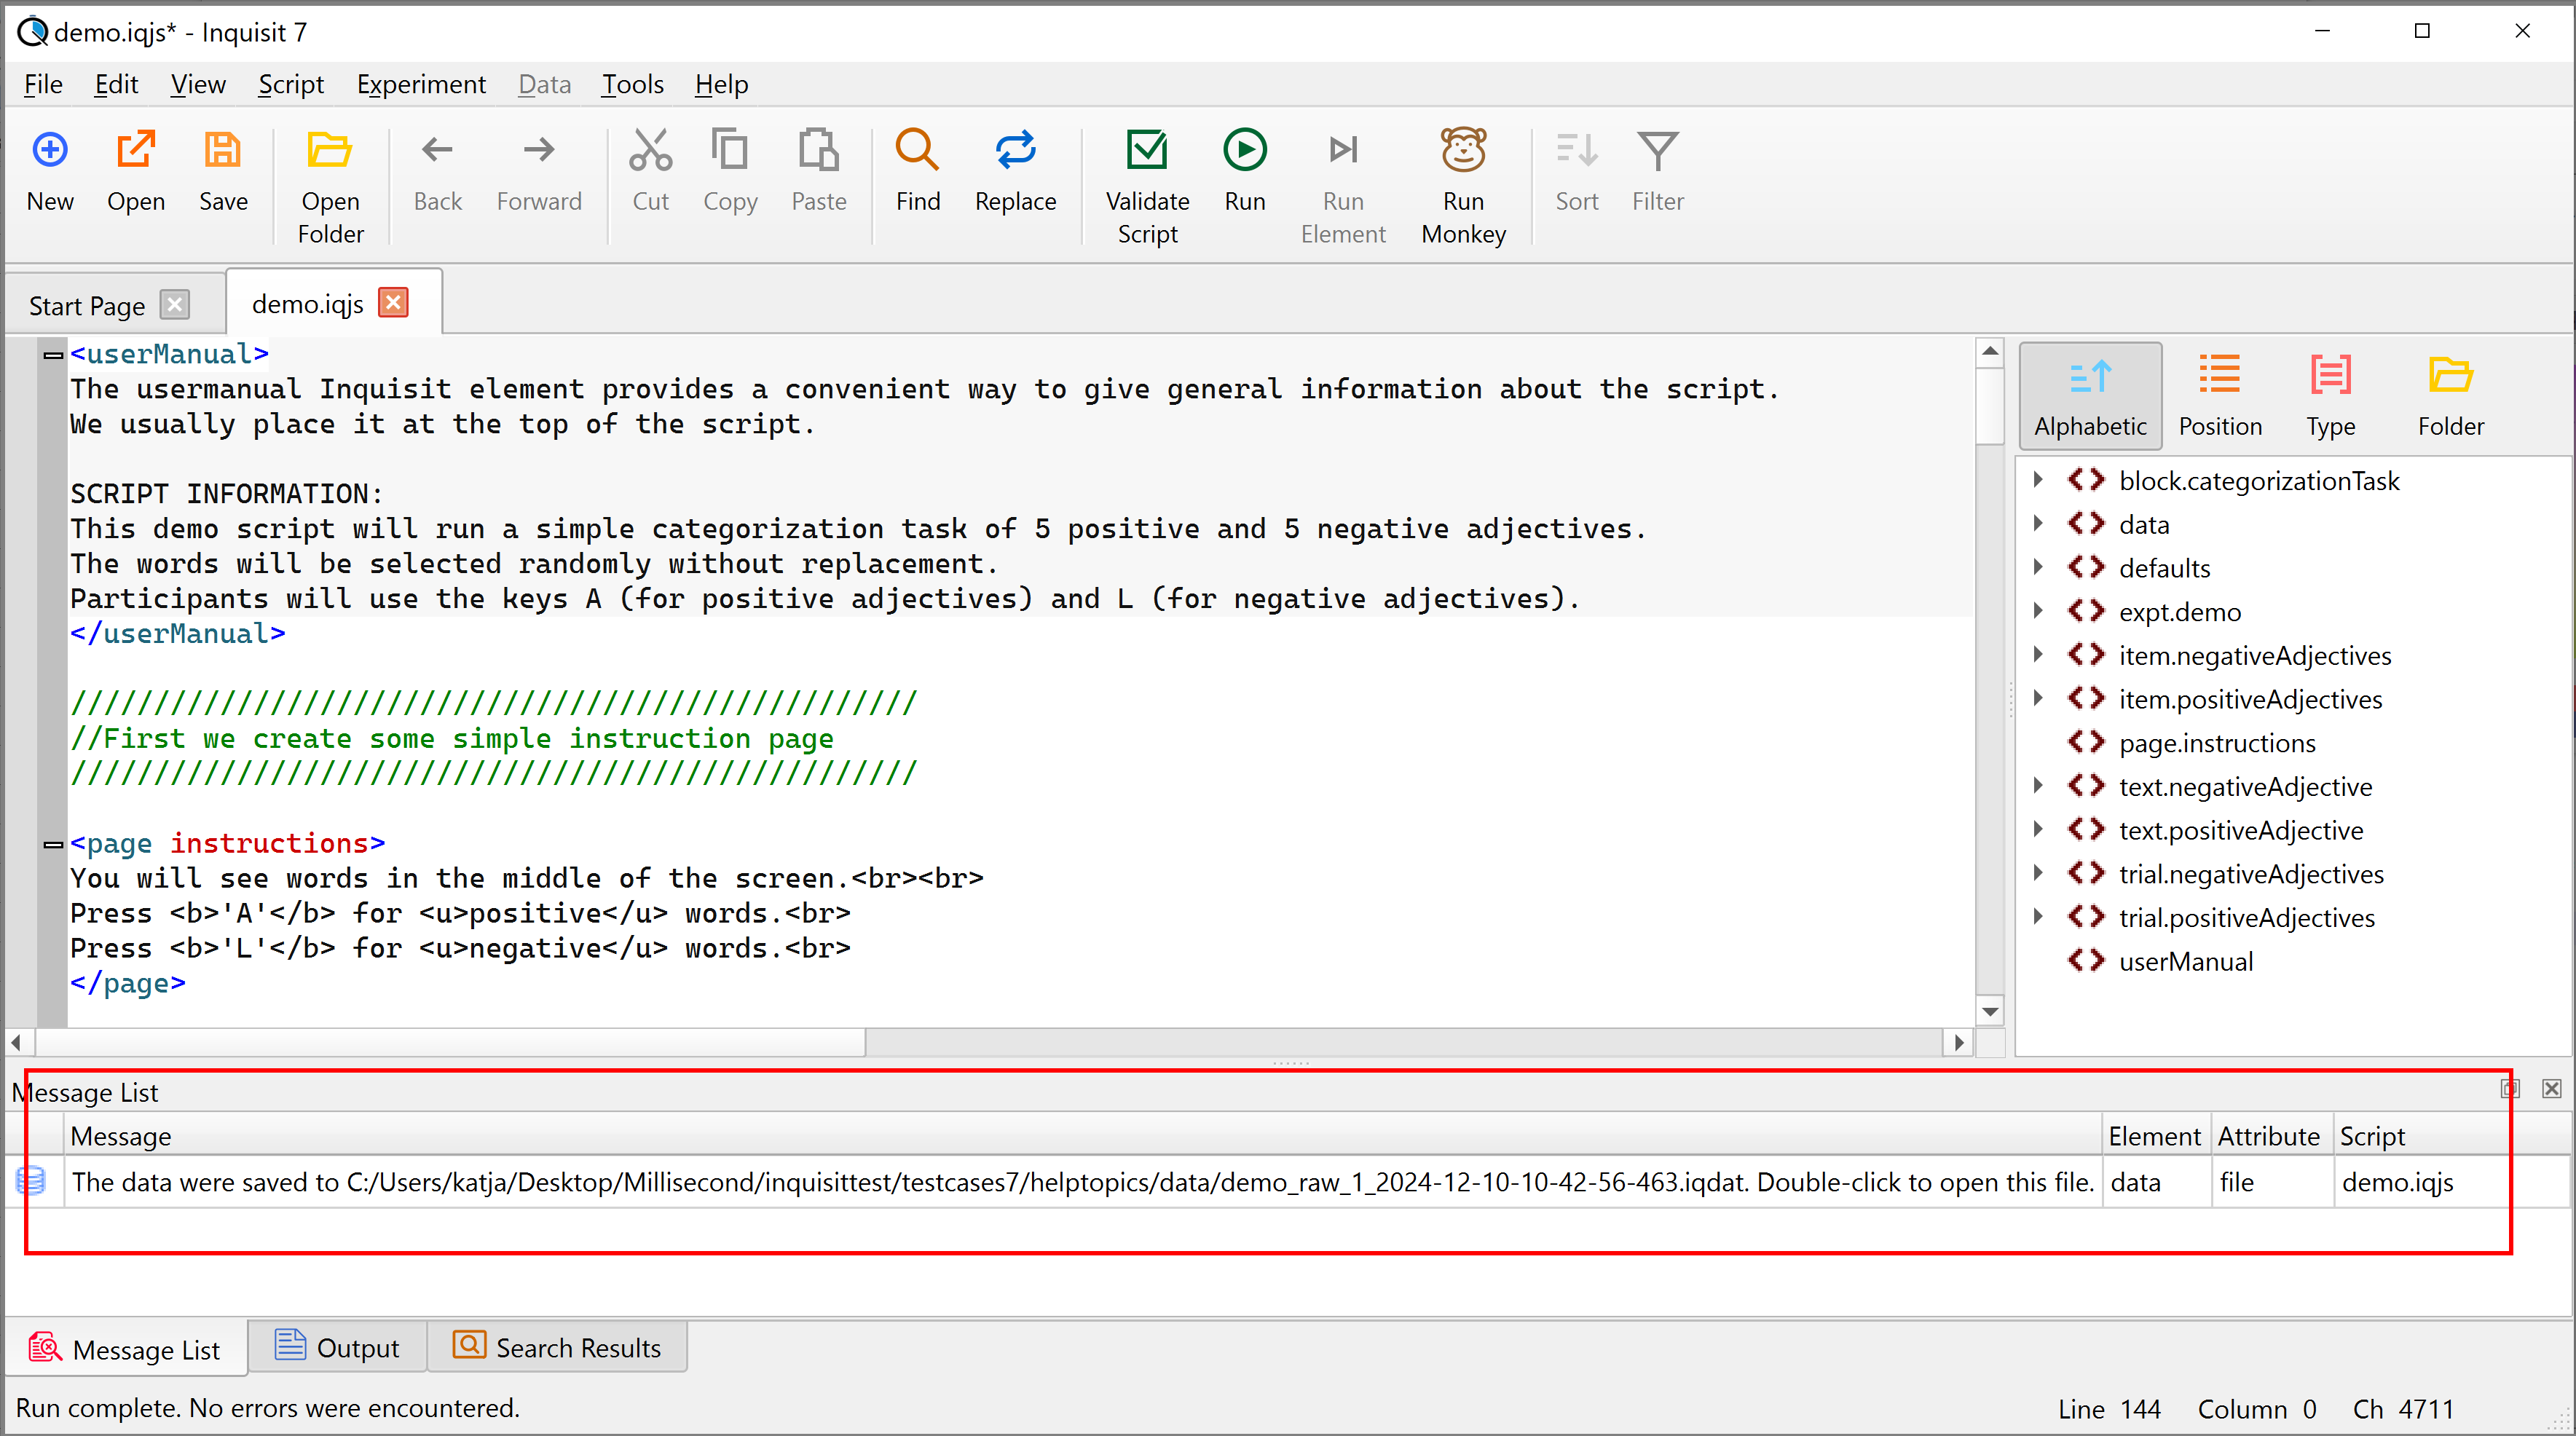
Once you have run your Inquisit script, you can locate the data file in a folder named ‘data’ that is located within the folder that hosts your script.
If you started the script from within the editor (as we have done), the data file is also listed down in the message list.
Click on it to open the data file in the Inquisit Editor.
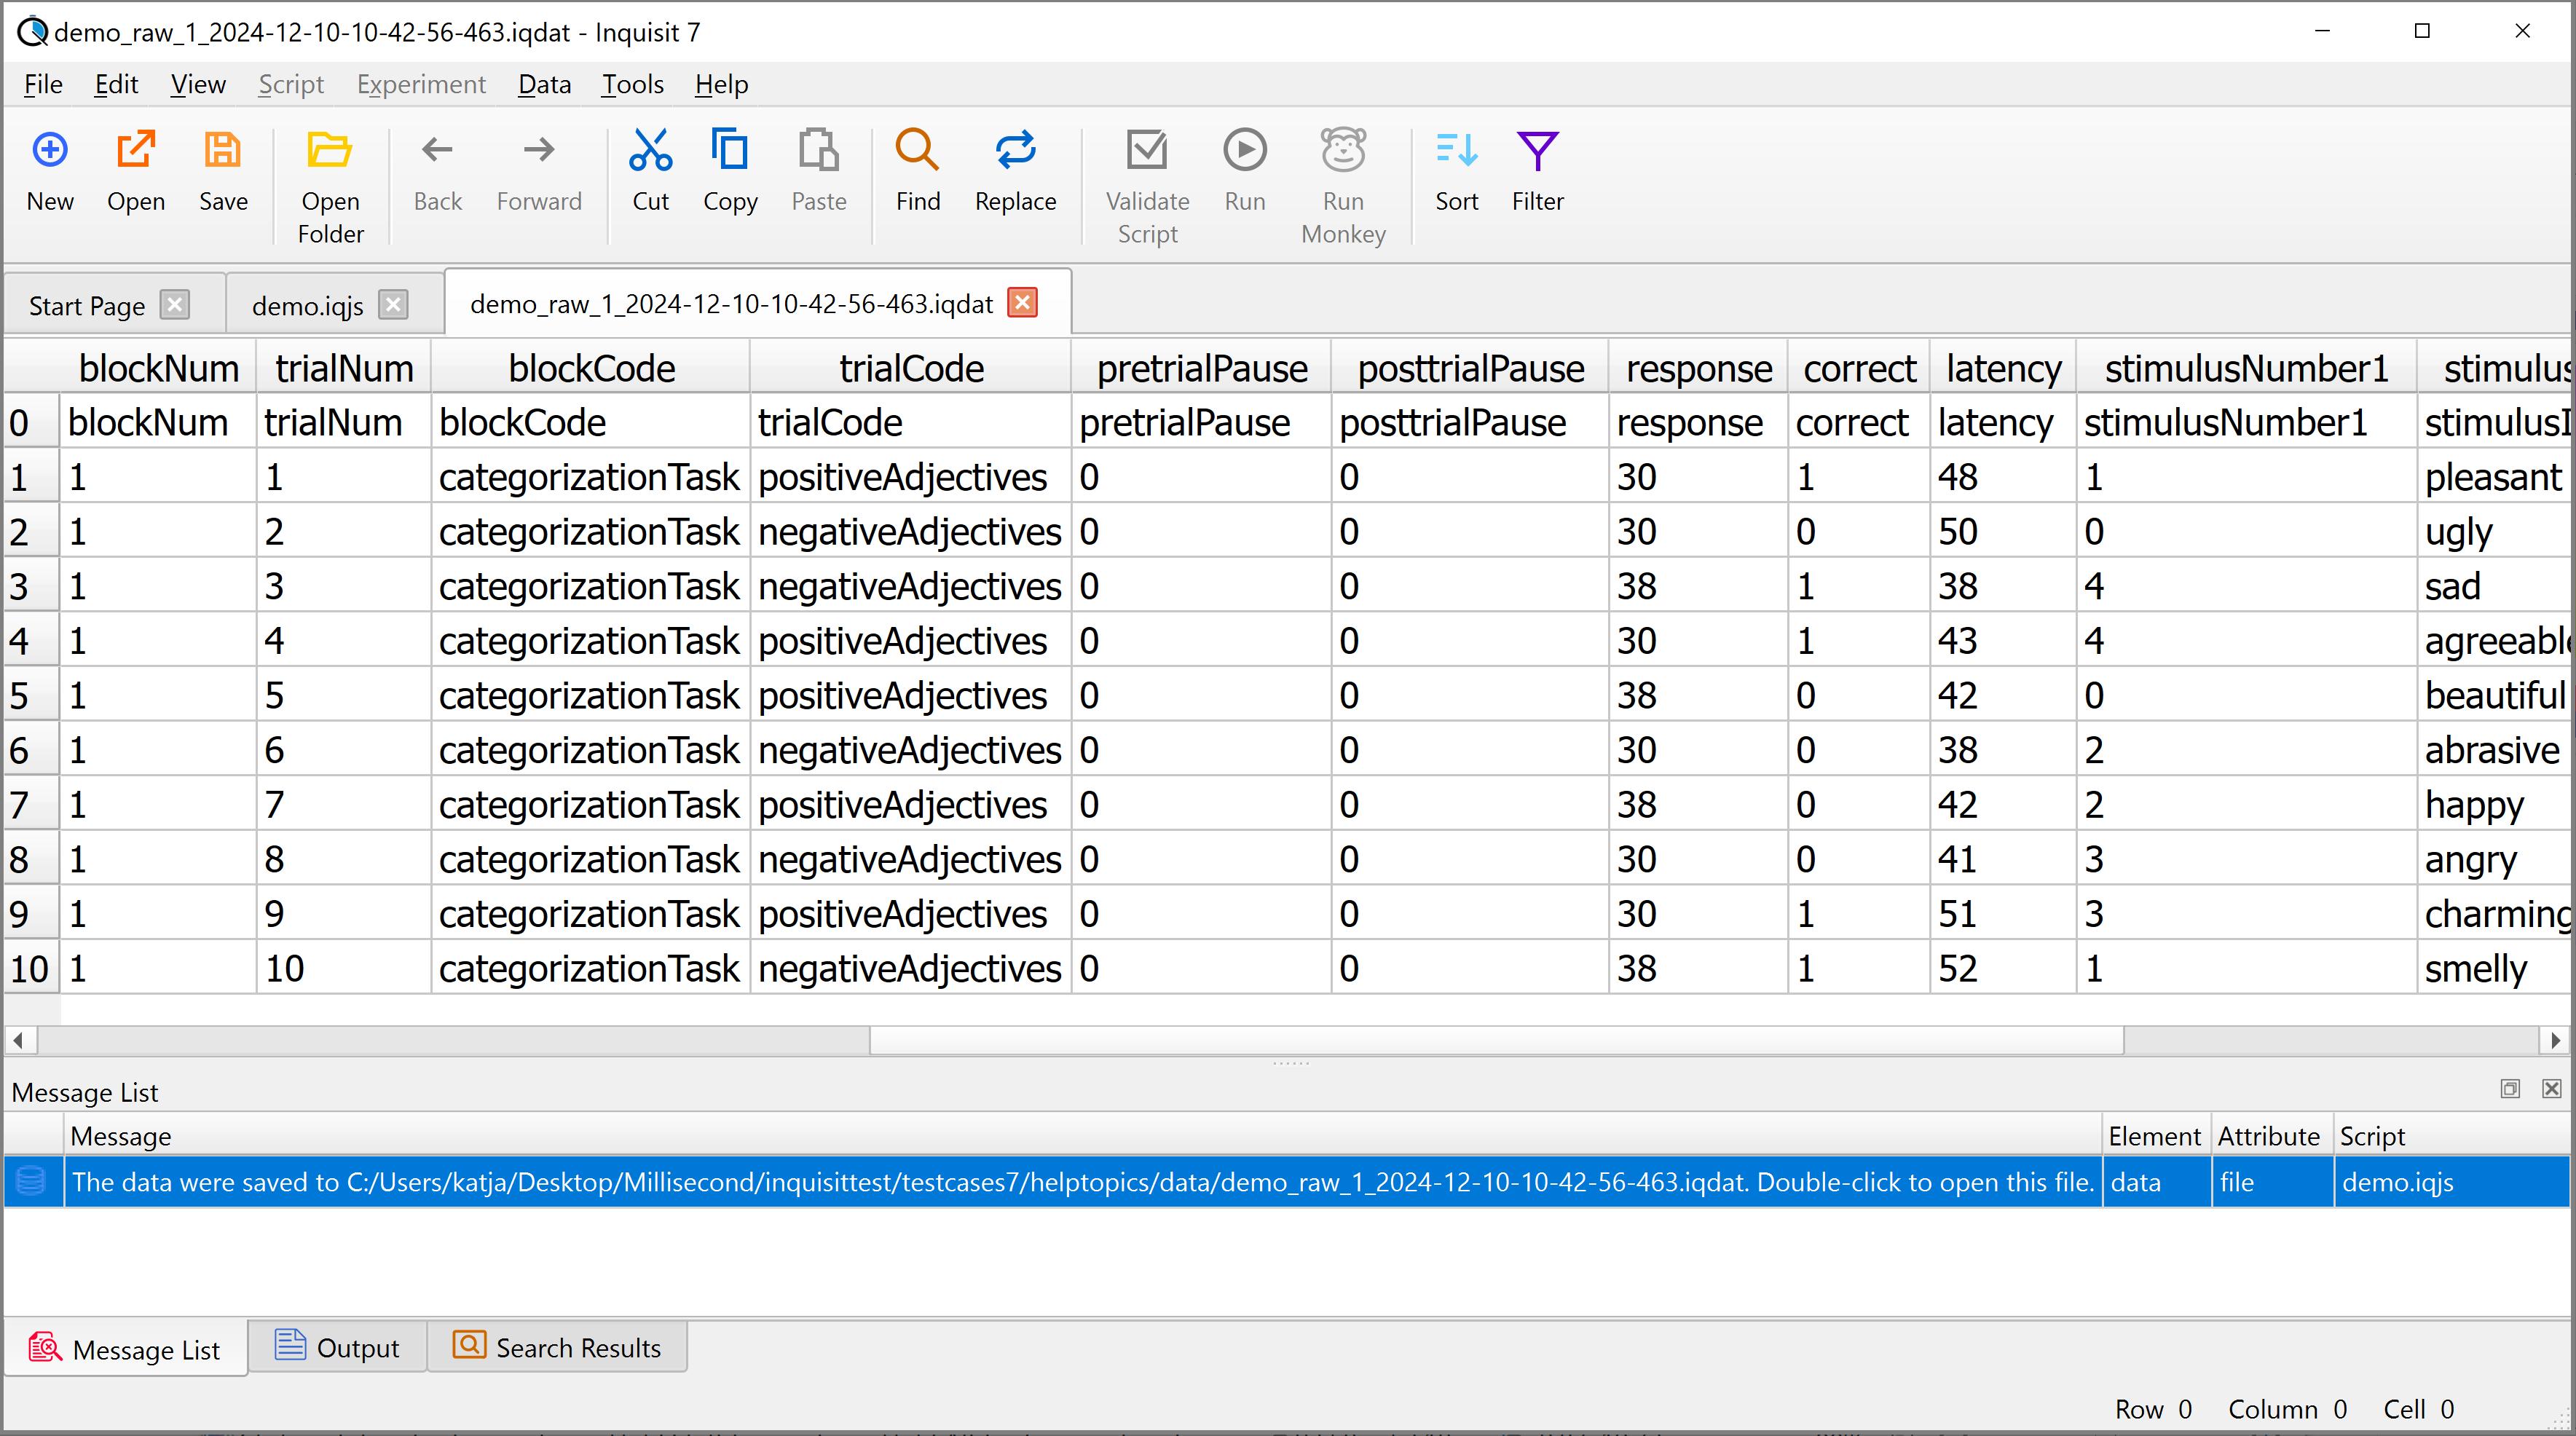
Raw data file
Our raw data file was produced by our monkey (that responded very fast but, sadly, not very accurately).
You can tell from the raw data file the order in which the trials were run, the order in which the stimuli were run, which response was made (response column), whether the response was correct (correct column) and how fast the response was made (latency column). Note that the default response column contains ‘scan code’ numbers instead of the actual letters of the response keys: number 30 refers to key ‘A’, 38 refers to key ‘L’.
Inquisit data files are tab-delimited text files that can easily be opened in third party software applications such as Excel or SPSS.
In fact, you can easily import Inquisit data files from the Editor to Excel via File -> Export Data to Excel.
Other Useful Elements
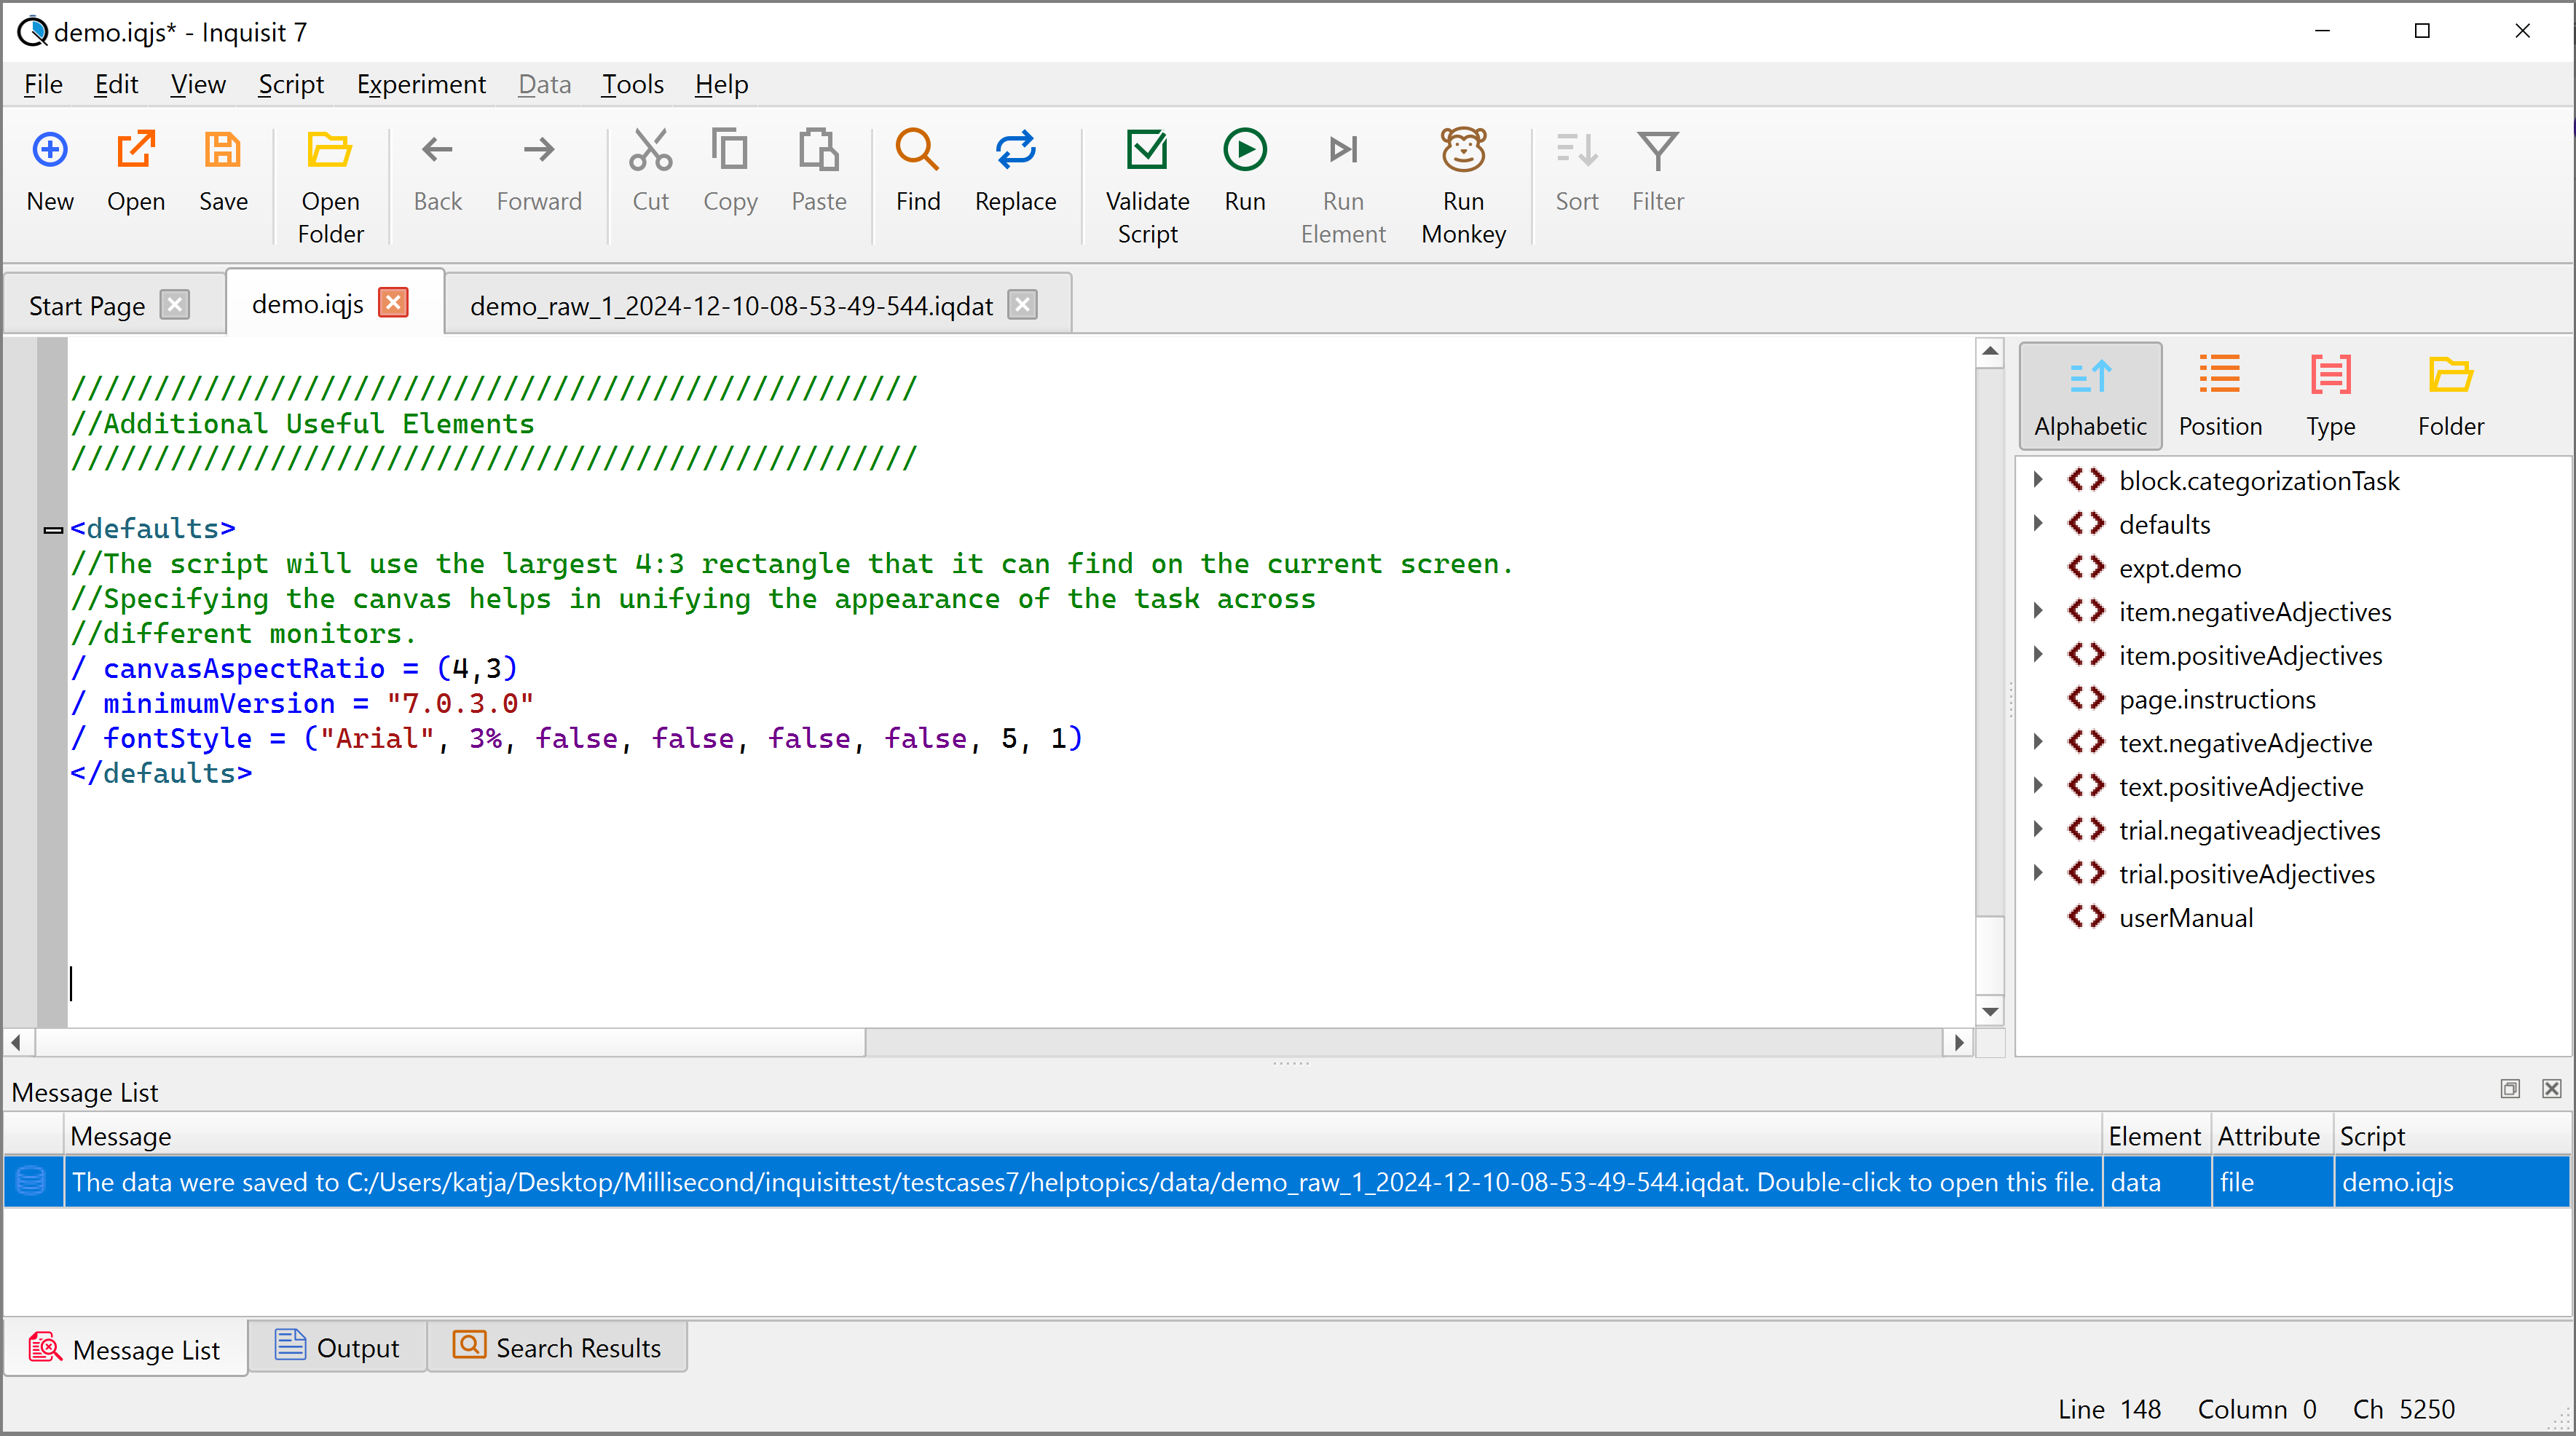
(1) <defaults>
The <defaults> element specifies several attributes that apply to the entire script.
For example, you can set the default font you would like to use in a script.
In our demo, we also specified the canvasAspectRatio, which helps to unify the appearance of the script across different monitors, and the minimumVersion attribute, which indicates the minimum version of Inquisit required to run this script.
(2) <data>
In our previous script we had not specified the kind of data columns we wanted to store in our raw data file. Thus Inquisit produced a default raw data file one for us. However, by adding a <data> element to the script we can define exactly what columns should appear in our raw data file.
Adding a customized <data> is particularly useful if you want to store custom variables in your raw data file.
<data>
/ columns = (date, time, subject, group, session, blockCode, trialCode, trialNum, stimulusItem, response, responseText, correct, latency)
</data>
(3) <summaryData>
The <summaryData> element allows researchers to generate a data file that contains one single line of data for each participant.
This is useful if you want to collect some summary statistics such as means or medians.
In the example below, the script now produces a summary data file that stores the mean latencies of response times in trial.negativeAdjectives and trial.positiveAdjectives.
<summaryData>
/ columns = (inquisit.build, computer.platform, script.startDate, script.startTime,
script.subjectId, script.groupId, script.sessionId,
script.elapsedTime, script.completed,
trial.negativeAdjectives.meanLatency, trial.positiveAdjectives.meanLatency)
</summaryData>
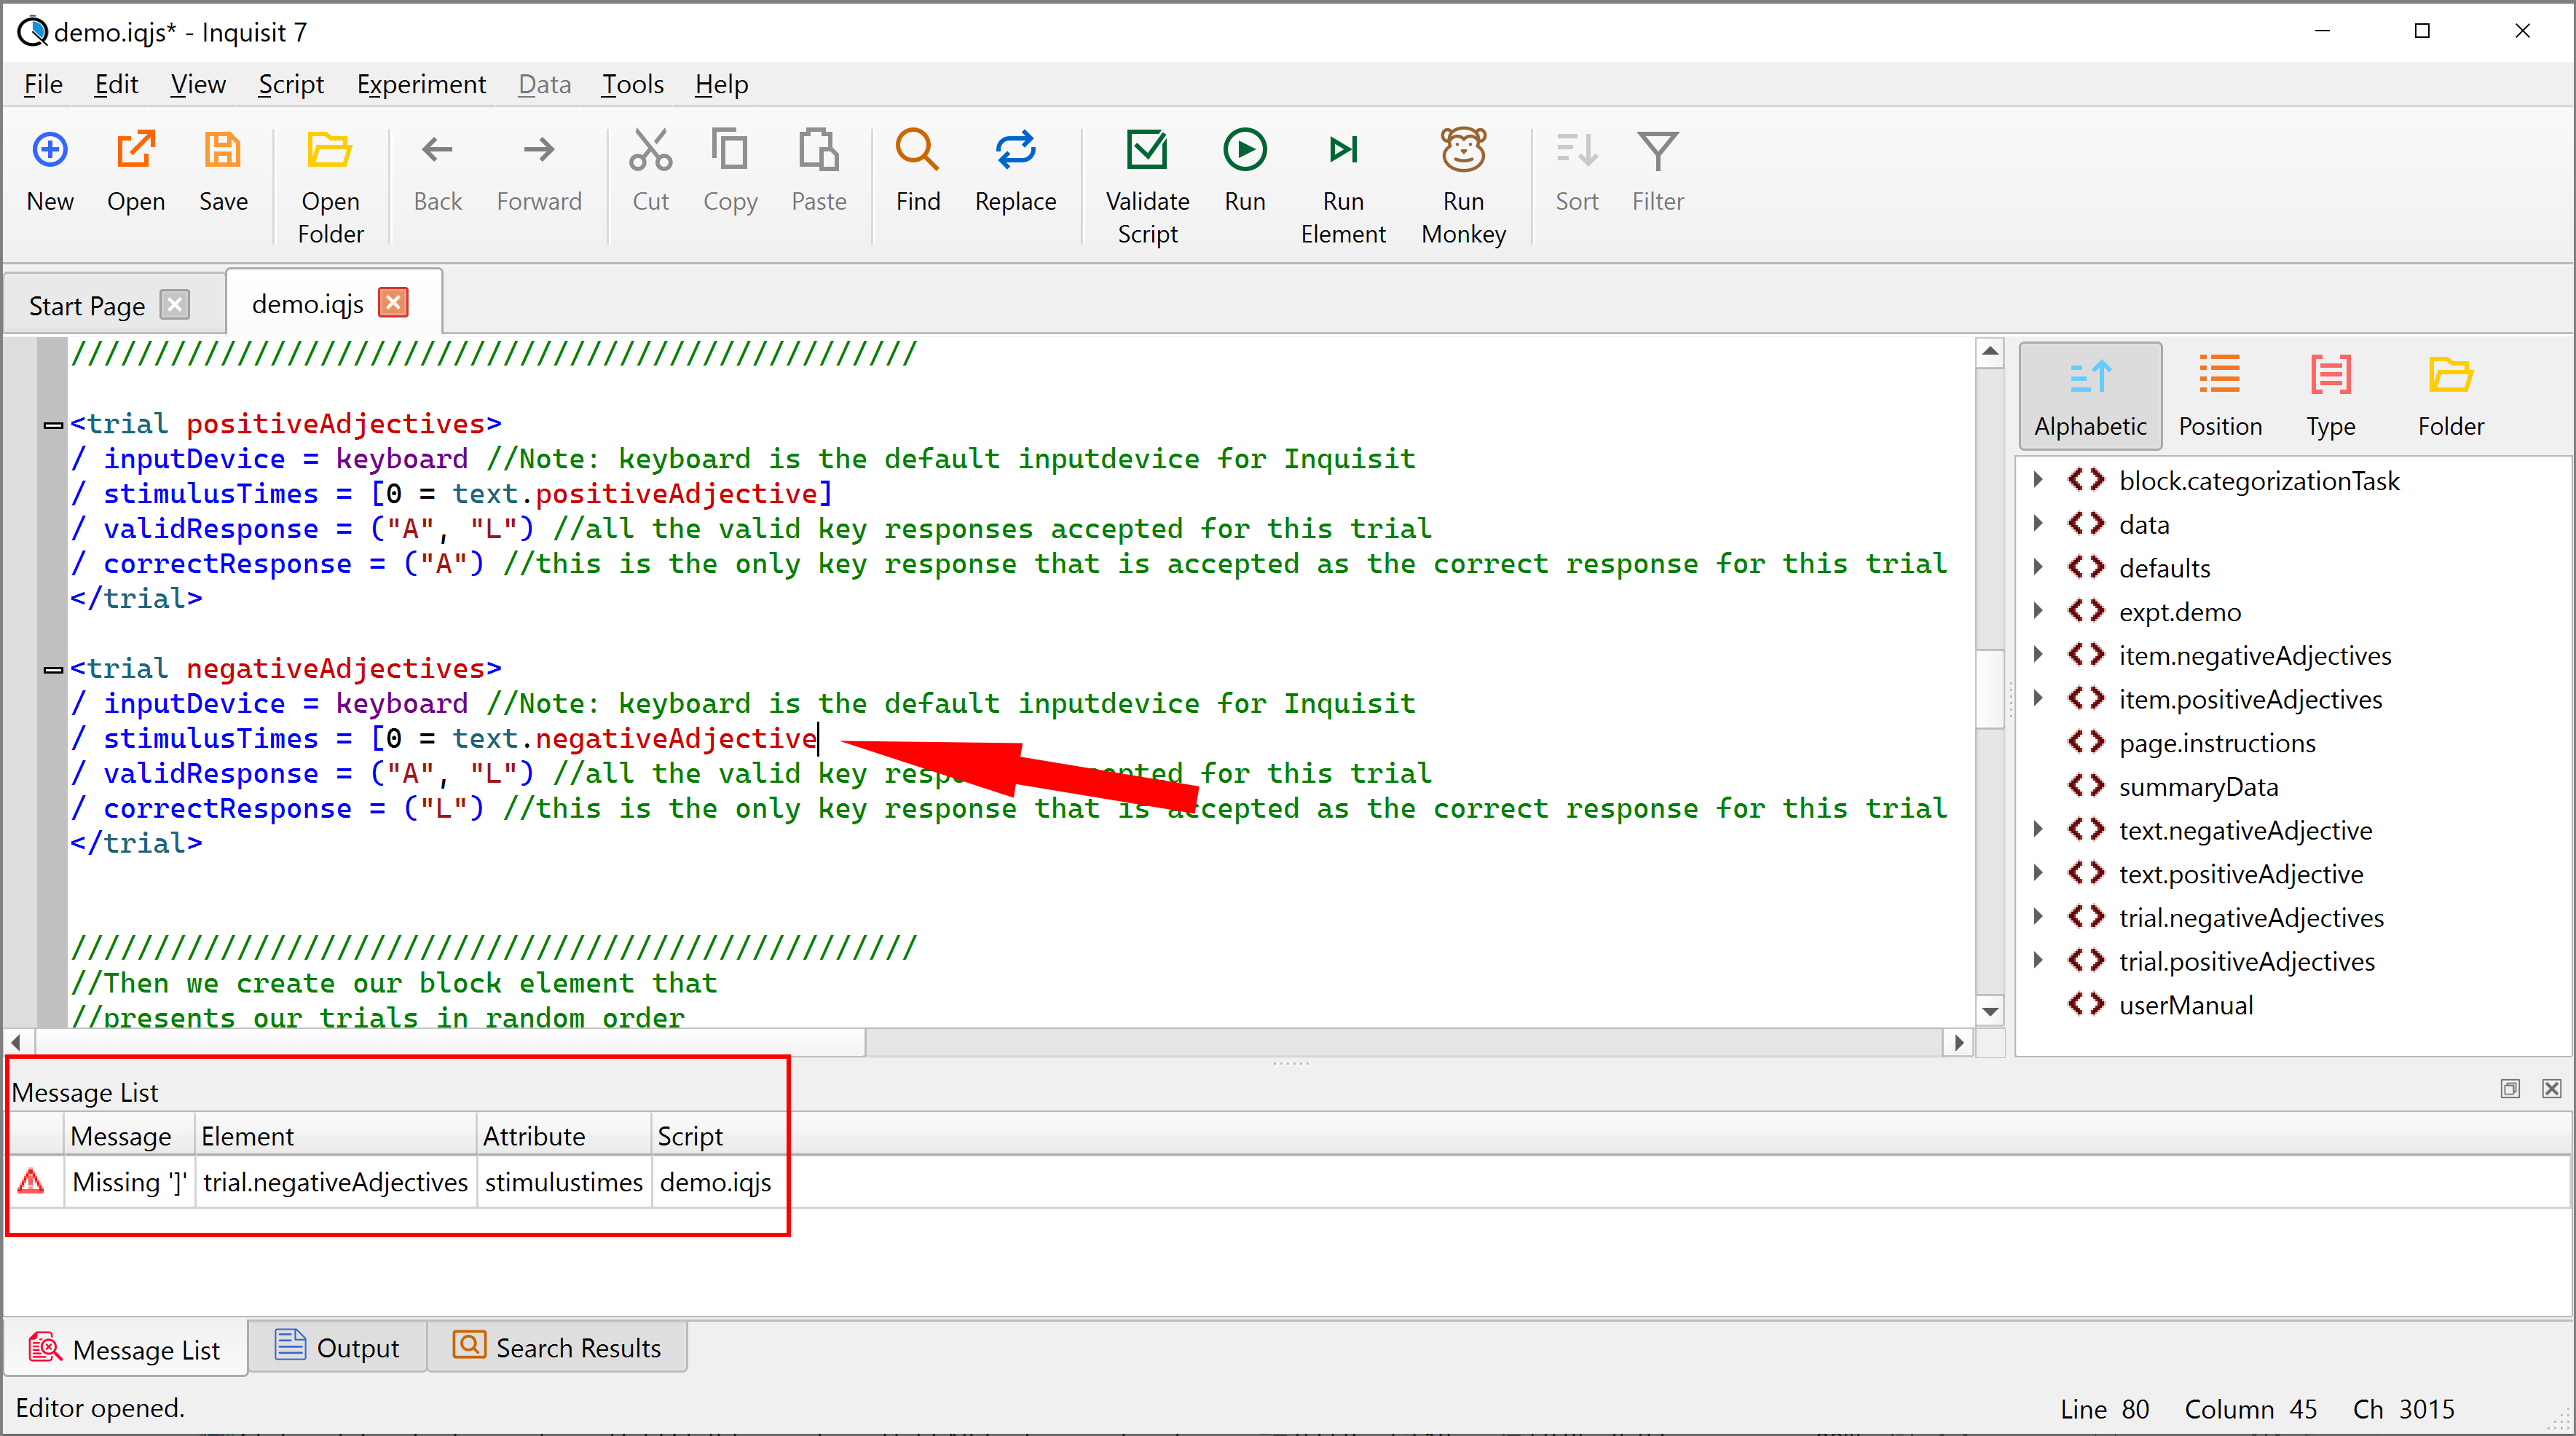
Debugging Help: Message List
Often when we write scripts we make mistakes. For example, we may forget to use the correct number of parentheses, or we make a spelling mistake. Then, when we try to run the script, it just doesn’t. In the cases of such syntax errors, Inquisit will report error messages down in the ‘Message List’ part of the Editor. These error messages try to pinpoint -as much as possible- the reason and location of our errors and are a good starting point to hunt them down.
In the example below, the error message tells us that we forgot a ']' in attribute 'stimulusTimes' of element 'trial.negativeAdjectives'.
Script Code:
<userManual>The usermanual Inquisit element provides a convenient way to give general information about the script. We usually place it at the top of the script. SCRIPT INFORMATION: This demo script will run a simple categorization task of 5 positive and 5 negative adjectives. The words will be selected randomly without replacement. Participants will use the keys A (for positive adjectives) and L (for negative adjectives).</userManual> /////////////////////////////////////////////////// //First we create some simple instruction page /////////////////////////////////////////////////// <page instructions> You will see words in the middle of the screen.<br><br> Press <b>'A'</b> for <u>positive</u> words.<br> Press <b>'L'</b> for <u>negative</u> words.<br> </page> /////////////////////////////////////////////////// //Then we declare our stimuli: /////////////////////////////////////////////////// //5 positive adjectives: <item positiveAdjectives> /0 = "beautiful" // using // you can add notes/explanations/comments to your script elements! /1 = "pleasant" /2 = "happy" /3 = "charming" /4 = "agreeable" </item> //5 negative adjectives: <item negativeAdjectives> /0 = "ugly" /1 = "smelly" /2 = "abrasive" /3 = "angry" /4 = "sad" </item> /////////////////////////////////////////////////// //Then we declare our text elements that //select our stimuli: /////////////////////////////////////////////////// <text positiveAdjective> / items = item.positiveAdjectives //we want this text element to select from the pool of positive adjectives / select = noreplace //we want to select the elements randomly but WITHOUT replacement / fontStyle = ("Arial", 5%, false, false, false, false, 5, 1) / txColor = blue //horizontal Position: left: 0% -> right: 100% //vertical position: top: 0% -> bottom: 100% / position = (50%,40%) //(horizontal position; vertical position) </text> <text negativeAdjective> / items = item.negativeAdjectives / select = noreplace / fontStyle = ("Arial", 5%, false, false, false, false, 5, 1) / txColor = blue / position = (50%,40%) </text> /////////////////////////////////////////////////// //Then we create our trial elements that //present the text elements to our participants /////////////////////////////////////////////////// <trial positiveAdjectives> / inputDevice = keyboard //Note: keyboard is the default inputdevice for Inquisit / stimulusTimes = [0 = text.positiveAdjective] / validResponse = ("A", "L") //all the valid key responses accepted for this trial / correctResponse = ("A") //this is the only key response that is accepted as the correct response for this trial </trial> <trial negativeAdjectives> / inputDevice = keyboard / stimulusTimes = [0 = text.negativeAdjective] / validResponse = ("A", "L") / correctResponse = ("L") </trial> /////////////////////////////////////////////////// //Then we create our block element that //presents our trials in random order /////////////////////////////////////////////////// <block categorizationTask> //10 trials with a random order of positive and negative adjective trials / trials = [1-10 = noreplace(trial.positiveAdjectives, trial.negativeAdjectives)] </block> /////////////////////////////////////////////////// //Then we create our final element: the expt element //that can run many blocks /////////////////////////////////////////////////// <expt demo> / preInstructions = (page.instructions) //we want to present the instructions at the very beginning of the task / blocks = [1 = block.categorizationTask] //then we want to run block.categorizationtask </expt> /////////////////////////////////////////////////// //Additional Useful Elements /////////////////////////////////////////////////// <defaults> //The script will use the largest 4:3 rectangle that it can find on the current screen. //Specifying the canvas helps in unifying the appearance of the task across //different monitors. / canvasAspectRatio = (4,3) / minimumVersion = "7.0.3.0" / fontStyle = ("Arial", 3%, false, false, false, false, 5, 1) </defaults> <data> / columns = (date, time, subject, group, session, blockCode, trialCode, trialNum, stimulusItem, response, responseText, correct, latency) </data> <summaryData> / columns = (inquisit.build, computer.platform, script.startDate, script.startTime, script.subjectId, script.groupId, script.sessionId, script.elapsedTime, script.completed, trial.negativeAdjectives.meanLatency, trial.positiveAdjectives.meanLatency) </summaryData>