How to Setup a Self-Paced Test Battery with Inquisit
If want to include more than one test in your project, you can combine the individual tests into a test battery that is controlled by a batch script. For a review of how to setup a simple batch script, check out How to create a Battery of Tests with a Batch Script with the Inquisit Editor
Most batch scripts automatically call each of the tests in order: once a test is completed, the next one is started. Sometimes, however, it can be useful to allow participants to self-pace through a test battery. This might be the case, for instance, if your participants are young children who might lose interest fast or participants who tire easily. Under these circumstances it’d be helpful for test administrators to be able to provide a single webpage location that participants can return to whenever they are ready to proceed with the next test.
The goal of this tutorial:
- Show how to set up a project with a single Inquisit Web license that provides three individual URLs
- Provide a html-document with separate links to each of these three test URLs.
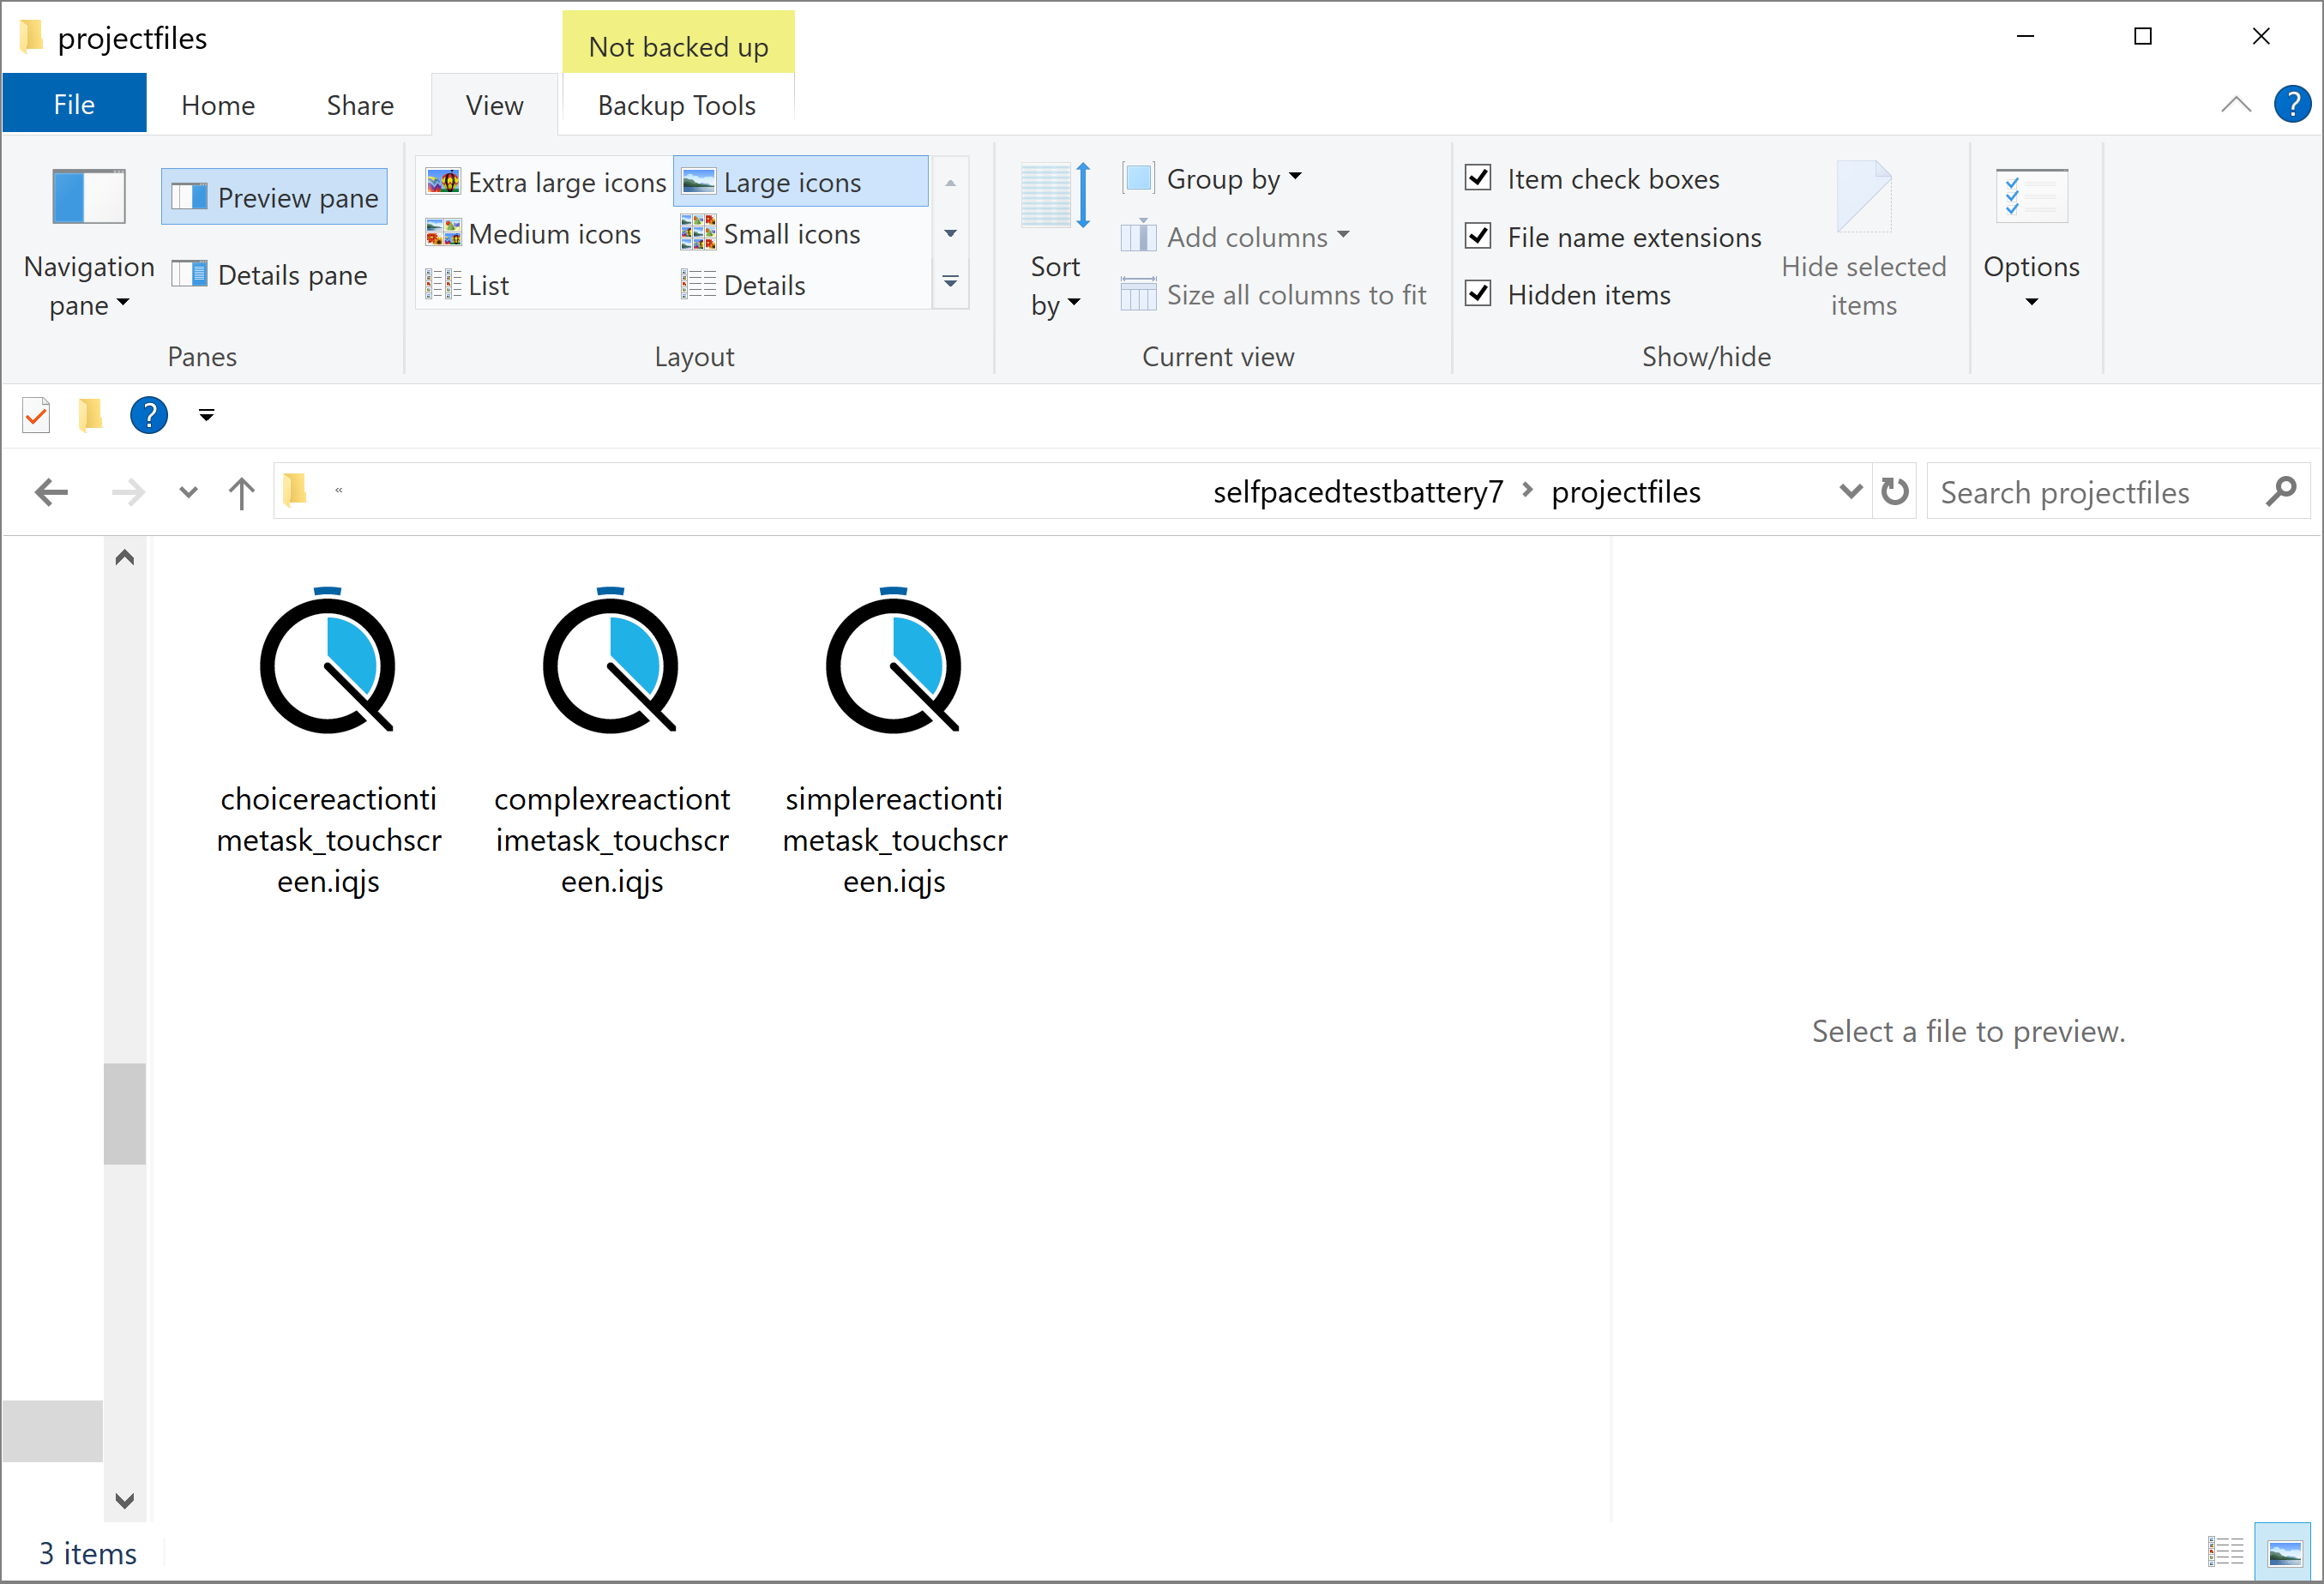
Create a project folder for all your test scripts and supporting files:
Our example test battery consists of three Inquisit reaction time tasks :
Create the Batch script
- Open Inquisit7 Lab and create a new (empty) script file.
- Save the script file to your project folder.
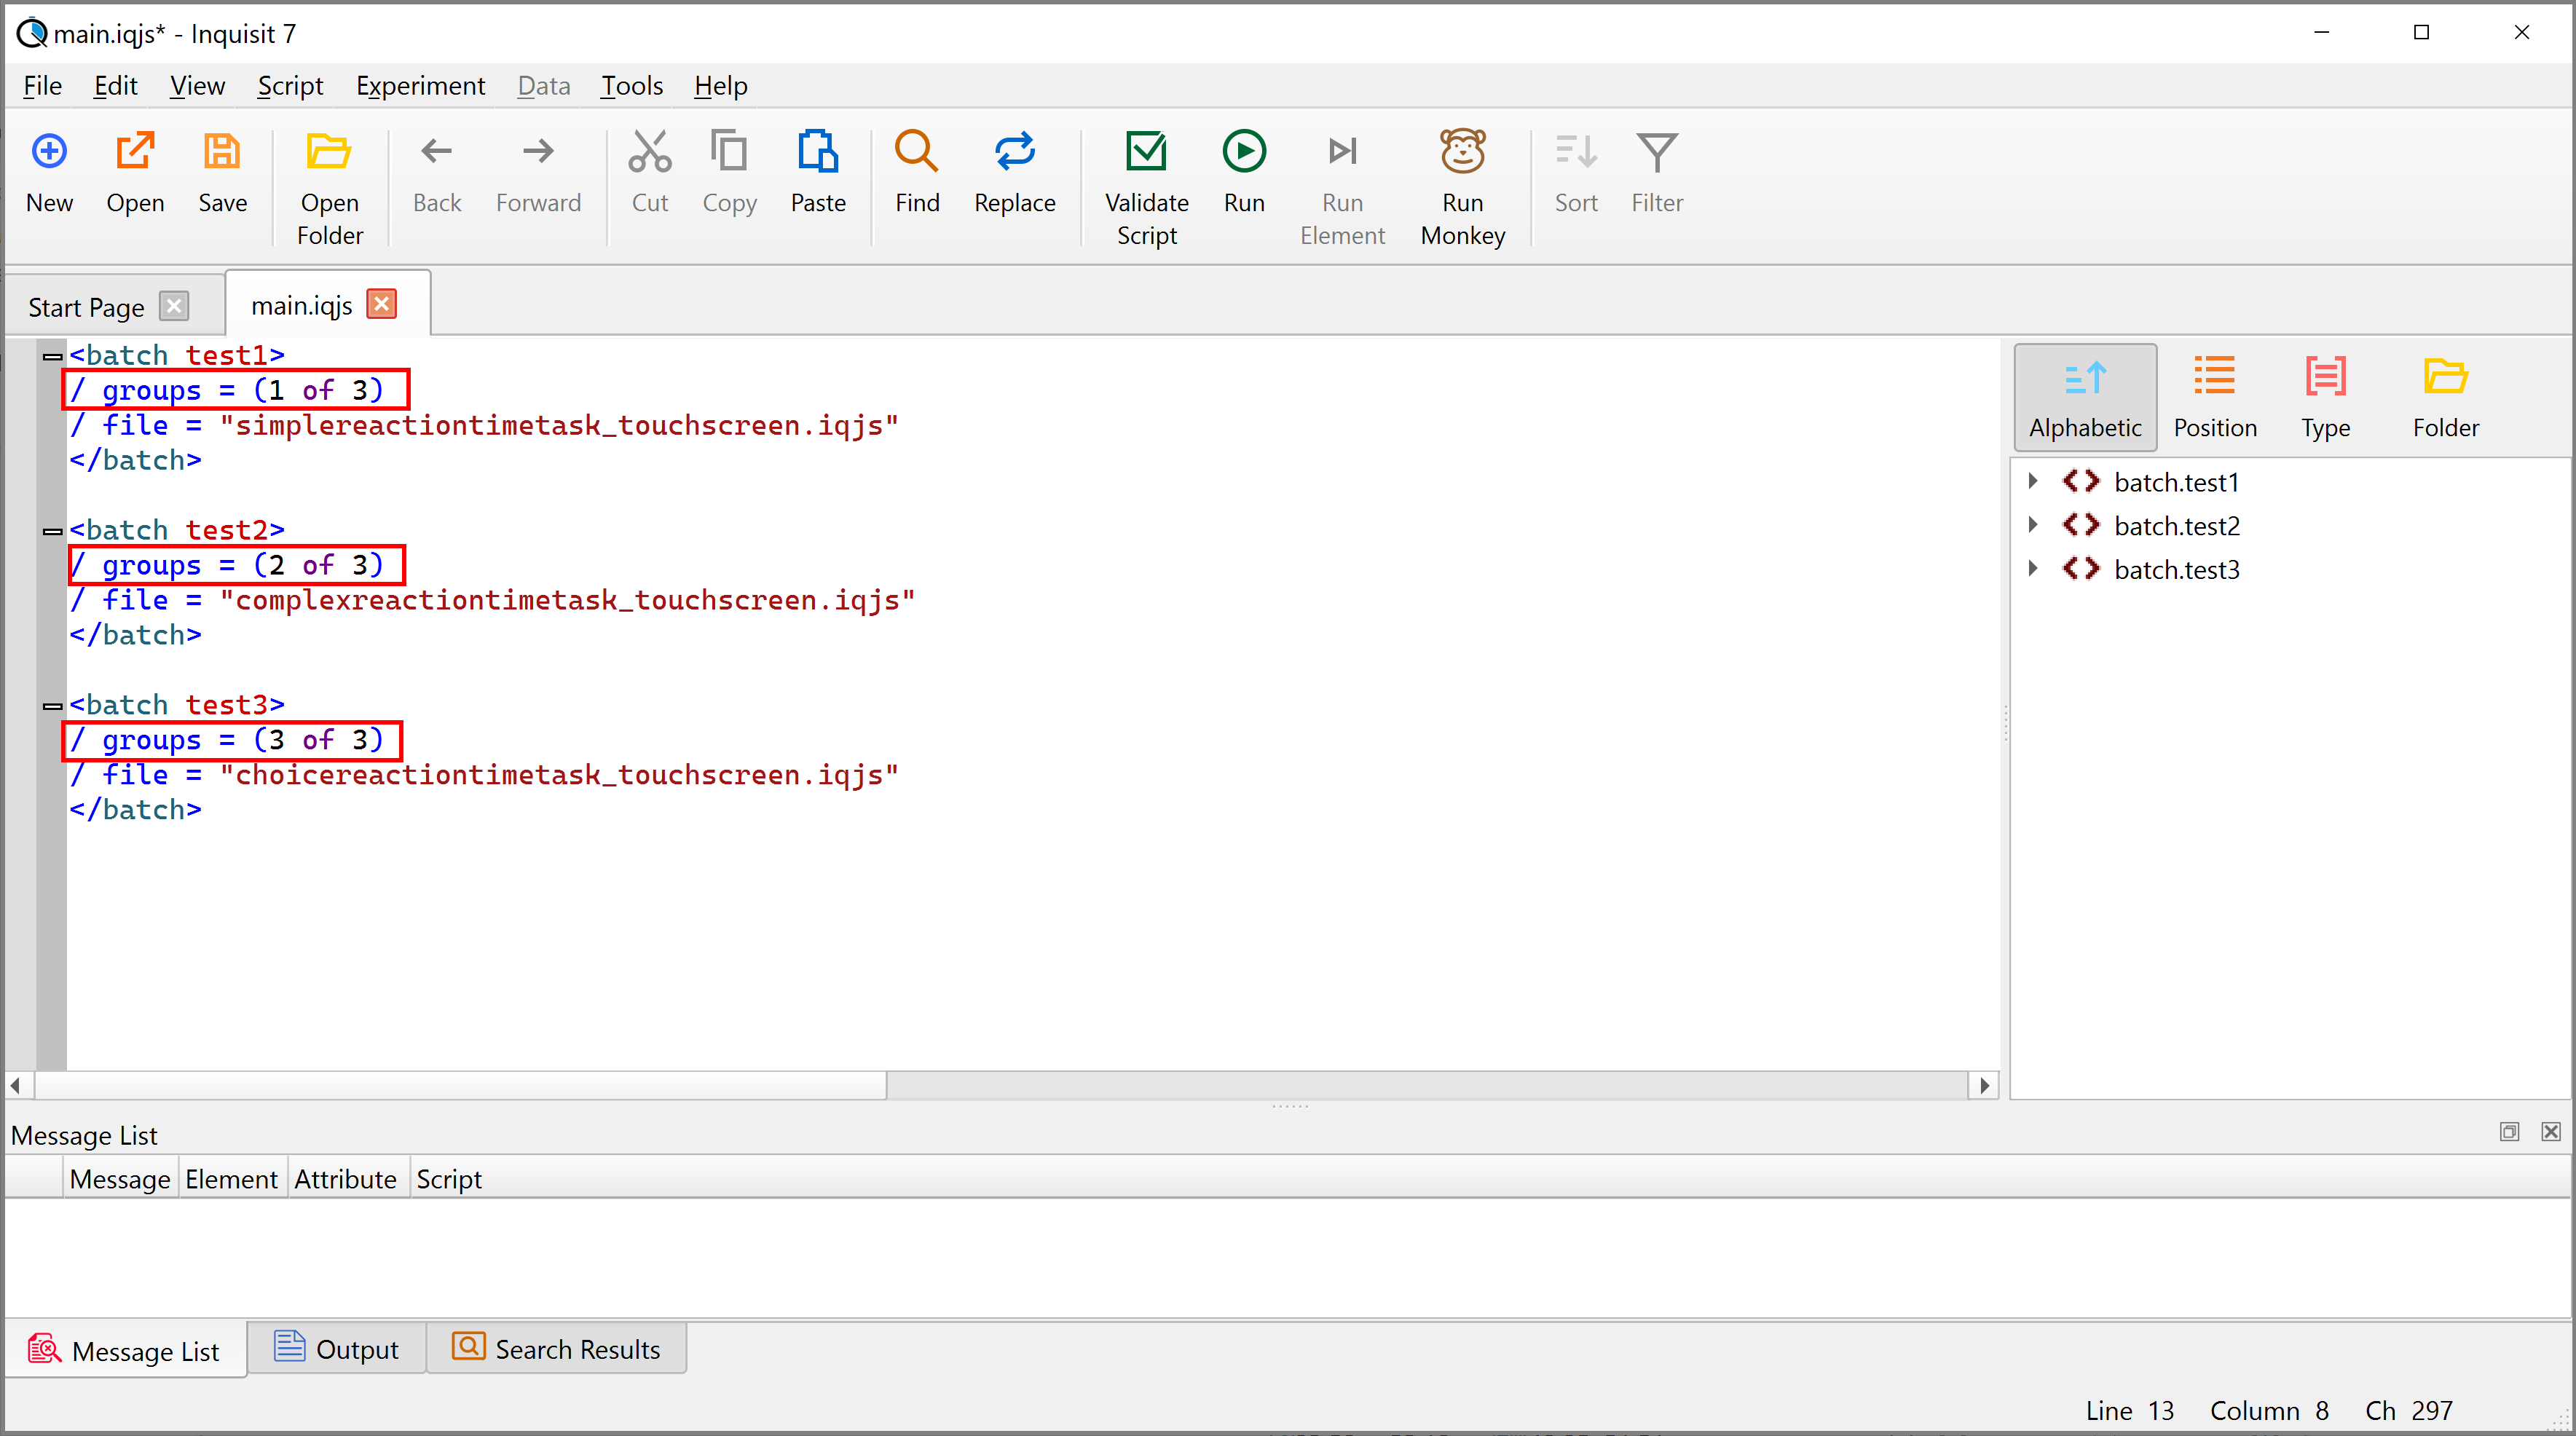
Here we name the batch file "main.iqjs".
Then add three <batch> elements to the script; one for each of the three tests.
The key to our batch script setup is to use different groups to control which test should be called.
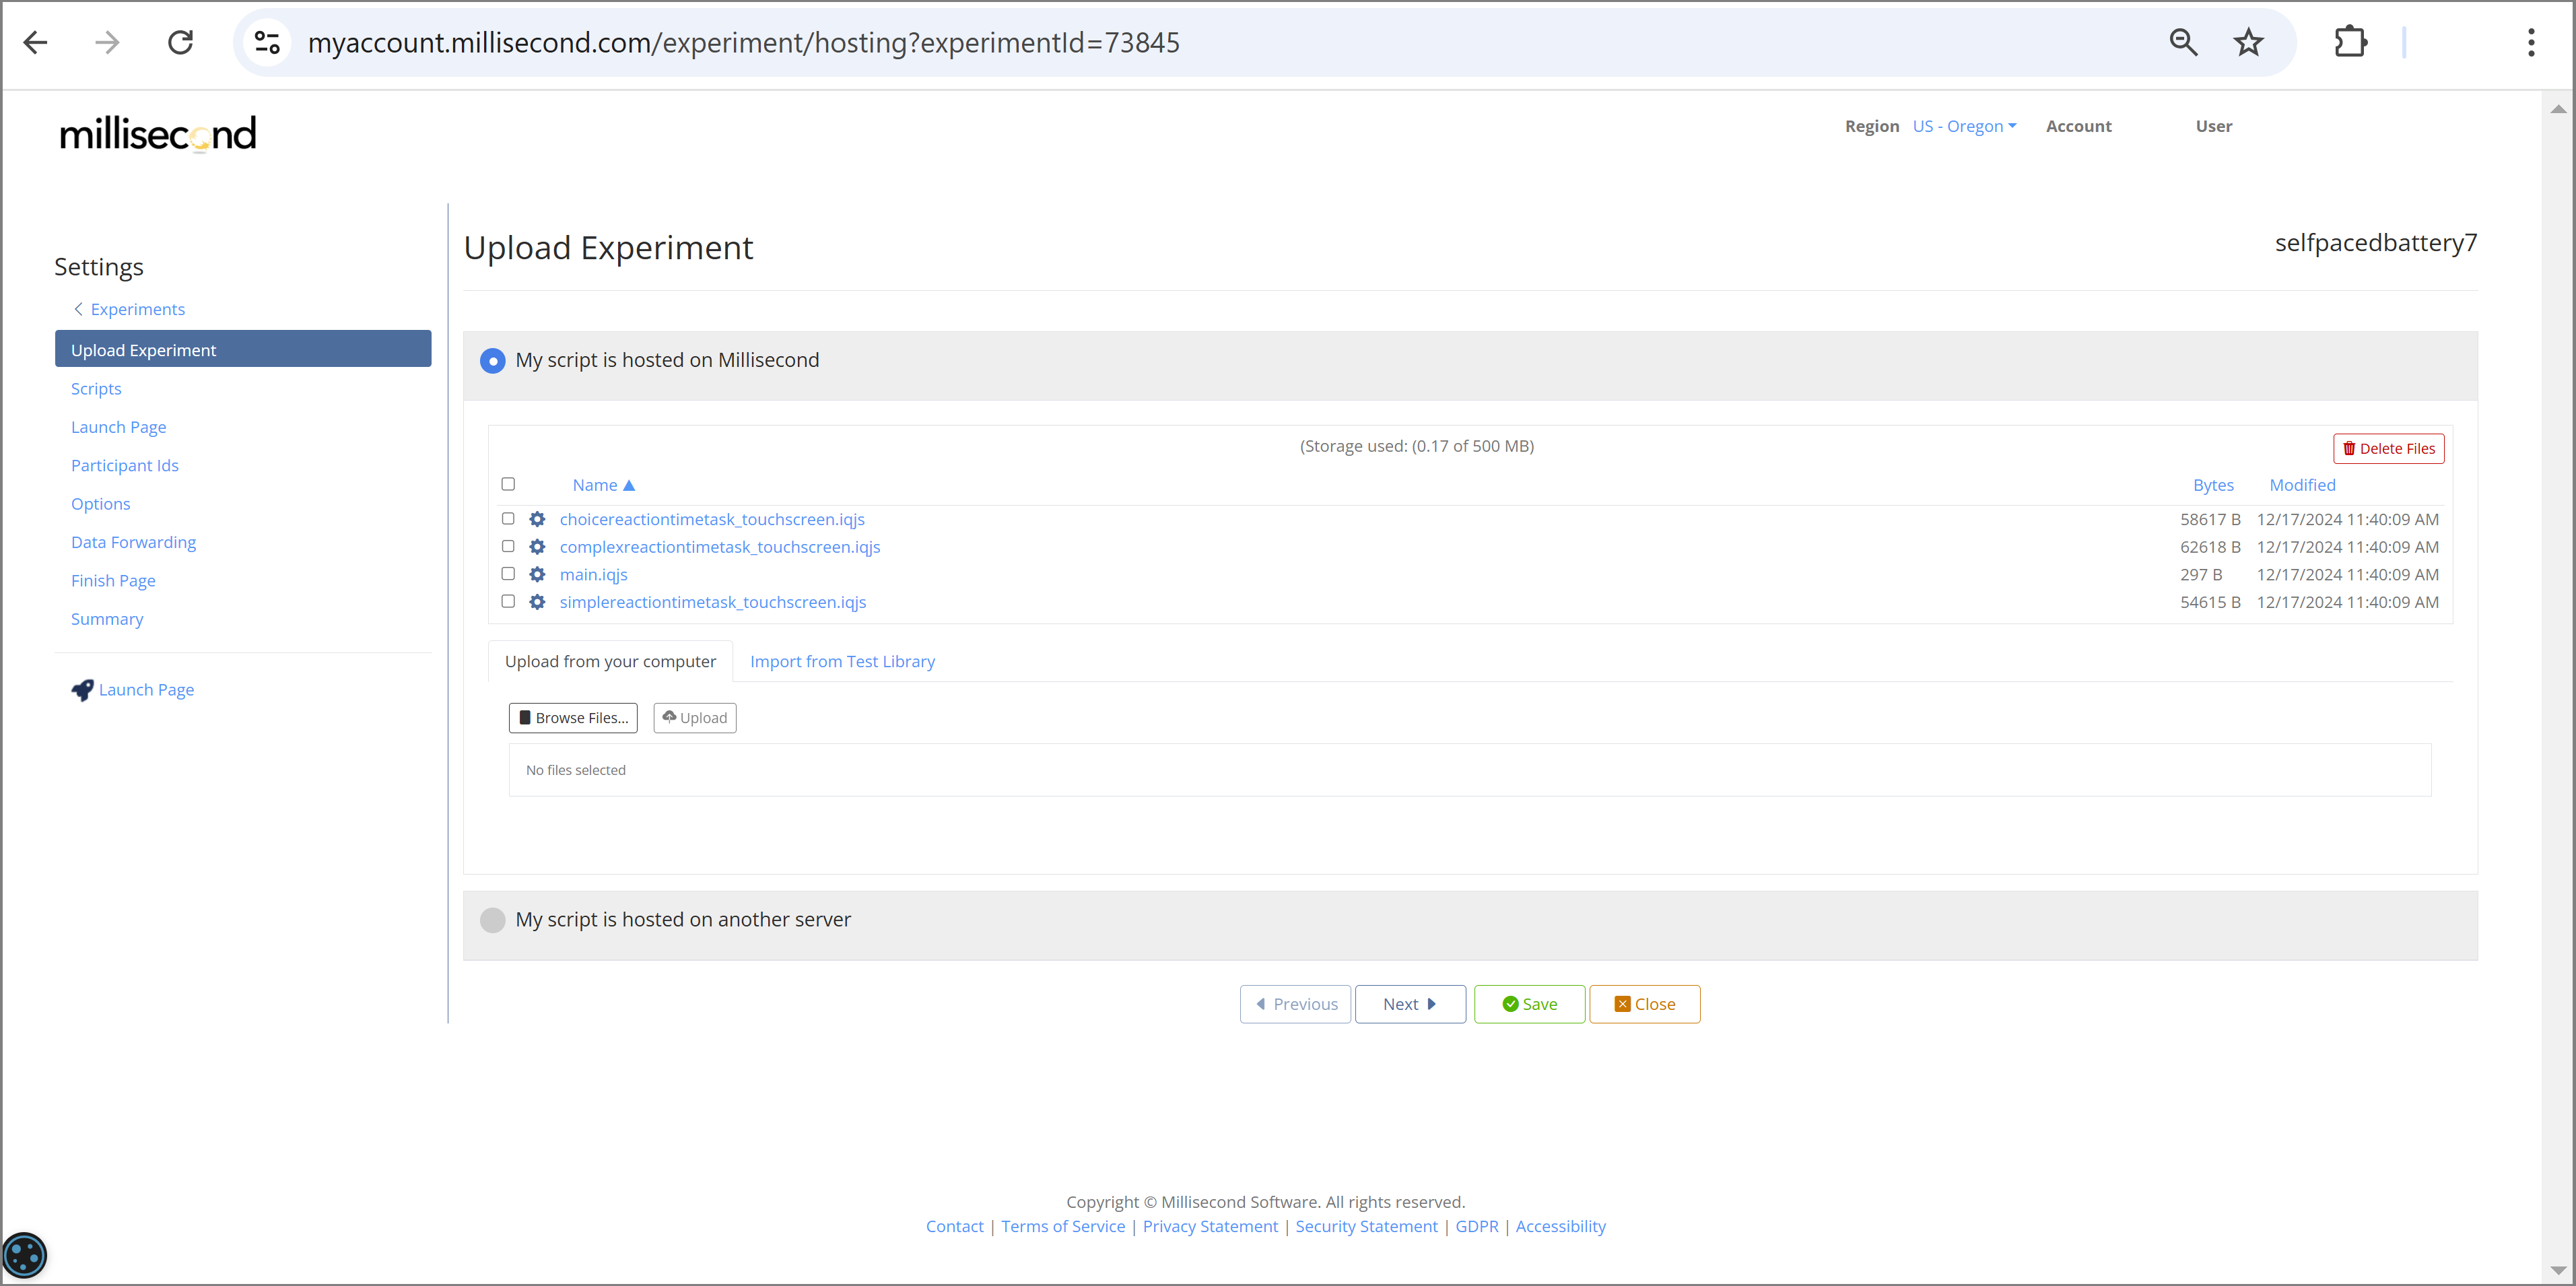
Upload your entire project to your Millisecond Account
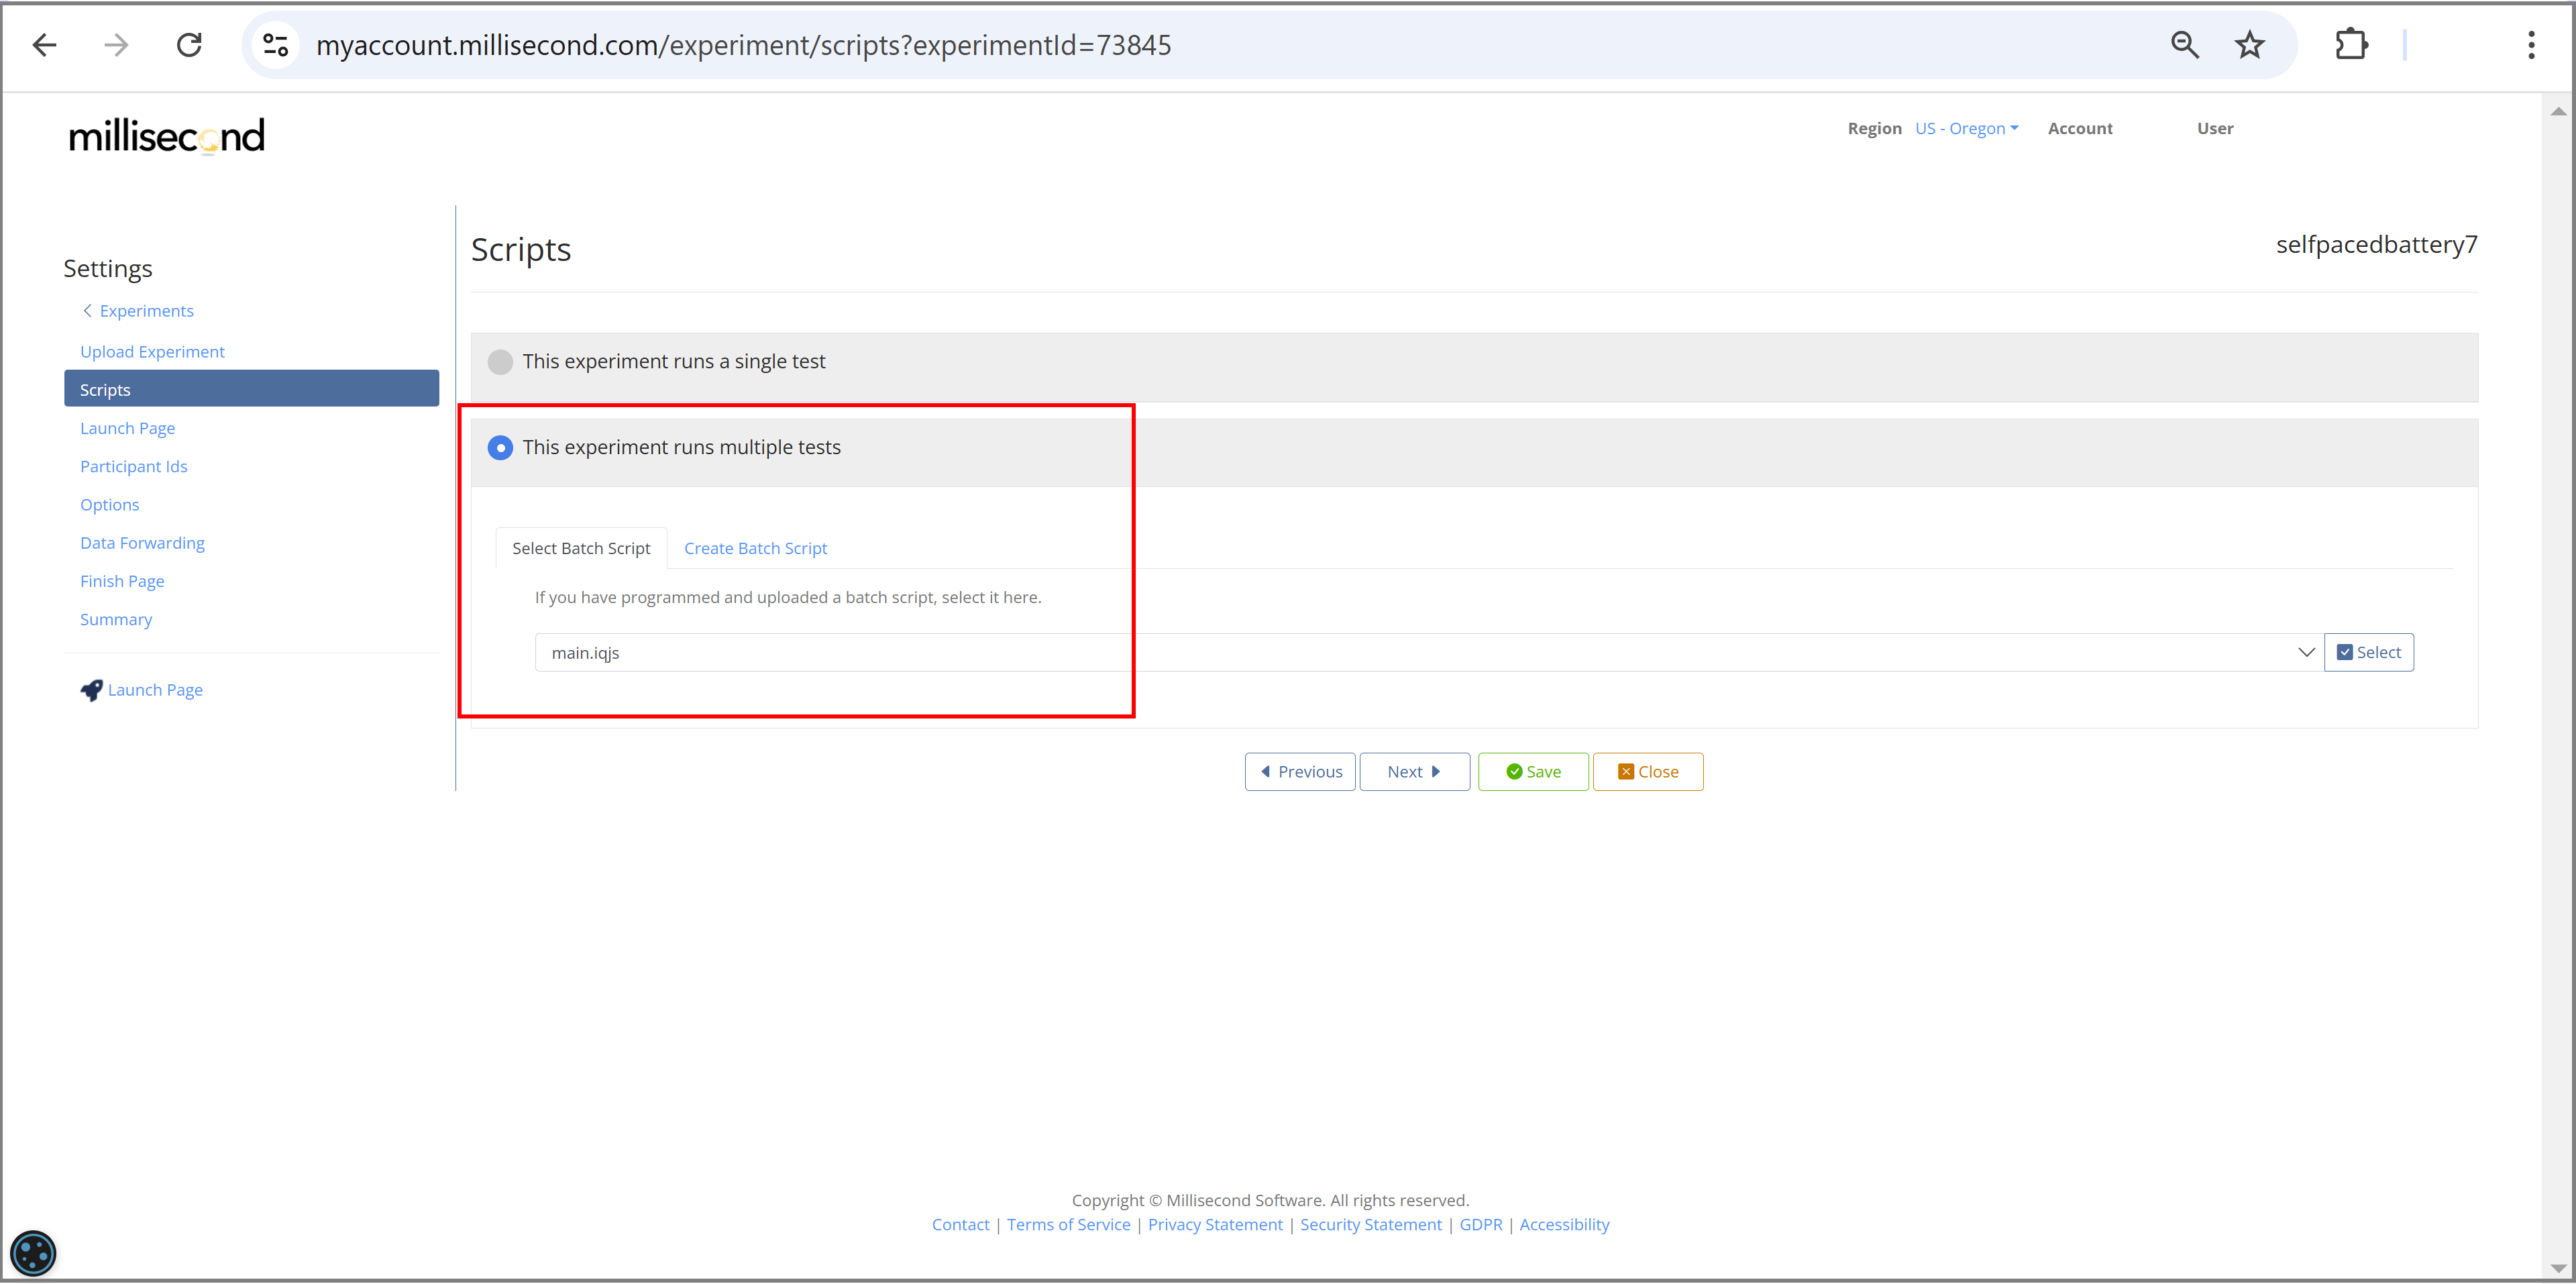
Select the batch script as your Start Script
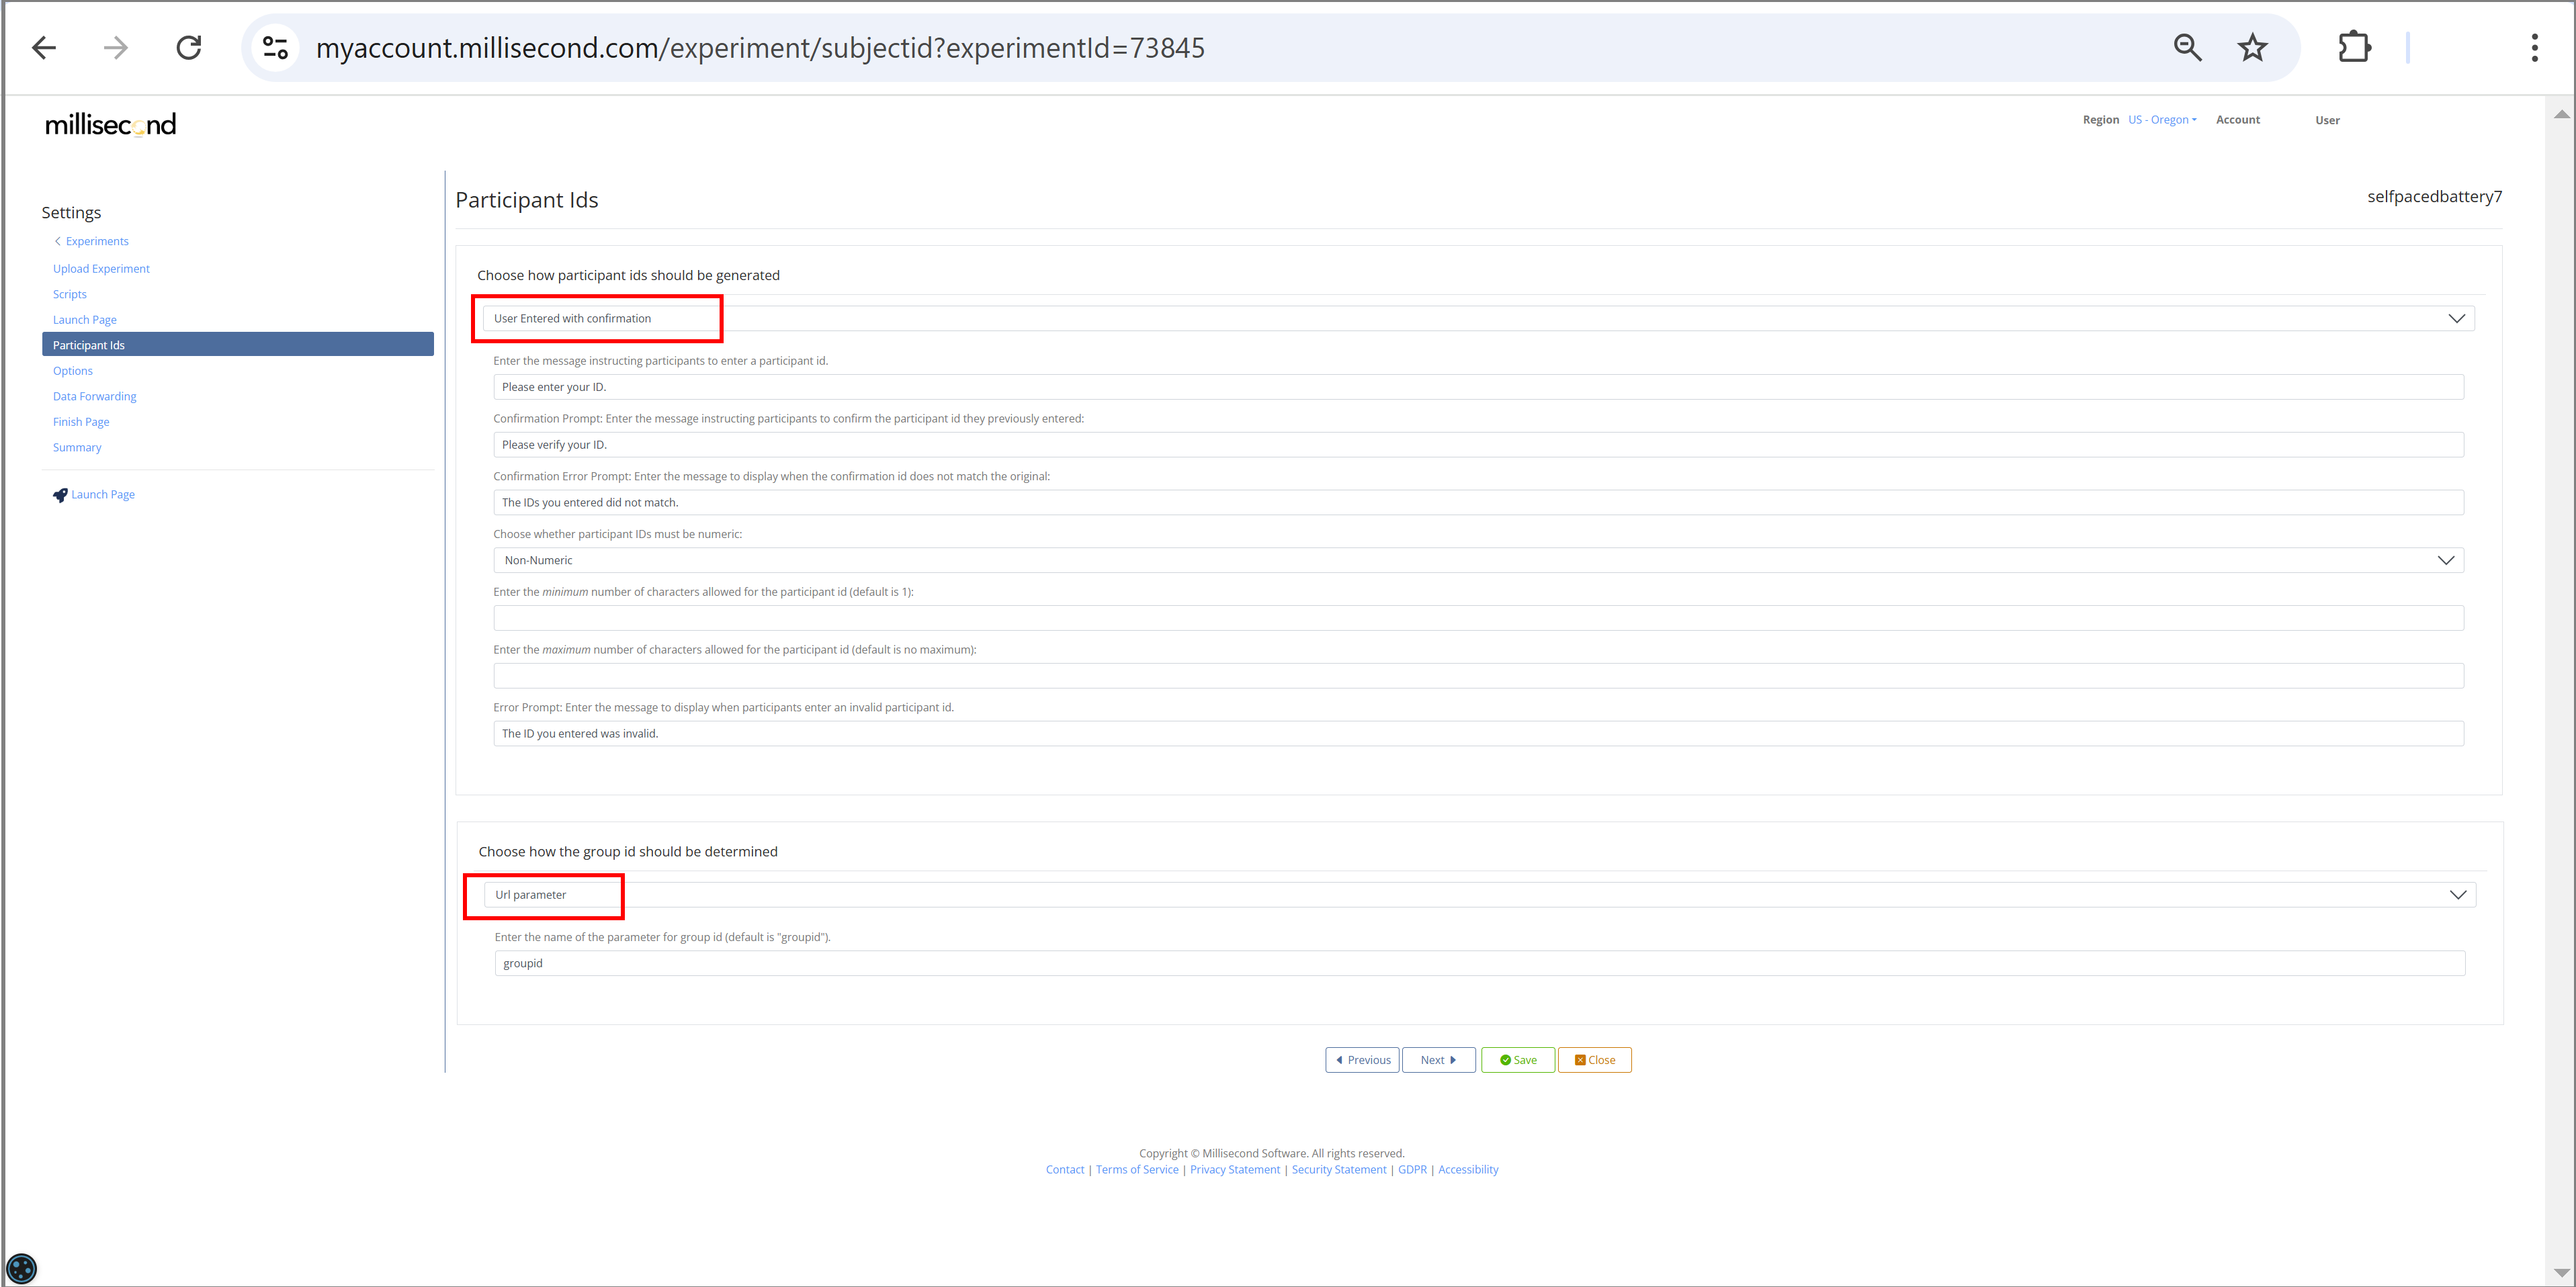
Select SubjectID and GroupID Assignment
SubjectID:
Select one of the 'User Entered' options. We have chosen 'User Entered with confirmation'.
For this setup we assume that each participant uses their own individual subjectID which should be
the same each time they opt to run a task.
GroupID:
Select 'Url Parameter'. This is the key.
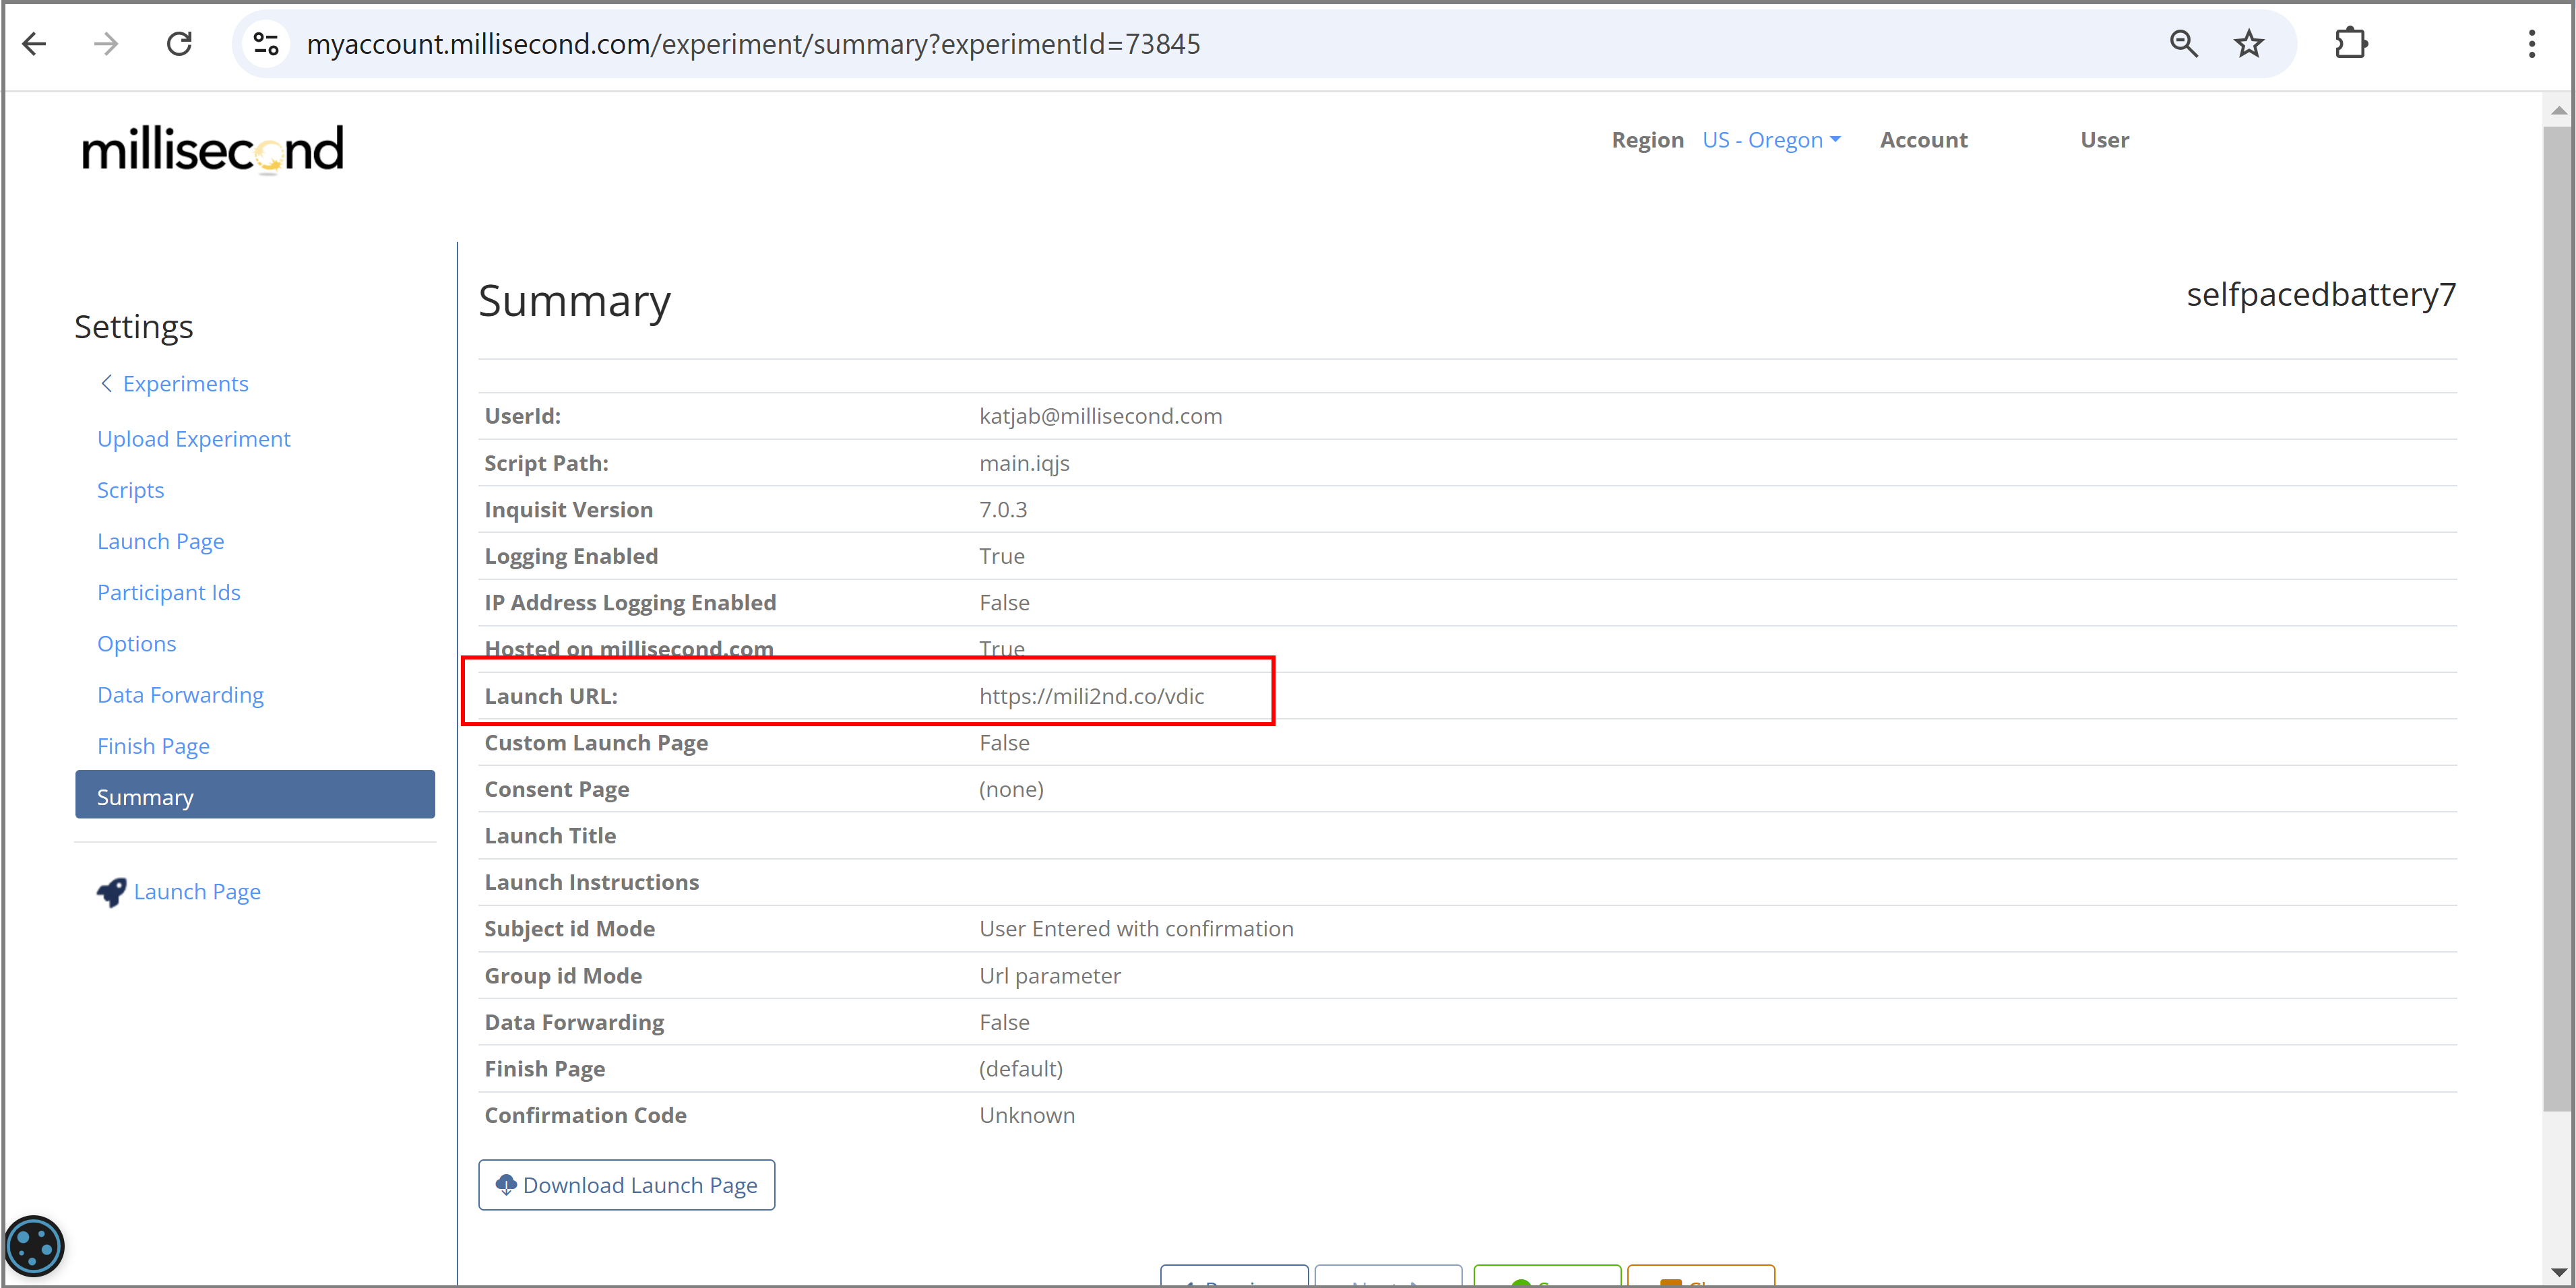
Retrieve the general launch URL of your project
Here our launch URL is: https://mili2nd.co/vdic
Create three unique test URLs
Recall that we selected ‘Url Parameter’ to assign group numbers. Thus, Inquisit Web will look for the number assigned to parameter ‘groupid’ in the launch URL to select test1, test2, or test3. If it does not find such a parameter within the launch URL, it will report an error. Consequently, we need to add these parameters to the launch URLs before sharing it with participants.
In general, such URL (aka query) parameters are appended to a URL after a ‘?’.
- Test 1: https://mili2nd.co/vdic?groupid=1
- Test 2: https://mili2nd.co/vdic?groupid=2
- Test 3: https://mili2nd.co/vdic?groupid=3
Note that these three launch URLs only differ in the number assigned to the ‘groupid’ parameter – this difference is all that is needed to control which test will be selected by Inquisit Web.
Create a simple webpage as a convenient start page for your online test battery
While you could easily just share the three individual URLs with each of your participants, you might prefer to share just one single webpage that will provide convenient links to each test.
Here is one example of such a simple webpage:

A simple and free text editor like Notepad ++ for Windows or TextEdit for Macs is all that is needed to create a simple html-page. You can be as creative as you want. We kept our example webpage pretty basic.
The code for this html page is provided at the end of this document in Appendix A.
Add this htm(l) document to your Millisecond account
We named the document "selfpacedbattery.htm".
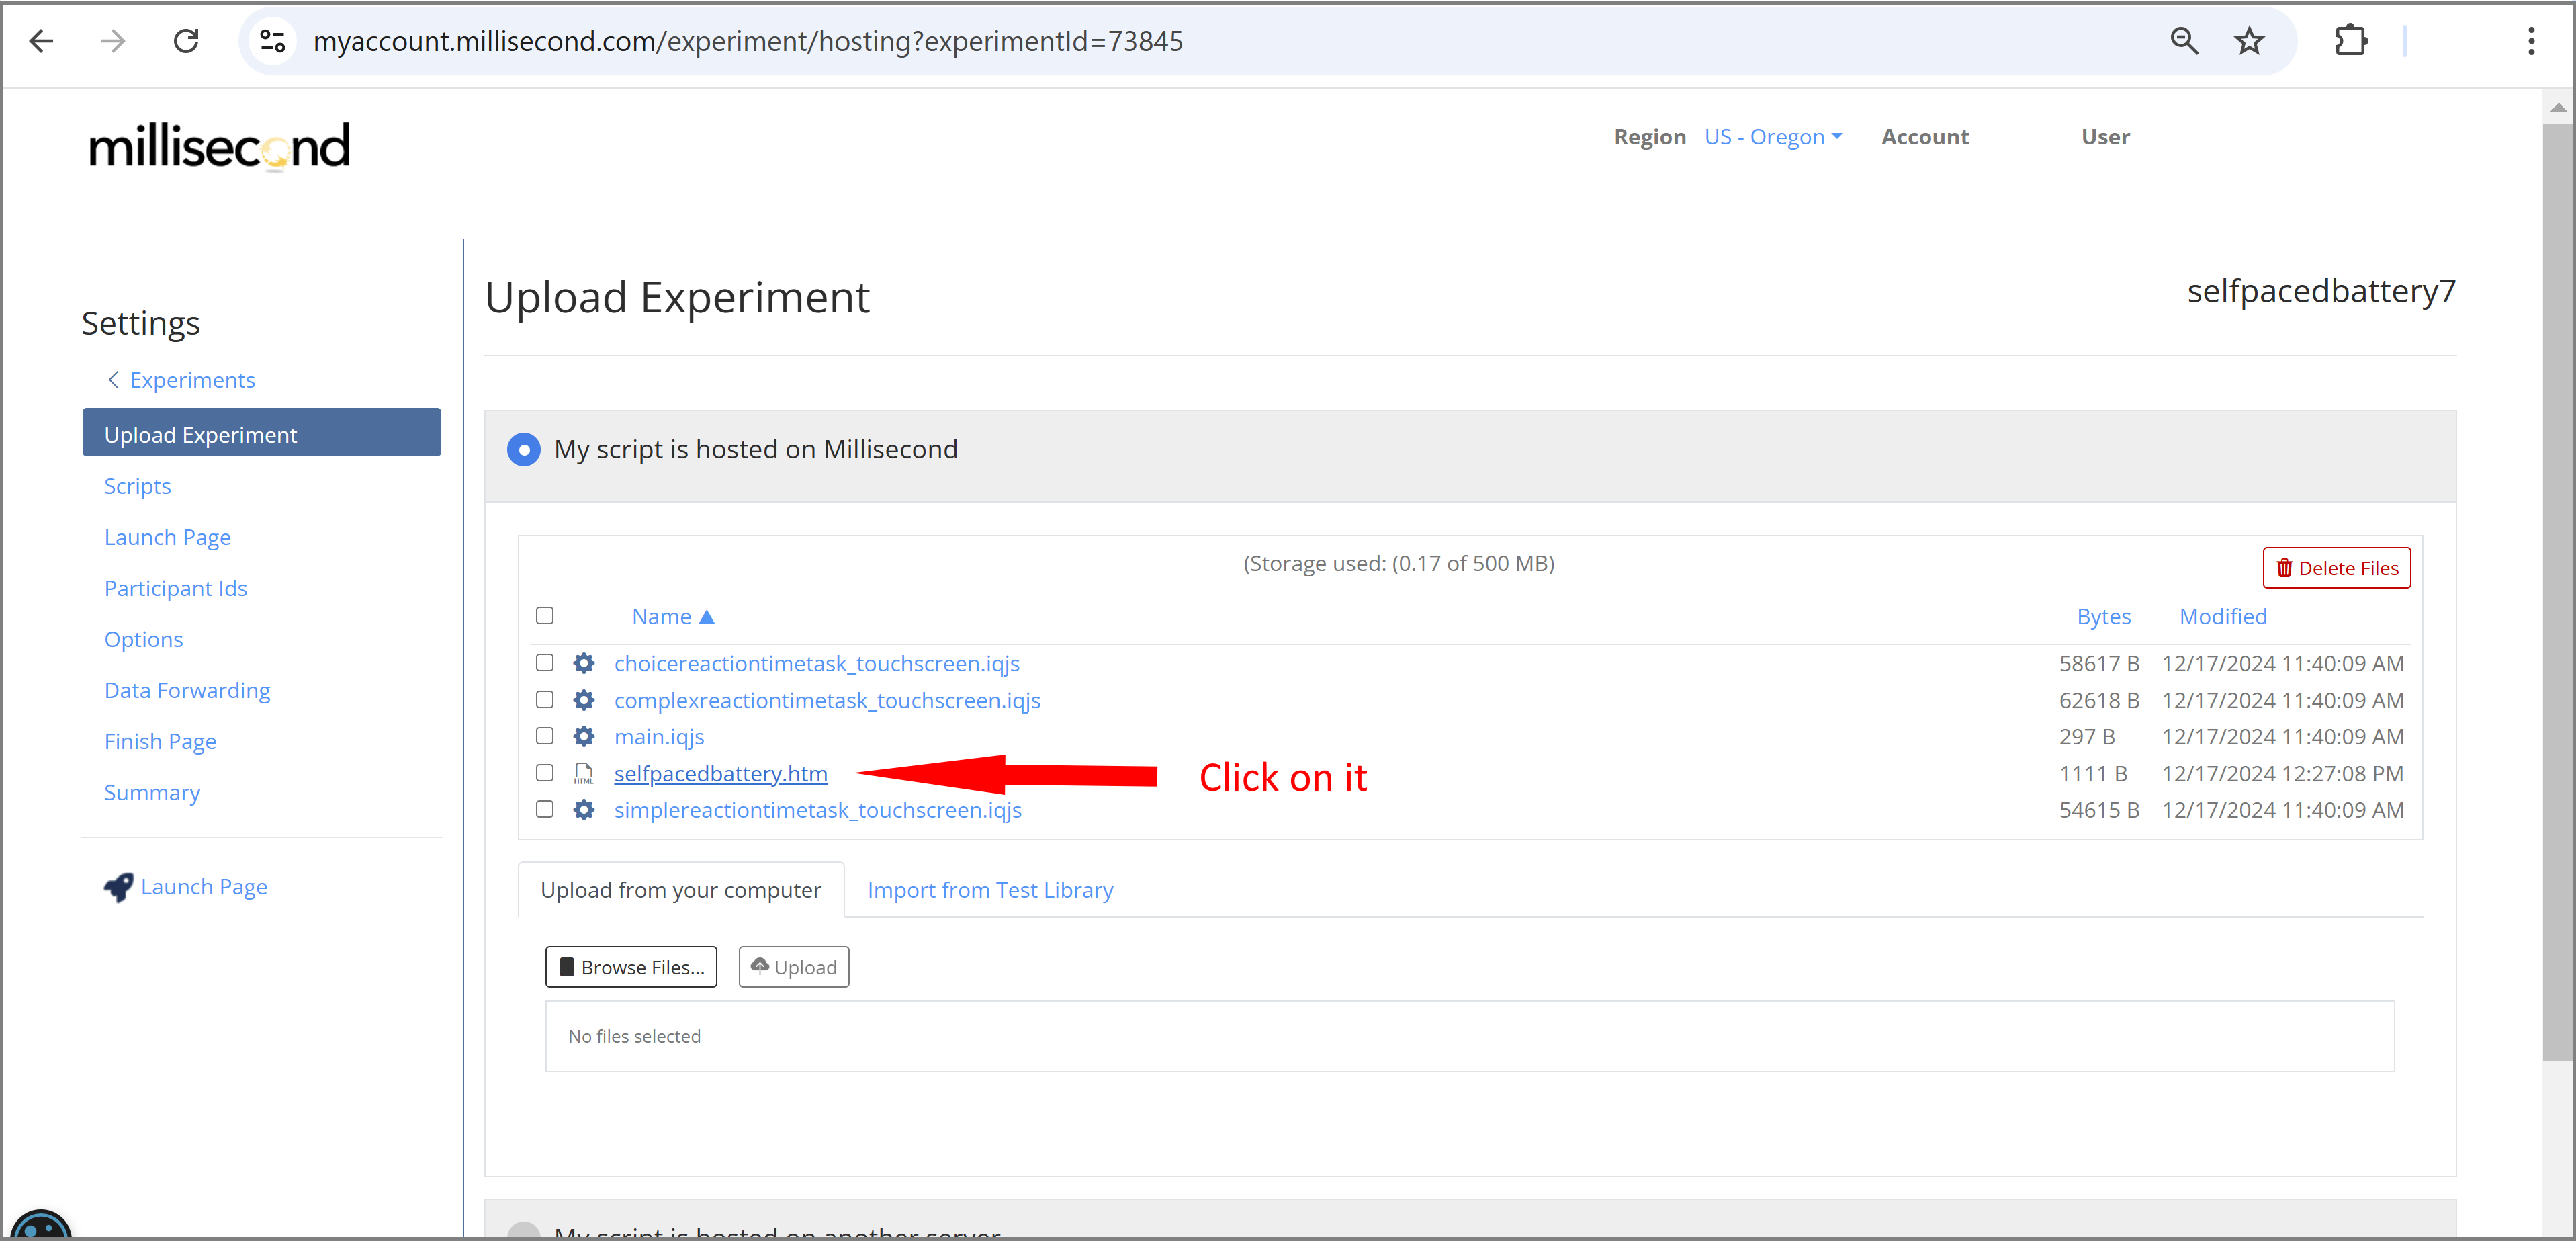
Then click on the document to retrieve your final URL:
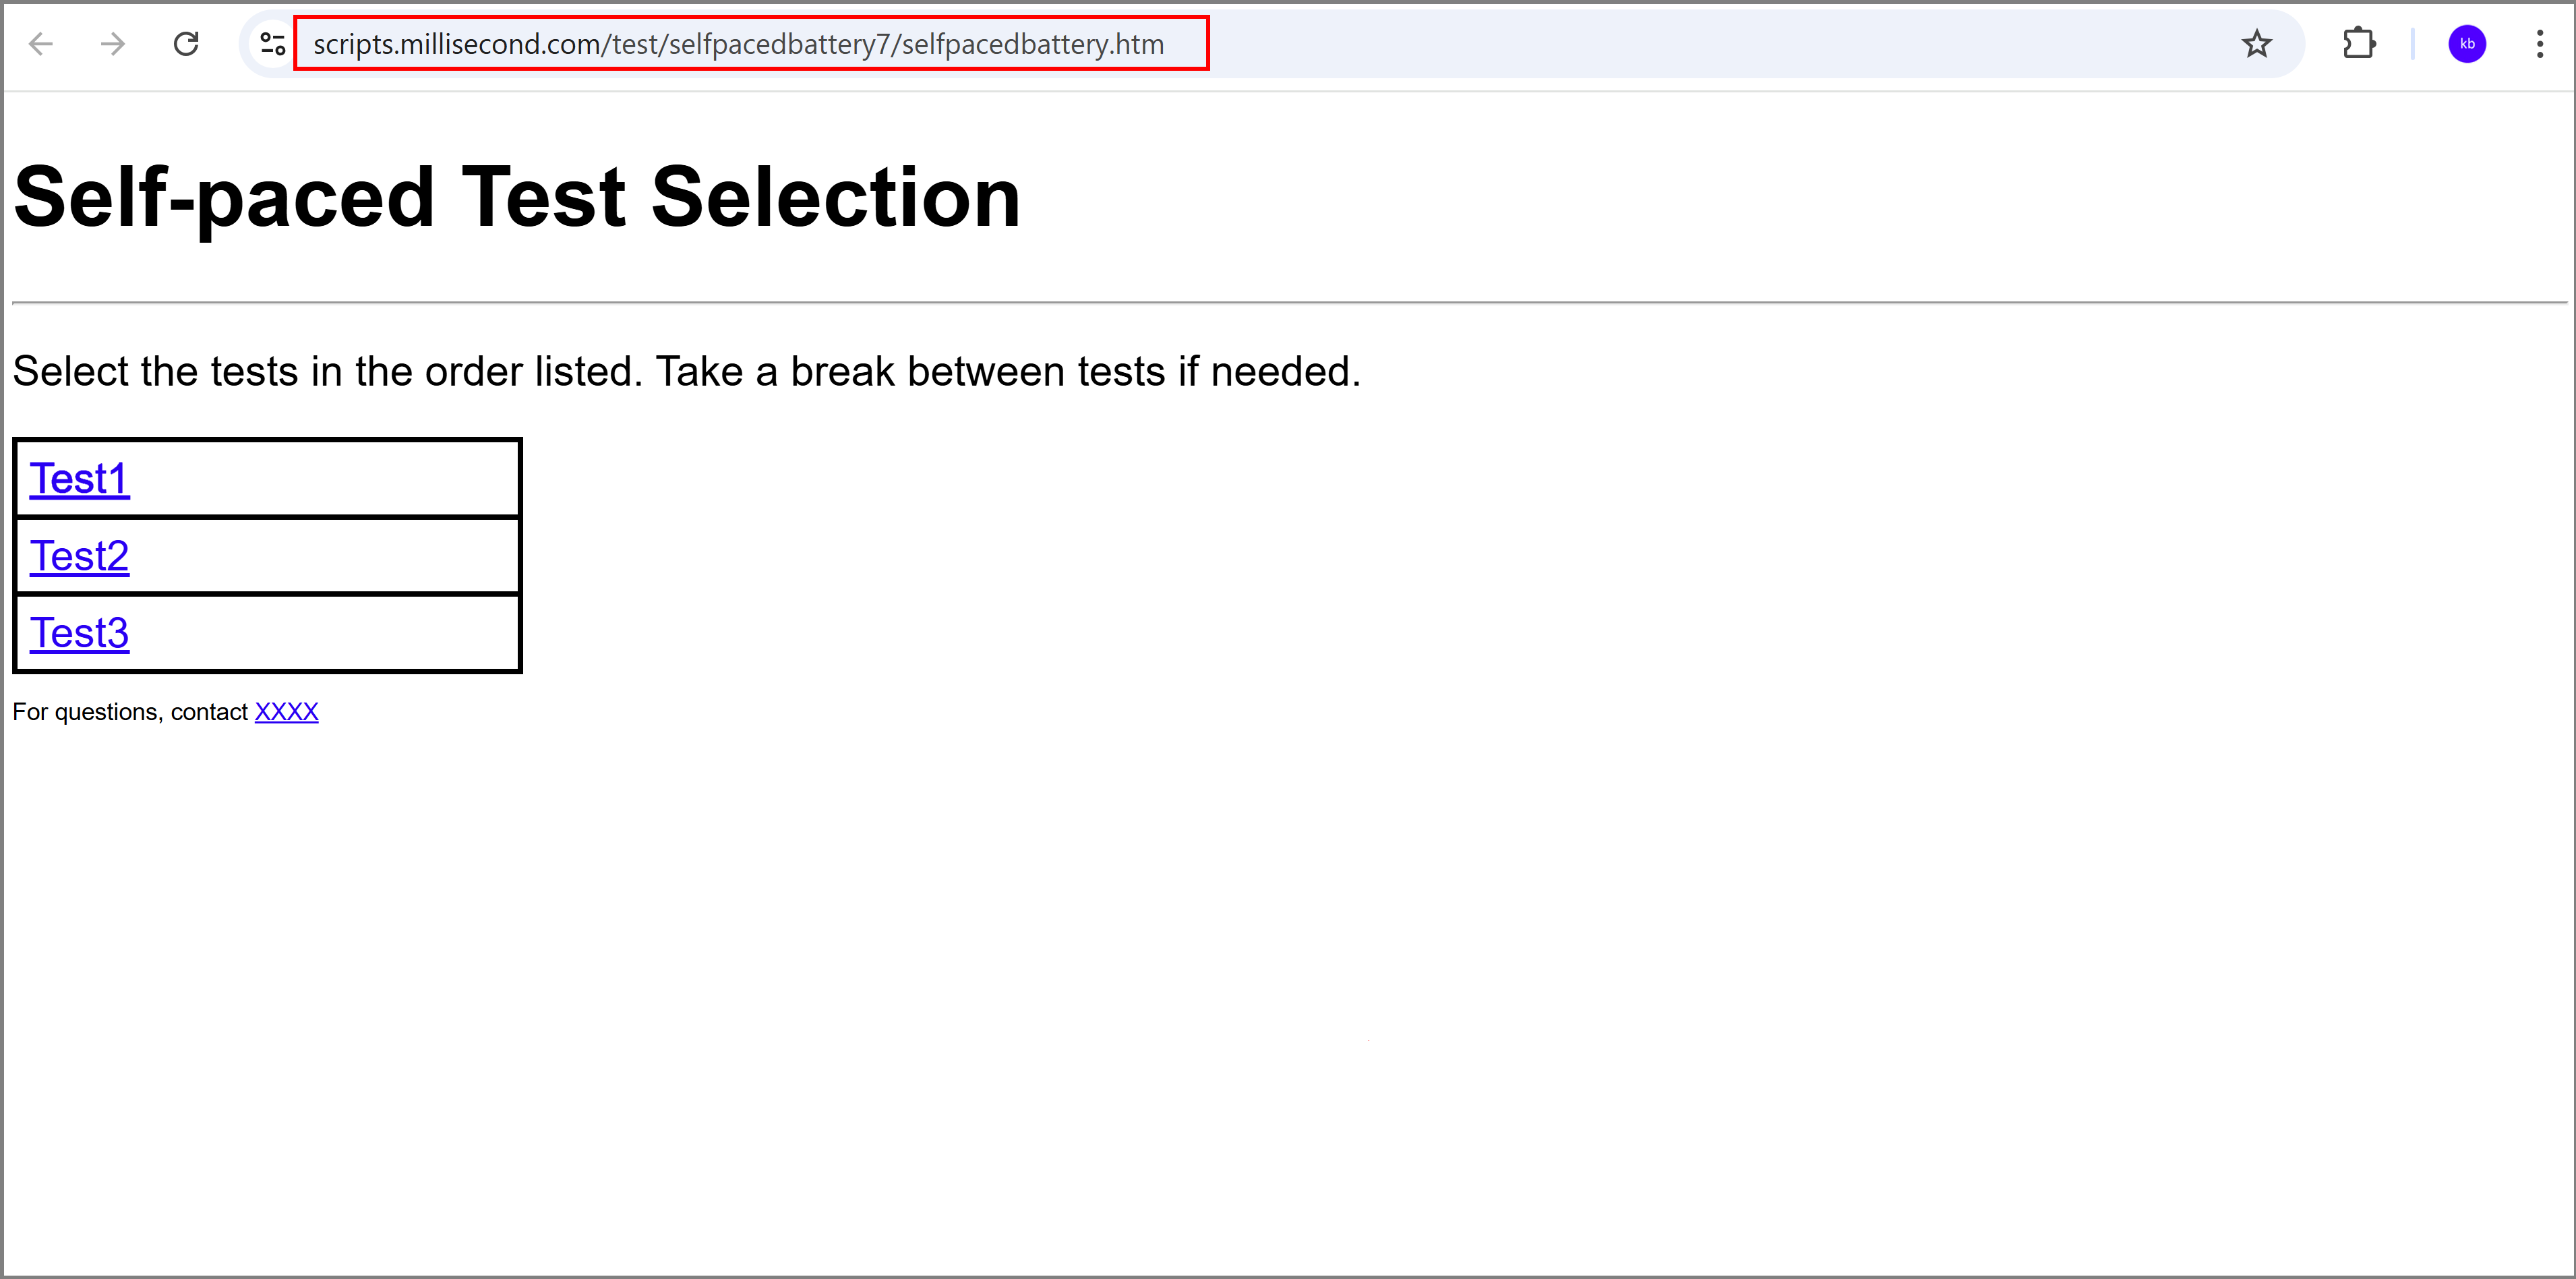
The URL of "selfpacedbattery.htm" can be seen in the browser window:
https://scripts.millisecond.com/test/selfpacedbattery/selfpacedbattery.htm
This is the URL to share with your participants if you want them to launch the tasks from this website!
The self-paced battery is now completed.
Appendix A: Simple html code for page "selfpacedbattery.htm"
Code that appears in green, needs to be updated for different projects.
<!DOCTYPE html>
<html>
<head>
  <meta charset="UTF-8">
<title>testSelection</title>
<style>
body {
    background-color: white;
    font-family: arial;
    color:black;
    font-size: 3.5vh;
}
table, th, td {
    border: 0.5vh solid black;
    border-collapse: collapse;
	border-color: black;
}
th, td {
    padding: 1vh;
}
th {
    text-align: left;
}
.center {
	text-align: center;
	}
.left {
	text-align: left;
	}
</style>
</head>

<body>

<div class="left">
<h1>Self-paced Test Selection</h1><hr>
<p>Select the tests in the order listed. Take a break between tests if needed.</p>
<table style="width:20%">
<tr>
<td><a target="_blank" href="https://mili2nd.co/vdic?groupid=1">Test1</a></td>
</tr>
<tr>
<td><a target="_blank" href="https://mili2nd.co/vdic?groupid=2">Test2</a></td>
</tr>
<tr>
<td><a target="_blank" href ="https://mili2nd.co/vdic?groupid=3">Test3</a></td>
</tr>
</table>
<p style="font-size: 2vh">For questions, contact <a href="mailto:xxx@xxx">XXXX</a>
</div>
</body>
</html>